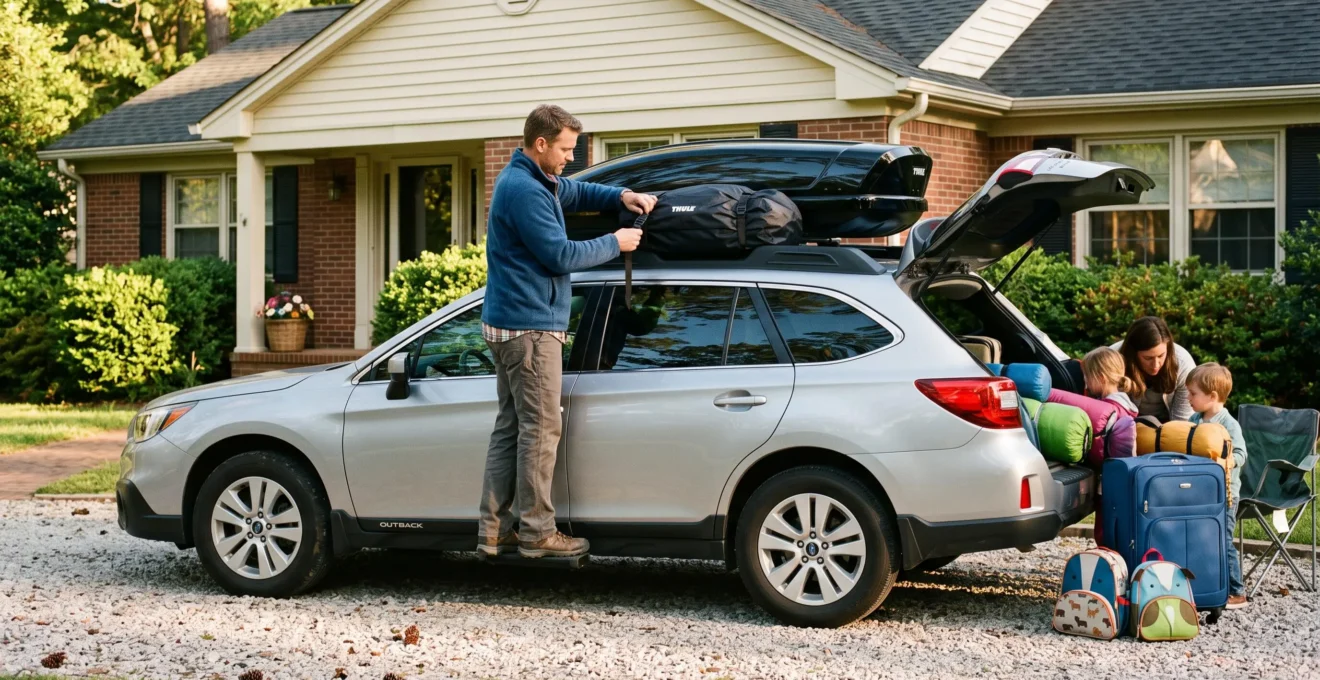
Roof-mounted camping gear creates a practical trade-off: extra luggage space comes at the cost of increased aerodynamic drag, potential wind noise and additional fuel consumption. A secure installation is essential, but simply tightening the straps will not prevent an inefficient load from increasing running costs over a long motorway journey.
The most effective approach combines a low, properly positioned cargo profile with suitable roof bars, careful weight distribution and driving speeds that account for additional air resistance. The vehicle manufacturer’s roof-load limit must remain the starting point, because aerodynamic improvements cannot compensate for an overloaded or incorrectly secured system.
According to FuelEconomy.gov, a large rooftop cargo box can reduce fuel economy by approximately 10% to 25% % at interstate speeds of 65–75 mph under the conditions studied. That is a substantial potential penalty, but not a prediction for every vehicle. Understanding how cargo shape, mounting and journey planning interact makes it possible to manage the penalty without sacrificing essential camping equipment.
Roof Cargo Efficiency: Essential Points
- Keep roof cargo low, secure and within the manufacturer’s weight limits; avoid exposed, loosely packed equipment that increases turbulence.
- Check the complete mounting system, including the contents, cargo container and roof bars, before departure and during the journey.
- Measure fuel consumption under comparable conditions, moderate cruising speed and remove unused roof equipment to reduce unnecessary drag.
- How to Arrange Roof Cargo to Cut Wind Resistance by 30%?
- Hard-Shell Roof Box or Soft Bags: Which Is Quieter on the Motorway?
- The Securing Error That Lets Roof Loads Shift Forward During Hard Braking?
- How to Verify Your Roof Load Stays Within Manufacturer Weight Limits?
- Why Should You Remove Roof Racks When Not Carrying Cargo?
- How to Verify Your Car Can Legally Tow Your Caravan’s Loaded Weight?
- Why Does Driving 10mph Slower Save £80 on Long Camping Road Trips?
- How to Plan Camping Routes That Minimise Fuel Costs Without Sacrificing Destinations?
How to Arrange Roof Cargo to Cut Wind Resistance by 30%?
Arrange roof cargo in a compact, low-profile configuration, keeping equipment properly restrained and avoiding unnecessary exposed edges. These measures can reduce aerodynamic disturbance, but a 30% reduction in wind resistance is not a verified universal result. Actual improvements depend on vehicle shape, cargo geometry, roof bars and speed, and should be assessed through comparable driving measurements.
Roof-mounted equipment affects airflow in two related ways. First, it increases the vehicle’s effective frontal area, particularly when bulky items extend above the roofline. Second, abrupt edges and gaps can disturb airflow, producing turbulence behind the cargo. Both can increase the aerodynamic resistance the engine must overcome.
At a given speed, reducing exposed area and improving the overall load profile can help. However, the aerodynamic design of the cargo box, its position relative to the vehicle and the roof-bar configuration all matter. There is no sound basis for assuming cargo placement is always more important than the container’s shape.
A practical packing method starts with the manufacturer’s approved load arrangement:
- Place heavy, compact items low. Where possible, carry especially heavy equipment inside the vehicle rather than on the roof, while respecting vehicle loading limits.
- Position suitable flat items at the base of the roof container, preventing movement without exceeding the box’s permitted loading distribution.
- Fill internal gaps with lightweight equipment so that objects cannot slide or vibrate, without obstructing locks or securing points.
- Keep the external profile as low and streamlined as the equipment and its approved mounting system allow.
- Secure all components and verify that the installed box or load cannot interfere with the tailgate, aerial or other vehicle parts.
For roof boxes, Thule‘s roof-box packing and safety instructions describe distributing approximately half the cargo weight centrally between the roof bars, with a quarter toward each end. This is a manufacturer loading recommendation, not evidence of a particular aerodynamic saving.
10%–25%
Approximate reduction in fuel economy associated with a large, blunt rooftop cargo box at 65–75 mph in the referenced research. The figure measures a consumption-related penalty under tested conditions, not the benefit of rearranging cargo.
FuelEconomy.gov, based on rooftop cargo research reported in 2014.
To estimate whether a new arrangement helps, compare fuel used over a familiar route before and after changing the load configuration. Use the same vehicle, broadly similar traffic and weather conditions, comparable speeds and the same measurement method. Ideally, repeat the comparison rather than relying on one trip-computer reading.
Kayaks and rooftop tents introduce different constraints. Their shape may prevent a particularly low profile, while mounting orientation is determined by the equipment manufacturer’s instructions. Never reverse or reposition equipment solely to improve airflow if doing so compromises its approved attachment method.
Once the load has an appropriate profile, the next decision is whether a rigid roof box or a flexible cargo bag better suits motorway travel and repeated camping trips.
Hard-Shell Roof Box or Soft Bags: Which Is Quieter on the Motorway?
A properly fitted hard-shell roof box may provide more predictable noise behaviour than a loosely packed soft bag, but neither option is guaranteed to be quieter. Wind noise depends on the entire installation, including the roof bars, straps, cargo shape and vehicle airflow. Compare the systems under similar driving conditions rather than relying on their materials alone.
A hard-shell box maintains its external shape as the vehicle moves, which can limit fabric flapping and exposed strap movement. However, its dimensions, mounting position and interaction with crossbars may still create whistles or low-frequency vibration.
Soft roof bags are easier to store when empty and can suit occasional camping journeys. Their flexible construction introduces a different challenge: loosely filled sections may move in the airflow, while unsecured strap ends can flutter against the fabric or vehicle.
Neither system eliminates wind noise from the roof bars themselves. Exposed crossbars can create audible airflow disturbances even when no cargo is attached.
Four practical considerations help distinguish the options:
| Criterion | Hard-shell roof box | Soft roof bag |
|---|---|---|
| Motorway noise | Rigid shape limits fabric movement, but airflow noise remains possible. | Noise depends heavily on packing firmness, fabric movement and strap management. |
| Crosswind behaviour | Provides a relatively fixed exposed profile; vehicle response still depends on dimensions and weather. | Exposed profile can vary with filling and compression; secure mounting remains essential. |
| Vehicle height | Adds a relatively predictable installed height that must be measured. | Installed height can change with the contents and compression. |
| Storage after use | Requires space for a rigid container. | Many designs fold or compress for easier storage. |
For families taking frequent motorway trips, a compatible, correctly installed rigid box may be convenient because its shape and mounting arrangement remain consistent between journeys. Occasional campers with limited storage space may prefer a soft bag, provided the vehicle and bag manufacturers permit the chosen installation.
Budget should include any necessary crossbars, mounting hardware and storage arrangements, not simply the advertised price of the container. Actual capacity also matters: choosing an unnecessarily large roof box can add exposed area without providing useful additional storage.
To reduce noise with either design, consider compatible aerodynamic crossbars, inspect any manufacturer-supplied sealing or wind-management components, and secure loose strap ends. Do not add improvised seals or modify structural mounting parts without manufacturer approval.
A short test drive at a moderate, legal speed can reveal new whistles, rattles or movement. If the installation makes unusual sounds, stop safely and inspect it rather than attempting to identify the cause while driving.
Whichever container is selected, controlling noise is secondary to preventing cargo movement, particularly during sudden braking or evasive manoeuvres.
The Securing Error That Lets Roof Loads Shift Forward During Hard Braking?
The critical securing error is treating a tightened cargo strap as proof that the entire roof-loading system is secure. During hard braking, inertia pushes the load forward relative to the decelerating vehicle. If the contents, container attachments or roof bars are inadequately restrained, movement can occur even when another part of the installation appears firmly attached.
The forces acting on cargo change during braking, acceleration, cornering and travel over uneven surfaces. Friction alone should not be relied upon to prevent movement: luggage needs suitable positive restraint, and the container and crossbars need their own correctly installed attachments.
Three separate connections deserve attention:
- Contents to container: bags, equipment and other items must remain restrained inside the roof box or within an approved external cargo system.
- Container to crossbars: clamps, brackets and straps must match the equipment specifications and engage correctly.
- Crossbars to vehicle: the rack feet, fixings or approved attachment points must remain secure according to the vehicle and rack manufacturers’ instructions.
A secure internal load cannot compensate for a poorly attached box. Similarly, correctly installed crossbars do not protect equipment that can slide or escape from the cargo container.
Recheck accessible attachments before departure and at a safe stopping point after the initial part of the journey, following the manufacturer’s specified inspection intervals. Flexible bags and packed materials may settle, changing strap tension.
Ratchet straps require particular care. Overtightening can damage a roof box, crush equipment or overload attachment points. Use only suitable restraints and the tightening method approved for the relevant system.
As an additional visual reference, removable marking tape may help indicate whether a particular component has changed position relative to a fixed reference point. However, this is not a validated substitute for inspecting the actual restraints, nor does unchanged tape prove that an installation is safe. Never climb onto an unsupported vehicle roof to perform a check; use safe, suitable access equipment at a properly parked location.
In the United Kingdom, the UK Highway Code’s vehicle towing and loading rules require drivers to secure their loads and avoid overloading. A load that becomes detached may expose the driver to legal responsibility. Insurance consequences depend on applicable law, policy terms and the circumstances of an incident; they should not be assumed to be automatic.
Mechanical security is only one part of safe installation. The next essential check is whether the roof, bars and container can safely carry the actual equipment weight.
How to Verify Your Roof Load Stays Within Manufacturer Weight Limits?
Start with the vehicle manufacturer’s permitted dynamic roof load, then subtract the weight of the roof bars and empty cargo container. The remainder is the maximum cargo allowance under that roof limit, provided the rack, container and mounting system also permit it. The lowest applicable capacity governs, and the loaded vehicle must remain within its other weight restrictions.
The vehicle handbook is the primary reference for the roof’s approved load and any restrictions associated with specific mounting points. Roof-bar and cargo-box manuals provide separate component capacities that must be checked rather than assumed to match the vehicle limit.
To establish the remaining roof allowance, calculate:
Available roof cargo allowance = permitted vehicle roof load − roof-bar weight − empty container weight.
Thule illustrates the calculation using a vehicle roof limit of 165 lb, roof bars weighing 11 lb and an empty box weighing 44 lb. The resulting allowance is 110 lb, before applying any lower component limit. These are example figures rather than standard capacities for passenger vehicles.
For an accurate calculation, weigh the luggage and equipment that will be placed in the roof container. A household scale can help with individual bags, provided it is suitable for the weight involved. Include straps or additional mounted accessories where their weight contributes to the roof load.
Weight distribution is as important as the total. A roof box can be within its maximum payload while being loaded unevenly, placing excessive stress on particular mounting points or affecting vehicle stability. Follow the approved front-to-rear and side-to-side loading instructions.
Dynamic roof-load limits apply while driving. Some equipment has a separate static capacity relevant to parked use, but a higher static figure does not authorise a heavier load on the road. Manufacturer speed restrictions or recommendations may also apply.
Five Checks Before Driving With Roof Cargo
- Find the vehicle’s dynamic roof-load limit in its handbook and record the permitted value.
- Identify the approved capacity of the roof bars and container, producing a list of the separate component limits.
- Record the empty weights of the bars and container, then calculate the remaining roof cargo allowance.
- Weigh the packed equipment and compare the total with every relevant limit, producing a final loading calculation.
- Inspect cargo distribution, attachment security and applicable speed or height restrictions, completing a departure check before driving.
Finally, check the vehicle’s maximum authorised weight and applicable axle limits, accounting for passengers, luggage, fuel and other loads. Roof compliance does not establish that the complete vehicle is within its permissible operating limits.
After confirming that the system is safe under load, consider whether the bars need to remain installed during the much longer periods when no roof cargo is being carried.
Why Should You Remove Roof Racks When Not Carrying Cargo?
Removing unused removable roof racks eliminates the aerodynamic resistance and potential wind noise created by those accessories. The fuel benefit varies with crossbar shape, vehicle design and driving conditions, so it cannot be expressed as one reliable percentage. The greatest practical opportunity is often during everyday driving between camping trips, when the bars serve no transport purpose.
Even without a cargo box, crossbars interrupt the airflow above the vehicle. Their exposed profile can generate drag, while certain shapes or installation positions produce whistling. Aerodynamic bars are designed to manage airflow more effectively, but their presence does not necessarily become aerodynamically neutral.
The distinction between removing a box and removing the bars matters. Taking off an empty box reduces the additional area and disturbance caused by the container, but leaves the crossbars in place. Removing detachable bars addresses the remaining roof-rack exposure.
FuelEconomy.gov’s driving efficiency guidance recommends removing external cargo containers when they are not needed. Its published roof-cargo figures describe particular tested configurations, not a quantified saving for every empty crossbar design.
For an occasional camper, the practical routine is straightforward: unload the system after the journey, remove compatible detachable components according to their instructions and store them properly. Before the next trip, inspect the mounting points for dirt, damage or corrosion and reinstall the bars using the manufacturer’s specified procedure and tightening torque where applicable.
Keep the necessary installation tools and documentation with the camping equipment. Recheck the installation in accordance with the manufacturer’s instructions after remounting; familiarity with the rack is not a substitute for correct assembly.
Removal is not always worthwhile. Some vehicles have integrated roof rails that are not intended to be detached, while frequently used accessories may require repeated fitting that increases the chance of installation mistakes. In those cases, manufacturer-approved low-drag equipment and careful maintenance may be preferable.
For a meaningful fuel comparison, record consumption over comparable journeys with and without the removable equipment. Wind, traffic and speed variations can otherwise conceal the actual difference.
Roof equipment is only one possible source of additional travel resistance. Campers towing caravans must also account for the much more demanding combined vehicle-and-trailer loading requirements.
How to Verify Your Car Can Legally Tow Your Caravan’s Loaded Weight?
Verify towing legality by comparing the caravan’s actual loaded mass with the vehicle’s permitted towing capacity, then checking the combined vehicle-and-trailer weight, individual vehicle limits and applicable axle restrictions. The driver’s licence entitlement and local towing laws must also permit the configuration. A caravan’s empty advertised weight is not sufficient for determining whether it can be towed legally.
Camping equipment, water and personal belongings can increase the caravan’s operating weight substantially beyond its unladen figure. Consequently, the important measurement is the caravan as it will actually travel, rather than the specification for an empty model.
Start with the towing vehicle’s identification plate and handbook. In UK guidance, the manufacturer’s plate typically identifies the vehicle’s maximum permitted weight, the maximum combined weight of vehicle and trailer, and the front- and rear-axle limits.
The DVSA‘s caravan and trailer towing safety checks explain how these limits are used and why a loaded vehicle-and-trailer combination must remain within its permitted gross train weight.
A useful verification sequence is:
- Identify the vehicle’s maximum authorised mass, permitted towing capacity and maximum combined mass from the relevant manufacturer documentation.
- Establish the caravan’s own permissible maximum mass and actual loaded weight.
- Account for passengers, fuel and luggage in the towing vehicle, including any roof-mounted equipment.
- Compare the relevant individual and combined masses against their separate limits, including axle and tow-ball loading requirements.
- Confirm that the driver holds the appropriate licence entitlement under the law applicable to the journey.
A public weighbridge or suitable weighing service can provide useful confirmation of real operating weights. The measurements must be interpreted against the correct manufacturer and regulatory limits; weighing the caravan alone does not establish compliance of the complete combination.
Do not assume that towing rules are identical across English-speaking countries. The United Kingdom, United States, Canada and Australia operate different licensing and road-use frameworks, and relevant requirements may vary within countries. Drivers crossing jurisdictions need to verify which rules apply.
Excessive or poorly distributed caravan weight can also affect vehicle handling, stopping distance and stability. Heavy objects should be positioned in accordance with the caravan manufacturer’s loading guidance, with appropriate attention to axle loads and nose or tow-ball weight.
Overloading may result in enforcement action or legal liability. Insurance outcomes are policy- and circumstance-dependent rather than universally automatic.
Once the vehicle and caravan are operating within their limits, driving behaviour becomes a major factor in controlling fuel expenditure over long camping journeys.
Why Does Driving 10mph Slower Save £80 on Long Camping Road Trips?
Reducing motorway cruising speed by 10 mph can lower fuel consumption because aerodynamic resistance rises rapidly with speed. However, £80 is a conditional example, not a guaranteed saving. The financial result depends on journey distance, actual consumption at each speed, fuel price and the vehicle’s cargo configuration. A controlled comparison provides a more useful estimate.
Aerodynamic drag force increases approximately with the square of vehicle speed relative to the surrounding air when the other relevant factors remain constant. The power needed to overcome that drag increases even more sharply with speed. This is why the fuel penalty associated with roof cargo can become particularly noticeable during sustained motorway driving.
Real-world consumption is not determined by aerodynamics alone. Engine efficiency, transmission gearing, vehicle weight, gradients and traffic conditions also contribute. A particular speed reduction therefore does not produce the same percentage benefit across petrol, diesel, hybrid and electric vehicles.
FuelEconomy.gov reports an average fuel-economy benefit of approximately 7% to 14% for a reduction of 5–10 mph in its referenced estimates. Those results are based on specified vehicle testing and should not be interpreted as a fixed outcome for every roof-loaded camping vehicle.
To estimate the potential saving for a particular journey, compare the fuel required at two realistic cruising speeds:
Estimated fuel saving = (fuel used at usual speed − fuel used at reduced speed) × fuel price per litre.
Hypothetical Camping Trip Fuel Calculation
Suppose a camper records 80 litres used at the usual cruising speed and 70 litres under otherwise comparable conditions at a reduced speed. At an assumed fuel price of £1.50 per litre, the difference would be 10 litres × £1.50, or £15.
These figures are purely illustrative, not observed test results or current fuel prices. A claim of £80 savings would require a correspondingly larger measured fuel difference or a different fuel-price assumption.
The calculation should be based on comparable journeys, preferably repeated under similar conditions. A single trip can be distorted by stronger headwinds, traffic delays or route changes. Fuel-pump measurements across comparable distances can provide a useful cross-check against dashboard estimates.
Slower travel also increases journey time. On a particularly long itinerary, that may create extra accommodation costs, change campsite arrival arrangements or make travel less convenient for families. Fuel savings should therefore be evaluated alongside the overall cost and practicality of the journey.
Maintain a legal, appropriate cruising speed, use cruise control where road and weather conditions make it suitable, and avoid unnecessary hard acceleration. Rather than targeting one universal engine speed or fuel-consumption reading, identify an efficient and safe cruising pattern for the specific vehicle.
Speed management can improve efficiency, but a poorly designed route may still waste the resulting savings through unnecessary mileage, repeated detours and expensive overnight stops.
Key Takeaways Before Planning Your Route
- Calculate transport costs using the fuel consumption of the vehicle in its actual camping configuration, rather than relying only on its unloaded economy figure.
- Compare alternative routes on overall expenditure, including fuel, tolls and overnight accommodation, while accounting for safe travel speeds.
- Group destinations geographically and retain flexibility for traffic, weather and necessary load inspections.
How to Plan Camping Routes That Minimise Fuel Costs Without Sacrificing Destinations?
Plan an efficient camping route by grouping nearby destinations, avoiding unnecessary return journeys and comparing the total cost of realistic alternatives. For a vehicle carrying roof equipment, distance alone is not enough: cruising speed, road gradients, traffic, tolls and accommodation costs can alter the result. The best itinerary balances fuel expenditure with safe driving and the places worth visiting.
Begin by identifying the destinations that matter most, then arrange them into geographical groups. A circular itinerary may reduce repeated mileage compared with returning to the same base after every stop, although the actual saving depends on the road network.
Before reserving campsites, compare at least two practical alternatives. One might prioritise direct motorway connections, while another uses regional roads between nearby camping locations. Estimate journey distance, likely travel time and expected fuel consumption for each.
The calculation should reflect the vehicle’s loaded condition. A car with roof equipment may experience different fuel penalties on sustained high-speed roads and slower routes with repeated climbs, bends and acceleration. However, a longer road is not automatically cheaper simply because its average speed is lower.
For each route, estimate:
- Fuel required using a realistic loaded-vehicle consumption rate.
- Expected fuel expenditure at the assumed purchase price.
- Tolls, parking and other relevant road charges.
- Campsite or accommodation costs caused by the chosen stopping pattern.
- Additional distance associated with attractions, supplies or unavoidable diversions.
A basic comparison can use the following calculation:
Estimated fuel cost = (distance in kilometres ÷ 100) × consumption in litres per 100 kilometres × fuel price per litre.
The result is a planning estimate rather than a guarantee. When using miles per gallon, apply a consistent fuel-volume unit: imperial gallons and US gallons are not interchangeable.
Online route planners can help compare distance, tolls and travel time. Where a fuel-cost estimator is available, enter the most representative loaded-vehicle consumption figure rather than accepting an unrelated default. Check the assumptions behind any estimate, particularly where road types or expected speeds differ.
Fuel availability also matters in rural camping regions. Identify sensible refuelling opportunities before entering sparsely served areas, and compare available local prices where practical. A distant cheaper filling station may not justify the extra driving required to reach it.
The most efficient itinerary is rarely the one that removes every scenic diversion. Instead, allocate time and distance deliberately to attractions that justify the journey, while eliminating unnecessary backtracking between them.
Maintain allowances for adverse weather, traffic and rest breaks. Journey planning should also accommodate safe opportunities to inspect roof cargo, particularly after changes in road conditions or when equipment movement is suspected.
Choose the route that offers the most useful combination of destination coverage, manageable driving time and total expenditure. Record the expected fuel budget, verify vehicle and cargo limits, and confirm that the loaded equipment is secure before departure.
Can an empty roof box still increase fuel consumption?
Yes. An empty roof box still changes the vehicle’s external shape and can increase aerodynamic resistance, especially at higher speeds. Removing it when unnecessary is generally preferable to carrying it empty. The actual fuel benefit depends on the vehicle, box and driving conditions.
Can fuel-consumption readings reliably measure roof cargo drag?
Fuel-consumption readings can help estimate the overall efficiency difference between cargo configurations, but they do not directly measure aerodynamic drag. Wind, traffic, gradients and engine operating conditions also affect fuel use. Repeated comparisons under similar conditions provide more meaningful results than a single journey.
Should heavy camping equipment go on the roof or inside the car?
Heavy equipment is generally better carried low in the vehicle where suitable and securely restrained, provided passenger safety, axle limits and the vehicle’s maximum permitted weight are respected. Roof containers are often more appropriate for comparatively lightweight, bulky items. Always follow the vehicle and accessory manufacturers’ loading requirements.
Does a roof box change the safe driving speed in strong crosswinds?
Roof-mounted equipment can increase the vehicle’s exposure to crosswinds and affect handling. Reduce speed when conditions require it, maintain sufficient space from other vehicles and follow applicable manufacturer speed guidance. If stability becomes uncertain, stop safely and reassess the conditions rather than relying on a fixed speed threshold.
Can a roof box be installed alongside a soft cargo bag?
Only if the vehicle, roof-bar system and both cargo products are explicitly compatible with that arrangement. The combined weight, mounting space, clearance and load distribution must satisfy all applicable limits. Separate accessories should not share mounting points or interfere with one another unless their manufacturers approve the configuration.