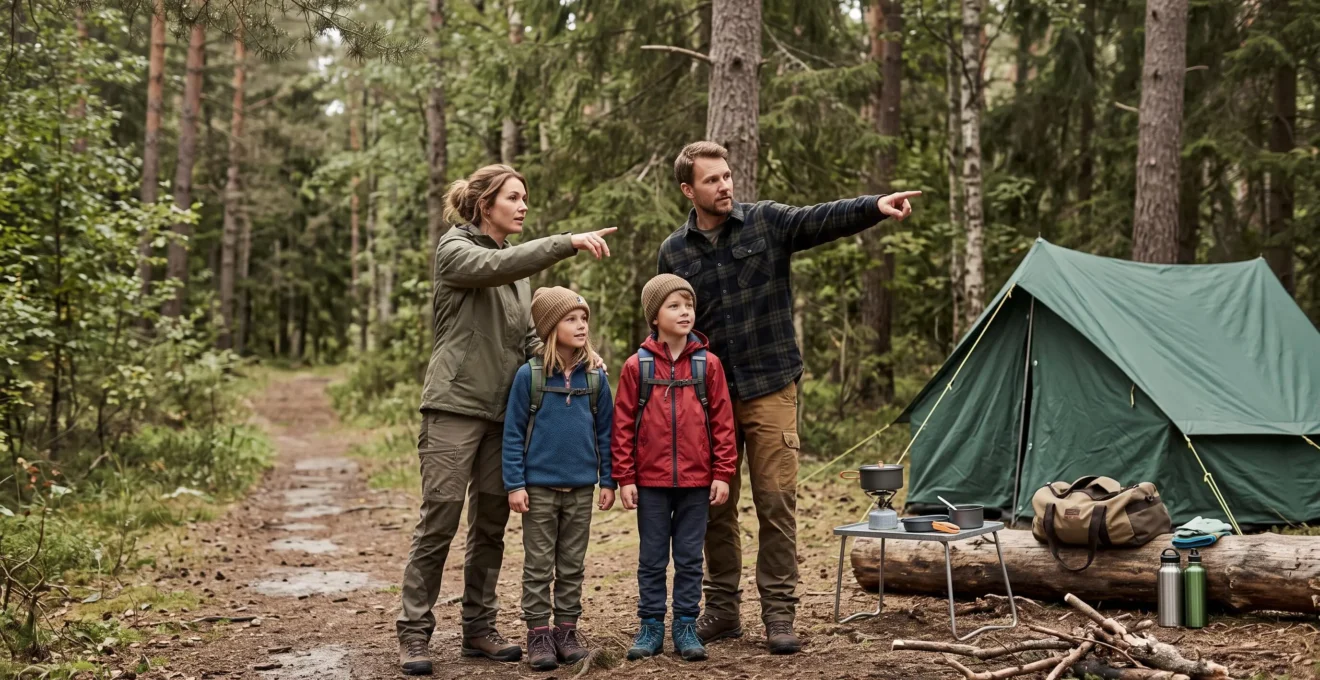
The most interesting discoveries on a camping trip often happen just beyond the tent: an unfamiliar bird call, animal tracks beside a trail, or a woodland floor covered with spring flowers. Yet exploring these surroundings responsibly requires more than curiosity. Even a short walk can become confusing when paths intersect, while repeated footsteps can damage habitats that appear resilient.
Safe campsite exploration begins with a defined route, reliable navigation tools, awareness of local access rules and a clear understanding of which natural features can be observed without disturbance. Families can then turn ordinary walks into structured opportunities to investigate wildlife, landscapes and ecological relationships.
The aim is not to travel as far as possible. It is to notice more within an area that can be explored safely, revisited confidently and left undamaged. Natural landmarks, guided interpretation, wildlife journals and carefully designed discovery activities provide complementary ways to achieve that goal.
Essential principles for safe campsite exploration
- Plan a manageable route, carry a map and compass, and use distinctive natural landmarks to check your position.
- Stay on established trails, respect protected areas and observe wildlife without approaching or disturbing it.
- Build lasting nature knowledge through guided walks, field observations and no-collection scavenger hunts.
- How to Explore Woodland Areas Using Natural Landmarks Instead of Technology?
- The Walking Error That Destroys Protected Ground Habitats in 70% of Wild Areas?
- Self-Guided Exploration or Ranger-Led Walk: Which Teaches More About Nature?
- How to Record Wildlife Sightings Ethically During Campsite Exploration?
- Should You Explore at Dawn or Dusk to Maximise Wildlife Encounters?
- How to Recognise Ancient Woodland From Plant Species During Spring Visits?
- What Transforms a Scavenger Hunt From Entertainment Into Lasting Nature Education?
- How to Create Nature-Based Scavenger Hunts That Educate Children Outdoors?
How to Explore Woodland Areas Using Natural Landmarks Instead of Technology?
Natural landmarks help woodland explorers maintain their bearings by connecting distinctive, stationary features with their position along a known route. Pairing a recognizable tree with a ridge, stream or rocky outcrop makes navigation more informative than remembering a single object. However, landmarks should supplement a map and compass, not replace essential navigation equipment.
Begin by identifying two features that are unlikely to be confused with their surroundings. A solitary oak beside a trail junction might serve as one reference, while a prominent hillside provides another. Notice their relative directions and record the relationship on a paper map when possible.
This is a practical landmark-pairing exercise, not precise surveying triangulation. Two visually identified features do not automatically establish an exact location. Their usefulness depends on visibility, correct identification and the ability to relate them to the planned route.
Navigation landmarks help identify the way back, particularly at junctions or recognizable changes in terrain. Confirmation landmarks provide intermediate evidence that the group is still following the intended trail. Using both creates opportunities to detect a wrong turn before continuing farther.
A progressive family exercise can develop this awareness without introducing unnecessary risk:
- Out-and-back trail: Follow an obvious path and ask each participant to identify two features they expect to recognize on the return. Check: “Can you describe the way back without guessing?”
- Short permitted detour: Where designated paths allow it, take a brief side route and identify its junction with the main trail. Check: “Which landmark confirms our return point?”
- Marked woodland loop: Follow a mapped circuit with several junctions. Check: “Can you locate our current position and the next junction on the map?”
Only increase difficulty when everyone can answer confidently. In uniform pine plantations or terrain with repetitive ridges, individual features may be too similar for dependable navigation. Shorten the walk, remain on clearly marked routes and agree on a regrouping point before departure. Do not treat that point as a reason to wander when disoriented.
Yosemite National Park‘s wilderness safety advice recommends using maps, compasses and landmarks to establish position, remaining together at junctions and staying in place if the trail cannot be safely relocated.
Once the group can navigate a modest route confidently, the next responsibility is understanding where footsteps belong.
The Walking Error That Destroys Protected Ground Habitats in 70% of Wild Areas?
The damaging walking error is repeatedly stepping onto fragile ground or widening established trails to avoid inconvenient surfaces. Foot traffic can crush mosses, disturb sensitive organisms and contribute to erosion or informal trail formation. The suggested 70% figure is not supported by the supplied conservation evidence and should not be treated as a verified environmental statistic.
Forest floors contain living layers that are easy to overlook. Moss cushions retain moisture, seedlings represent future woodland regeneration, and soil organisms contribute to nutrient cycling. In some ecosystems, biological soil crusts are exceptionally vulnerable to disturbance. Their presence and sensitivity vary by habitat.
Repeated off-trail walking can produce trail braiding: visitors avoid a muddy or obstructed section by creating parallel tracks, which gradually enlarge the disturbed area. On an established trail, walking through a manageable muddy section rather than around it generally helps prevent widening, provided doing so is safe and permitted.
Use this surface assessment before each change in route:
| Surface | General assessment | Appropriate response |
|---|---|---|
| Established trail tread | Preferred route in developed or frequently visited areas | Remain within the existing trail |
| Rock and gravel | Generally durable where access is permitted | Use only where route rules allow |
| Dry grass | Often more resistant than delicate vegetation | Consider only in areas where off-trail travel is permitted |
| Wet peat, moss banks and sensitive vegetation | Fragile and susceptible to trampling | Avoid stepping on them |
| Biological soil crusts and vulnerable lichen mats | Potentially damaged by very limited disturbance | Keep off these surfaces |
| Stream margins and restoration areas | May contain sensitive habitat or restricted access | Follow designated crossings and signs |
The Leave No Trace guidance on durable surfaces distinguishes established trails, resistant terrain and fragile ground. In suitable undeveloped areas where dispersed off-trail travel is allowed, its recommendations differ from those for established high-use routes. Local rules therefore take precedence over a simplistic instruction to always walk on rock or grass.
For campsite exploration, define a low-impact curiosity radius using designated paths, permitted access and habitat sensitivity rather than an arbitrary distance from the tent. A nearby protected meadow may be less appropriate to enter than a longer established woodland trail.
Protecting the ground also improves nature education: children learn that observing an ecosystem does not require entering every part of it.
Self-Guided Exploration or Ranger-Led Walk: Which Teaches More About Nature?
Ranger-led walks and self-guided exploration teach different aspects of nature awareness. A ranger can explain local ecology, species interactions and conservation concerns, while independent walks give participants opportunities to practise observation and develop confidence. Neither format is universally superior; the useful choice depends on existing knowledge, available learning resources and familiarity with the site.
A guided walk can reveal relationships that visitors might otherwise miss. A ranger may explain why a particular plant grows near a stream, how woodland management influences wildlife, or which signs indicate a sensitive nesting area.
Self-guided exploration gives families control over pace and questions. Children can revisit an observation, compare habitats and develop explanations rather than simply receiving information. Interpretive signs, field guides and nature journals make these independent experiences more structured.
| Situation | Ranger-led walk | Self-guided exploration |
|---|---|---|
| First visit to an unfamiliar habitat | Useful for understanding local features and precautions | Best kept to clear, designated interpretive routes |
| Children with limited ecological knowledge | Provides explanations and opportunities for questions | Benefits from structured observation prompts |
| Interpretive trail and field materials available | Adds specialist local context | Offers an accessible framework for independent learning |
| Repeat visit to a familiar site | Can deepen understanding of specialized topics | Allows comparison with previous observations |
A practical hybrid approach is to attend a ranger activity early in the stay, then return independently to suitable locations with a small set of questions informed by that experience. This is an educational planning suggestion, not a proven superior learning intervention.
For example, Mammoth Cave National Park‘s ranger-led programs include interpretive activities and Junior Ranger opportunities. The park distinguishes free surface programs from fee-based cave tours, with schedules subject to staffing, weather and seasonal availability.
Other parks may use different pricing and booking arrangements. Check the relevant visitor center or official schedule before arrival rather than assuming a ranger-led walk will be available on demand.
Whichever format you select, keeping a record of observations helps turn a single walk into knowledge that can be revisited.
How to Record Wildlife Sightings Ethically During Campsite Exploration?
Ethical wildlife recording begins with observation that does not change an animal’s behaviour. Keep a respectful distance, avoid attracting wildlife and record what can be seen naturally. A useful sighting note includes when and where the observation occurred, the surrounding habitat and the behaviour witnessed, while protecting sensitive species from unnecessary location disclosure.
The first rule is no disturbance for a better record. Never use food to attract an animal, imitate calls or play recordings to provoke a response, move an animal for a photograph, or interfere with nests and dens. Follow species-specific and park-specific viewing distances wherever these are provided.
A simple field-journal entry can include:
- Date and time: When the animal was observed.
- Location: A recognizable landmark or GPS point, recorded privately where appropriate.
- Habitat: Woodland edge, stream corridor, grassland or another observed environment.
- Identification: Species name if reasonably certain, otherwise a descriptive label.
- Behaviour: Feeding, calling, resting, moving or interacting with another animal.
- Evidence: A distant photograph, sketch or written description obtained without disturbance.
Personal records and scientific observations serve related but different purposes. A sketch may preserve a meaningful family memory, whereas a citizen-science record benefits from verifiable identification, accurate time and location data, and relevant observation details.
Platforms such as iNaturalist can accept suitable observations, but public visibility settings and sensitive-species protections deserve attention. Avoid publicly disclosing precise locations of vulnerable nests, dens or threatened wildlife. Children should contribute through an adult-managed account where appropriate.
Photography creates a particular temptation to approach. Use optical zoom instead of moving closer, stop when the animal reacts to your presence, and leave nesting or denning locations undisturbed. If an animal interrupts feeding, becomes alert or retreats, the encounter has already crossed an important behavioural boundary.
A wildlife journal also supports comparison over time. Recording similar observations during separate walks may reveal patterns worth investigating, without claiming that a few sightings establish population trends.
The next question is when to schedule those observations, since animal activity and safe walking conditions change throughout the day.
Should You Explore at Dawn or Dusk to Maximise Wildlife Encounters?
Dawn and dusk can both offer rewarding wildlife observations because many species are especially active during transitions between daylight and darkness. Dawn is often a practical choice for family birdwatching, while dusk may provide opportunities to observe certain mammals. Neither period guarantees sightings, and route safety, local restrictions and species behaviour should determine the final choice.
Animals described as crepuscular are especially active around twilight. Their activity may relate to temperature, feeding opportunities, predator avoidance and other ecological pressures. These explanations vary among species, so it would be misleading to suggest that most wildlife universally follows one twilight schedule.
Dawn frequently brings noticeable bird vocalizations, particularly during breeding seasons. Cooler temperatures and relatively quiet surroundings can make listening productive, although visibility may remain limited and early-morning conditions can be cold.
Dusk can offer observations of mammals emerging to forage. However, diminishing light creates a navigation constraint: familiar obstacles become harder to recognize, and a delayed return can turn an ordinary walk into travel after dark.
| Consideration | Dawn | Dusk |
|---|---|---|
| Potential wildlife interest | Birdsong and morning activity | Twilight-active mammals and evening movement |
| Visibility | Generally improves as the walk continues | Decreases as the walk continues |
| Preparation | Warm clothing and a light source when needed | Headlamp, clear turnaround time and known route |
| Family suitability | Often preferable for a familiar, accessible route | Best limited to a previously inspected short route |
Weather provides another observation window. After rainfall, suitable conditions may encourage activity among amphibians and ground invertebrates. The opportunity depends on species, season and local conditions; heavy rain, flooding or slippery surfaces can make exploration inappropriate.
For an evening outing, inspect the entire proposed route in daylight and establish a turnaround time that allows a safe return. Prefer dawn when terrain includes uneven footing or water crossings, and never enter trails closed during twilight or darkness.
Seasonal timing matters beyond the hour of day, particularly when plants provide clues to the history of the woodland itself.
How to Recognise Ancient Woodland From Plant Species During Spring Visits?
In parts of the United Kingdom, ancient woodland can be investigated through combinations of plant species associated with long-established woodland conditions. Spring-flowering plants such as bluebells and primroses provide useful clues, especially when several indicator species occur together. These plants suggest woodland continuity; they do not establish an exact age or independently prove official ancient woodland status.
Ancient woodland is valued partly because long-standing woodland conditions can support ecological communities that are difficult to recreate after clearance. Some plants disperse or establish slowly, making their presence informative when interpreted alongside local history and habitat conditions.
In British woodland, useful species to investigate include bluebells, primroses and herb paris. Other familiar spring plants, including wood anemone, wild garlic and wood sorrel, may contribute to woodland interpretation, but their diagnostic significance differs by region and site.
The Woodland Trust advice on identifying ancient woodland emphasizes considering multiple botanical indicators alongside historical and structural evidence.
Look for complementary clues such as veteran trees, old coppice stools, deadwood, historic woodland boundaries and evidence from maps. A hollow tree alone does not prove woodland continuity, just as a patch of bluebells cannot provide an exact establishment date.
A family spring survey can turn these clues into an accessible investigation:
- Choose two safe observation points along an established woodland trail.
- Record the plant species visible from each point without entering vegetation.
- Count how many locally recognized indicator species can be identified confidently.
- Compare observations from a woodland edge and a more sheltered interior section.
- Discuss alternative explanations for differences, including light, moisture and disturbance.
This is an educational comparison, not a scientific woodland-dating technique. Plant indicators developed for British habitats must not be applied automatically to North American or Australian forests, where ecological histories and indicator species differ.
Recognition should encourage restraint. Do not pick flowers, step into bluebell carpets or disturb deadwood to search for hidden organisms. Follow the site’s access rules and any protected-area restrictions.
The same careful attention to evidence can make children’s outdoor discovery games more educational and less intrusive.
What Transforms a Scavenger Hunt From Entertainment Into Lasting Nature Education?
A nature scavenger hunt becomes an educational activity when children investigate relationships rather than simply locate objects. Asking what an animal has eaten, why two leaves differ or how fallen wood changes over time encourages interpretation. A short explanation after each discovery helps children revisit their observations, while a no-collection rule keeps the activity compatible with habitat protection.
A conventional hunt might ask participants to find a feather, a round stone or a yellow flower. These tasks encourage attention but may end as soon as the object is identified.
A relationship-based version asks more demanding questions: What evidence suggests an animal has fed here? How are two leaves damaged differently? What might be breaking down a fallen branch?
These prompts encourage children to describe, compare and explain. They also create opportunities to distinguish direct evidence from speculation. A hole in a leaf is observable; identifying the exact organism responsible may require additional evidence.
After each discovery, introduce a short report-back moment. Ask the child to describe the evidence, suggest an explanation and identify what remains uncertain. This provides an opportunity for active recall rather than treating the activity as a race to complete a list.
Difficulty can be layered within one shared hunt. Younger children might identify contrasting shapes, colors or sounds. Older participants can investigate camouflage, decomposition, seed dispersal or feeding relationships using observations from the same route.
Everything remains in place. Photographs, sketches and descriptions replace collected specimens, while adults ensure that nobody leaves the permitted trail to complete a challenge.
The aim is not to guarantee long-term learning from one activity. It is to create a repeatable process of observation, explanation and later reflection that gives discoveries greater educational value.
With that educational principle established, a campsite-specific hunt can be designed around the habitats, boundaries and seasonal conditions actually present.
Key takeaways before designing your hunt
- Build activities around visible evidence in the actual habitat, not an inflexible list of objects.
- Set route boundaries and supervision arrangements before giving children discovery tasks.
- Plan a short reflection afterward so observations can inform the next exploration.
How to Create Nature-Based Scavenger Hunts That Educate Children Outdoors?
Create an educational nature scavenger hunt by first surveying a safe, accessible route near the campsite, then selecting observation tasks suited to its habitat and season. Set clear boundaries, require children to leave natural objects in place and finish with a discussion of what they discovered. A short, locally adapted hunt is more useful than a generic checklist.
Start with an adult reconnaissance walk. Identify established trails, recognizable junctions, suitable stopping points and any restricted or sensitive areas. Note what can realistically be observed without entering vegetation or approaching wildlife.
Next, choose a compact set of categories that works across different environments:
- One color: Find a natural example of a chosen color and describe where it appears.
- One sound: Listen for a bird, insect, moving water or wind and describe its source if identifiable.
- One texture: Describe the visible surface of bark, stone or fallen wood without damaging it.
- One animal sign: Identify possible evidence of feeding, movement or shelter without approaching nests or dens.
- One ecological relationship: Observe how two organisms or environmental features appear connected.
In woodland, these prompts might involve bark patterns, bird calls and decomposing branches. Along a permitted shoreline trail, they might focus on wave sounds, rock textures and signs of tidal activity. Grassland versions could emphasize seed shapes, insect sounds and plant variation.
Keep the hunt within a defined section of an established trail, with a duration appropriate to participants and conditions. Explain the boundaries using recognizable landmarks and identify an adult-supervised check-in location. Children should remain within the agreed supervision arrangement rather than separating to search independently.
Adopt a simple rule: observe, record and leave in place. No plants, fungi, feathers, stones or animal remains need to be collected. Where touching is permitted, children should avoid unknown mushrooms, wildlife, nests, sensitive vegetation and objects that may present hazards. Observation without handling is the safest default.
Five steps to prepare a campsite nature hunt
- Walk the proposed route and produce a simple sketch showing the start, turnaround point and permitted observation stops.
- Select five locally observable discovery prompts and write them on a small hunt card.
- Mark two recognizable boundary landmarks and identify the adult check-in point on the route sketch.
- Brief every participant on supervision, no-collection rules and restricted areas; confirm each child can repeat the essential boundaries.
- Complete the hunt with one sketch or observation note per participant and one question to investigate during the next walk.
The educational experience continues after returning to camp. During a short evening discussion, invite children to show a sketch, locate their observation on the route map and explain one relationship they noticed. If the family attended a ranger program, compare the discovery with something learned there. Relevant wildlife observations can also be added to the field journal.
Finish by asking, “What would you like to investigate tomorrow?” A question about a bird call, a woodland plant or a change in habitat gives the next outing a meaningful focus without requiring a longer or more intrusive route.
For your next camping trip, prepare one short trail-based hunt, carry a notebook and map, and allow the children to choose a question for the following day. The most valuable result is not a completed checklist, but a growing ability to explore carefully, notice ecological relationships and respect the places being visited.
What should you carry when exploring woodland near a campsite?
Carry a suitable map and compass, sufficient water, weather-appropriate clothing, rain protection and basic emergency supplies. Additional food and warm clothing may be appropriate even for apparently straightforward walks. Tell a trusted person your intended route and expected return time, and follow local safety advice.
What should a family do if it becomes lost during a woodland walk?
Stop moving, keep the group together and assess the situation calmly. Use the map, compass and recognizable landmarks to establish position. If the trail cannot be safely relocated, remain in a safe place rather than wandering. Contact emergency services when necessary and follow instructions from local authorities.
Can children use nature identification apps during a camping trip?
Identification apps can support learning by suggesting possible species names, but their results may be incorrect. Treat identifications as hypotheses to check against reliable field resources. Do not handle unknown organisms to obtain better photographs, and never rely on an app alone to determine whether a mushroom or plant is safe to eat.
Is it acceptable to leave a marked trail to investigate an interesting discovery?
Only where local access rules explicitly permit off-trail travel and the terrain can be crossed without damaging sensitive habitats. In established high-use areas, remaining on designated trails is generally preferable. Protected vegetation, restoration zones, biological soil crusts and sensitive wildlife areas should not be entered simply to obtain a closer view.
How can families keep nature exploration interesting across several camping days?
Give each outing a different observation focus while revisiting familiar, safe routes. One walk might emphasize sounds, another animal signs, and another plant relationships. At the end of each day, compare journal entries, discuss unanswered questions and select one investigation for the next outing. Repeated observations can reveal changes that a single visit would miss.