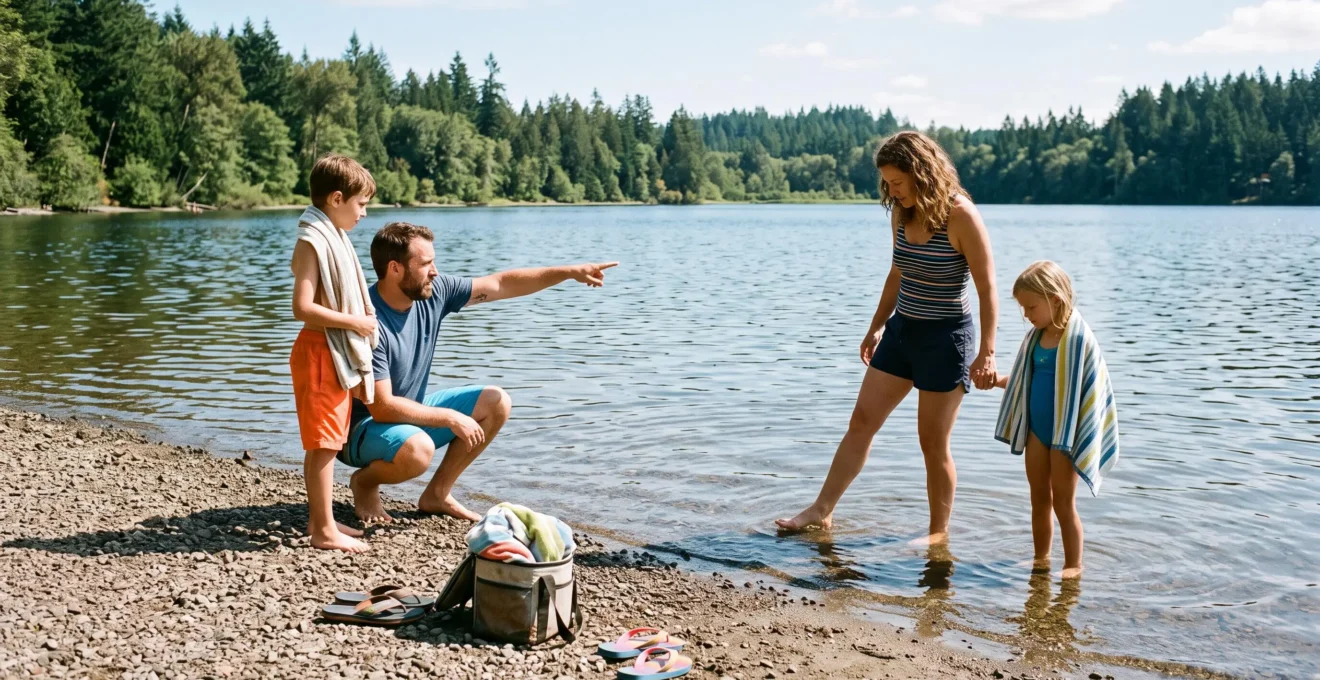
A beautiful lake, quiet river or sheltered beach can look perfectly suitable for family swimming while concealing hazards that are difficult to recognise from the shore. Currents, sudden changes in depth, cold water, pollution and limited escape routes can turn a seemingly straightforward outing into an emergency.
Assessing natural swimming water means looking beyond its appearance. Parents and group leaders should check official safety information, observe conditions, identify suitable entry and exit points, and consider whether the youngest or least confident swimmer can cope with the environment.
In the UK, supervised bathing areas offer a useful starting point, particularly for families unfamiliar with open water. Even there, conditions can change with weather, tides and water movement. The safest decision sometimes involves choosing another location or staying out of the water altogether.
The following framework explains how to recognise warning signs, evaluate different swimming environments and make practical decisions before children enter.
Family open-water safety at a glance
- Check official warnings, water quality, currents, weather and tides before travelling, then reassess conditions on arrival.
- Choose supervised swimming areas with gentle entry slopes, clearly identifiable exits and conditions suitable for the weakest swimmer.
- Never assume clear, calm or warm-looking water is safe. Cold water, hidden currents and contamination may be invisible.
- How to Spot Hidden Currents From Surface Water Patterns Before Entering?
- The Summer Swimming Risk That Causes 50% of Open-Water Emergencies?
- Blue Flag Beach or Wild Swimming Spot: Which for Families With Under-10s?
- Why You Should Never Swim Near Drainage Pipes or Outflow Points?
- When to Consult Tide Charts to Avoid Being Cut Off by Rising Water?
- How to Choose Lakes With Multiple Easy Exit Beaches for Nervous Paddlers?
- Why Is This Beautiful Beach Always Empty Even in Peak Summer?
- How to Choose Lakes That Provide Safe Learning Conditions for Kayak Beginners?
How to Spot Hidden Currents From Surface Water Patterns Before Entering?
Hidden currents may reveal themselves through unusual surface patterns, including gaps in breaking waves, lines of foam moving offshore, or channels of water that look different from their surroundings. However, dangerous currents can exist without visible signs. Families should combine careful observation with official warnings and local lifeguard advice, never treating a visual inspection as proof of safety.
At a coastal beach, compare the movement of waves along the entire shoreline. A narrow channel where waves break less frequently than on either side can indicate a rip current. Discoloured water, disturbed surface patterns and foam moving away from shore are other possible clues.
The National Weather Service rip current safety FAQ explains that these indicators may appear individually, together or not at all. Rip currents can also develop near piers, groynes and gaps in sandbars.
The calmest-looking gap between breaking waves may be the most hazardous place to enter. Explain this to children before arriving at the water’s edge, where the temptation to run towards a quiet patch can be difficult to resist.
Rivers require a different approach. Their current may move steadily across the entire channel, without the contrasting wave patterns that help identify some coastal rip currents. Floating leaves or naturally occurring debris can reveal surface movement, but they cannot measure underwater flow, submerged turbulence or whether swimming is safe.
For a practical shoreline assessment:
- Walk the accessible shoreline and identify bends, narrowing channels, structures and possible escape points.
- Observe the same stretch from a fixed, safe position for several minutes, comparing surface movement in different areas.
- Watch existing floating material for consistent movement, without approaching hazardous banks or entering the water to test the flow.
- Check warnings about river levels, flood conditions and upstream structures.
- Ask a lifeguard or knowledgeable local authority whether the location is designated for swimming.
Reservoirs and rivers downstream of dams introduce another hazard: controlled water releases can change flow and water levels rapidly. Surface observations made a few minutes earlier may no longer reflect the conditions.
Children should never be sent into unfamiliar water to investigate its depth or current. If the family cannot confidently establish that a location is suitable, choose a supervised swimming area instead.
Identifying moving water is only one part of the assessment. Even water with little apparent movement can present a serious cold-immersion hazard.
The Summer Swimming Risk That Causes 50% of Open-Water Emergencies?
Cold water shock is a major open-water hazard, even during hot summer weather. The suggested figure of 50% of emergencies cannot be verified from the available evidence and should not be treated as an established statistic. What is well documented is that sudden immersion in cold water can trigger involuntary gasping, uncontrolled breathing and immediate difficulty staying afloat.
The RNLI advice on cold water shock identifies water temperatures of 15°C or below as presenting a significant risk. The sudden cooling of the skin can provoke an involuntary gasp, while breathing may become much faster and difficult to control.
This response is especially dangerous if someone jumps into deep water, unexpectedly submerges their face or cannot immediately reach a stable position. A capable pool swimmer may struggle to manage breathing during the first moments of cold immersion.
15°C
Water at or below this temperature presents a significant cold water shock risk according to the RNLI. This is not a boundary below which all water is dangerous and above which swimming is automatically safe.
Royal National Lifeboat Institution, cold water shock guidance.
Summer weather can create a misleading impression of warmth. Sunshine heats the air and may warm shallow surface water, while deeper lake water or river water fed by colder sources remains substantially cooler. A sunny day therefore tells families very little about the temperature they will experience when immersed.
Before allowing children to enter, check available water-temperature information. Where swimming is permitted and conditions are appropriate, enter cautiously from a stable, shallow access point rather than jumping or diving. Gradual entry does not eliminate cold water shock, so it must never substitute for a suitable location and close supervision.
Adults should also establish how they will respond if a child panics. A sudden gasp or distress reaction can alarm other children, especially in a group, making calm instructions and immediate access to safety important. The specific claim that panic routinely spreads between siblings is not established by the supplied evidence.
Never let a child jump or dive into unsurveyed natural water. Hidden obstacles, unexpected depth and cold immersion create separate risks that can occur together.
If someone unexpectedly enters cold water, the RNLI recommends floating to regain control of breathing before attempting to move towards safety or seek help. An adult should not enter hazardous water impulsively to attempt a rescue; call for assistance and use available rescue equipment from a safe position.
Temperature is one reason families benefit from choosing managed bathing locations, where local information and safety arrangements may be easier to verify.
Blue Flag Beach or Wild Swimming Spot: Which for Families With Under-10s?
For families with children under ten, a lifeguarded beach with gentle shallows, clear hazard information and accessible emergency assistance is generally the more suitable first choice. Blue Flag certification provides useful information about environmental and safety standards, but it does not guarantee that lifeguards will be present or that every section of a beach is suitable for young swimmers.
The official Blue Flag beach certification criteria cover bathing water quality, environmental management, safety arrangements, services and visitor information. Depending on the circumstances, public rescue equipment may be provided instead of lifeguards.
Consequently, parents should check the actual safety provision at their intended location and visiting time rather than relying on certification alone.
The comparison below focuses on practical considerations for children rather than the reputation of either type of destination.
| Safety criterion | Blue Flag beach | Wild swimming spot |
|---|---|---|
| Lifeguard presence | Check whether lifeguards operate and their duty hours; certification alone is insufficient. | Often absent; verify locally before visiting. |
| Shallow entry | Inspect the actual swimming zone for slopes, waves and drop-offs. | Requires direct inspection of the entry and exit terrain. |
| Water quality | Subject to certification-related monitoring requirements; check current notices. | Testing and published information may be limited or unavailable. |
| Hazard signage | Safety information forms part of certification requirements. | Signs may be limited or absent. |
| Emergency access | Assess the location of rescue provision and vehicle access. | Remote paths or difficult terrain may delay assistance. |
Wild swimming can be a rewarding family activity when the location is established, conditions are suitable and adults have reliable local knowledge. A familiar swimming community, documented access points and current water-quality information are useful starting points.
However, familiarity does not remove natural hazards. A swimming hole visited safely in previous years may change after flooding, erosion or alterations to the riverbed.
For a family holiday, a sensible progression is to begin at a supervised beach, assess children’s stamina and confidence, and consider more natural locations only when the adults can independently evaluate the conditions.
Active lifeguard supervision matters more than the presence of an award flag. Children still require close adult supervision even within a lifeguarded area.
Regardless of certification, water entering the swimming area from drains or outfalls requires a separate assessment of potential contamination.
Why You Should Never Swim Near Drainage Pipes or Outflow Points?
Swimming near drainage pipes, sewage outfalls or discharge points can expose families to contaminated water and, depending on the structure, hazardous flows. Pollution may be present without an obvious smell or colour change. Because discharge conditions vary and no universal safe distance can be assumed, families should avoid these locations and follow official bathing-water warnings.
The EPA information on beach health risks advises avoiding beaches with visible discharge pipes and urban beaches after heavy rainfall. Runoff and untreated sewage can carry microorganisms capable of causing gastrointestinal illness and other infections.
Children may be especially vulnerable because they can accidentally swallow water while swimming or playing in the shallows.
Three potential hazards deserve separate consideration:
- Water contamination: runoff or sewage can introduce harmful microorganisms without producing visible warning signs.
- Unpredictable water movement: some discharge structures create localised currents or turbulence, although not every pipe produces dangerous suction.
- Changing conditions: rainfall, upstream operations or changing discharge volumes can alter the environment after a family arrives.
Visible pipes in riverbanks, seawalls or lakeshores should prompt caution. Discoloured water, foam, oily films or unusual surface accumulations may indicate a problem, but their absence does not establish that the water is clean.
Some outfalls are partly hidden beneath jetties, at the base of cliffs or below the waterline. Parents should examine maps and official information rather than assuming that every relevant discharge point will be visible from the beach.
Wind and currents can transport discharged material away from its source. The affected area cannot reliably be defined using a fixed distance from the pipe, and a beach on the other side of a visible structure is not necessarily unaffected.
Families staying at lakeside or riverside campsites should check nearby water quality before planning a morning swim. Convenient access to a shoreline is not evidence that the adjacent water is suitable for bathing.
After heavy rain, consult current local bathing-water notices and consider postponing swimming, particularly where runoff or sewage pollution is a concern.
Water quality is only one environmental variable that can change during a visit. At the coast, the tide may alter access to the beach itself.
When to Consult Tide Charts to Avoid Being Cut Off by Rising Water?
Families should consult local tide charts before visiting any tidal beach, rock shelf, sandbank or causeway where rising water could block the return route. Check both high and low tide times, the predicted tidal range and local warnings. Establish a conservative turnaround time before setting off, rather than waiting until the water visibly approaches the escape path.
A tidal cut-off occurs when rising water covers the route back to safety. A family may remain on dry rocks or sand while the channel separating them from shore fills with water. This is fundamentally an access and planning problem, not necessarily a failure of swimming ability.
For example, imagine a family walking across an exposed sandbank to explore rock pools. The route appears broad and dry on arrival. As the tide rises, a low section behind them floods first, leaving the family separated from the mainland even though their immediate surroundings remain above water.
Spring tides add another complication. They have a greater tidal range than neap tides, meaning a route that remained accessible during one visit may flood differently on another day.
Local geography also matters. Narrow channels, estuaries and headlands can create water movements that are not obvious from a general regional tide table.
Five checks before a family coastal outing
- Find the tide predictions for the specific destination and date. Record the local high and low tide times.
- Check the predicted tidal range and any local spring-tide warnings. Record whether an unusually large range affects the visit.
- Identify the access path, potential cut-off points and alternative exits on a map. Mark the intended return route.
- Read official signs and consult local lifeguards or coastal safety notices. Record any site-specific restrictions or warnings.
- Agree on a conservative turnaround time, confirm everyone understands it and check that a charged phone is available. Record the departure deadline before leaving the main beach.
The turnaround time should account for local advice, the route’s exposure, walking speed and the needs of children. Tide times alone cannot establish exactly when a particular path will become impassable.
If the return route is already submerged, do not attempt to cross fast-moving or unfamiliar water. In the UK, call 999 or 112 and ask for the Coastguard if stranded or in danger on the coast.
On inland lakes, tides are usually not the issue, but the same principle applies: families need reachable exits before they enter the water.
How to Choose Lakes With Multiple Easy Exit Beaches for Nervous Paddlers?
A suitable lake for nervous swimmers or paddlers should offer several clearly visible, accessible shoreline exits with gentle gradients and stable footing. Exits should be close enough for the least confident participant to reach without exhaustion or panic. Parents should inspect them on arrival because water levels, mud, vegetation and shoreline conditions can change.
An easy exit is more than a patch of shoreline visible from the water. It needs to be usable by someone who is tired, cold or frightened.
Firm sand or a stable, gently sloping surface is preferable to slippery stones, submerged roots or a steep muddy bank. A route that requires climbing over boulders may be manageable for an experienced adult but unsuitable for a nervous child.
When reviewing a lake before travelling, look for designated bathing areas, official access maps and local information about shoreline conditions. Identify multiple access points rather than relying on a single beach.
On arrival, inspect:
- Whether the bottom slopes gradually or drops away abruptly.
- Whether exits remain visible from the intended swimming area.
- Whether reeds, submerged branches or other obstacles obstruct access.
- Whether boat traffic or wakes affect the shoreline.
- Whether water-level changes have exposed steep, slippery or unstable banks.
Where a lake has a designated swimming area, remain within its boundaries and comply with local rules. Multiple potential exits do not make swimming safe if currents, water temperature or other conditions are unsuitable.
For nervous children, familiarity with an exit can also reduce uncertainty. Walk the route together before entry and agree on a simple signal meaning that the child wants to return immediately.
A visible exit is useful only when it is genuinely reachable and usable. Adults should not assume that a child can swim to a distant beach simply because it appears nearby from shore.
Late-summer changes deserve particular attention. Falling water levels may transform a previously gentle sandy margin into an awkward muddy slope, making older photographs unreliable.
The same habit of questioning first impressions is valuable at the coast, especially when an attractive beach appears unexpectedly deserted.
Why Is This Beautiful Beach Always Empty Even in Peak Summer?
An unusually empty beach may simply be difficult to reach, but it can also indicate hazards known to local residents. Strong currents, sudden depth changes, pollution, dangerous access or a lack of emergency facilities are possible explanations. Families should investigate the reason rather than assuming that an uncrowded shoreline offers a safer or more enjoyable swimming experience.
Start by assessing the water itself. A beach near a river mouth, headland or narrow channel may experience complicated currents. A steeply shelving seabed can create deep water close to shore, while rocks and slippery algae may make entry difficult.
Next, consider whether the beach has active lifeguard coverage, reliable emergency access and clear safety information. The absence of facilities does not automatically mean the location is dangerous, but it increases the amount of independent assessment required.
Water quality is another possible explanation. Official bathing-water classifications, pollution notices and local authority warnings can identify problems that are not apparent from photographs or a brief visit.
Seasonal conditions also matter. Jellyfish, algal blooms and changing wave conditions can affect the suitability of a location at different times.
A useful investigation follows this order:
- Check official safety warnings and current bathing-water information.
- Identify nearby river mouths, outfalls, rocks and structures that may influence conditions.
- Confirm whether lifeguards are present and whether emergency access is practical.
- Review recent, credible local reports for recurring concerns.
- Observe the shoreline and water without assuming that other visitors’ behaviour proves safety.
Fishing boats, surfers or experienced swimmers may use a beach for reasons unrelated to its suitability for children. Equally, an absence of swimmers may reflect limited parking or a long walking route rather than an identifiable water hazard.
Local community information can provide context, but official notices and direct inspection should take priority over unverified online comments.
A quiet location is worth considering only when its hazards can be assessed and the conditions match the abilities of everyone attending. Privacy is not a substitute for supervision, safe access or reliable information.
Once a family can distinguish attractive scenery from genuinely manageable conditions, the same evaluation skills become useful for other water activities, including beginner kayaking.
Key takeaways before choosing a kayaking lake
- Prioritise sheltered water and accessible shorelines over scenery or the size of the lake.
- Assess wind, boat traffic and cold-water exposure independently of swimming conditions.
- Choose a learning environment where beginners can practise recovery with qualified supervision before travelling farther from shore.
How to Choose Lakes That Provide Safe Learning Conditions for Kayak Beginners?
A beginner-friendly kayaking lake should have sheltered water, manageable wind conditions, stable launching areas, accessible shallow margins and little interference from motorboats. Families should favour designated paddling areas and supervised introductory sessions. A lake that appears calm from shore can become challenging when wind increases or paddlers move into deeper, exposed water.
The first consideration is the launch site. Beginners need stable footing and enough room to enter and leave their kayaks without slipping, colliding with obstacles or immediately drifting into deeper water.
Gentle shorelines also make it easier to practise controlled exits and recover equipment under supervision.
Next, assess the lake’s exposure to wind. Open stretches of water can develop waves even when the shoreline remains relatively sheltered. Afternoon conditions may differ significantly from those experienced during a calm morning.
Check a reliable local forecast before setting out and observe the water again on arrival. Whitecaps are a clear warning that conditions may already be unsuitable for novice paddlers, but dangerous wind or drifting conditions can develop before whitecaps appear.
Beginners should avoid launching in conditions that would prevent an easy return. Planning a route that starts against a manageable wind can sometimes make the return easier, but wind direction may change, and this tactic does not replace a conservative route or professional instruction.
Remaining close to an accessible shore is particularly important for beginners. Deep, cold water increases the consequences of capsizing, while boat wakes and changing weather can complicate recovery.
Appropriate, correctly fitted buoyancy aids should be worn, and children should participate in activities suitable for their age and ability. A supervised introductory session with a qualified instructor is preferable to attempting unfamiliar rescue techniques independently.
During instruction, beginners can learn how to remain with their kayak after capsizing, keep control of the equipment and move towards a safe recovery point. The appropriate technique depends on the kayak, water conditions and participant’s ability, so it should be practised in a controlled environment.
Before departure, agree on group boundaries, communication signals and the conditions that require an immediate return. Avoid routes near dams, spillways, strong inflows or areas with heavy motorboat traffic.
The lake-selection principles already used for swimming remain valuable: gradual margins, multiple usable exits, reliable local information and conditions appropriate for the least experienced participant.
For the next family outing, choose one potential destination, check its official safety information, inspect the access and exits, and make a clear go-or-no-go decision before anyone enters the water. If the conditions cannot be assessed confidently, choose a supervised alternative.
Can children swim safely in a lake without lifeguards?
A lake without lifeguards requires particular caution. Parents must consider water quality, temperature, currents, underwater hazards, entry and exit conditions, and their ability to supervise and respond to an emergency. For younger or inexperienced swimmers, a designated lifeguarded bathing area is generally the more appropriate choice. Adult supervision alone cannot eliminate open-water hazards.
Does clear water mean a river or lake is safe for swimming?
No. Clear water can still contain harmful microorganisms, strong currents, submerged obstacles or sudden depth changes. Appearance is not a reliable substitute for official water-quality information, local warnings and a physical assessment of the swimming area.
What should parents do if a child is caught in a rip current?
Alert the lifeguard immediately or call emergency services. Encourage the child to remain afloat, avoid fighting directly against the current and signal for help. If able, a swimmer may move parallel to the shoreline to escape the current before returning towards shore when safe. Do not enter dangerous surf impulsively to attempt a rescue; use available rescue equipment and follow professional instructions.
How soon after heavy rain should a family return to wild swimming?
There is no universal waiting period that guarantees safe water quality. Rainfall can increase runoff and sewage-related contamination, with the consequences varying by location and drainage system. Check current official bathing-water notices and local advice, and avoid swimming while pollution warnings remain in effect.
What emergency information should families carry when visiting remote swimming locations?
Carry a charged phone, know the location and nearest practical emergency access point, and establish how to contact emergency services. In the UK, call 999 or 112 for emergencies and ask for the Coastguard when appropriate for coastal incidents. Inform someone of the intended destination and return plans when visiting remote areas. A communication plan is useful, but it cannot make an otherwise hazardous swimming location safe.