Experienced campers often discover that adding equipment does not necessarily improve a night outdoors. More poles, storage compartments, accessories and specialized tools can create a camp that is comfortable but increasingly complicated to transport, organize and dismantle. Simplifying the setup changes the experience before the first night even begins.
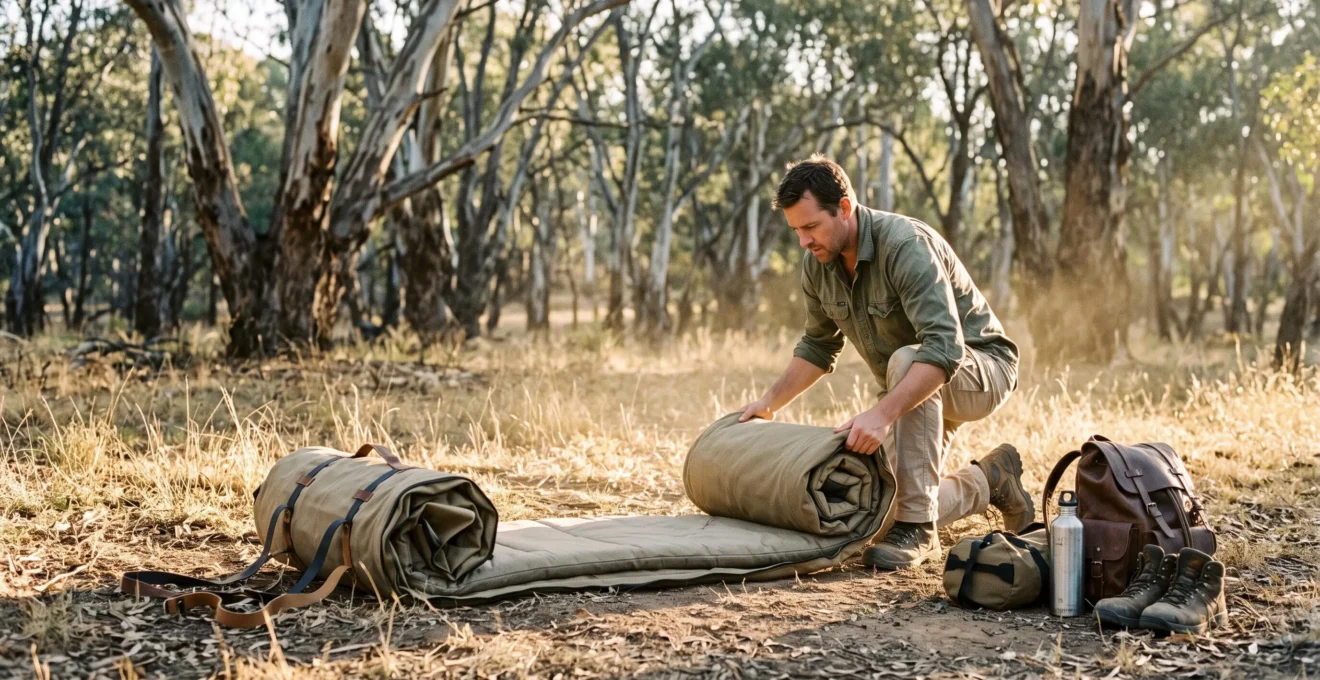
Swag-style camping illustrates this alternative. A swag combines a sleeping enclosure and mattress into a compact roll, often with integrated support poles and insect mesh. Instead of constructing a separate living space, the camper prepares a protected place to sleep. The distinction is less about owning fewer objects than about eliminating unnecessary decisions.
Yet minimalism has limits. A canvas swag may be convenient beside a vehicle but burdensome on a long walking route. A smaller shelter may provide less room for wet clothing, and a simpler kit still needs reliable insulation, navigation and emergency supplies. The experienced camper’s advantage comes from knowing which complexity serves a purpose and which merely follows habit.
Minimalist camping: the essential decisions
- Simplify the system, not just the packing list. Integrated shelters can reduce setup steps, but actual speed depends on design, terrain and practice.
- Match shelter to travel style. Swags often suit vehicle-supported camping, while compact ultralight tents usually make more sense when carried weight matters.
- Keep essential safeguards. Shelter, ground insulation, water, navigation and emergency communication remain important regardless of how minimalist the camp becomes.
- Why Do Swag Users Set Up Camp in Under Two Minutes While Tent Campers Take Much Longer?
- Swag or Ultralight Tent: Which Aligns With Minimalist Solo Camping?
- How to Transition From Tent Camping to Swag-Style Without Feeling Exposed?
- How to Build a Full Swag Camp Kit That Weighs Less Than 12 Kilograms?
- When Should You Abandon Swag Philosophy and Bring a Proper Tent?
- How to Progress From Group Camping to Confident Solo Wilderness Camping?
- When Should You Start Pitching to Finish Before Poor Light or Wind Picks Up?
- How to Camp Alone Safely Without Backup Support?
Why Do Swag Users Set Up Camp in Under Two Minutes While Tent Campers Take Much Longer?
Some swags can be pitched in approximately two minutes because their sleeping surface, enclosure and supporting structure are designed to work as one system. Conventional tents may involve more separate assembly and adjustment. However, neither a two-minute swag setup nor a twenty-minute tent setup is universal: the actual difference depends on equipment design, familiarity, terrain and weather.
The mechanical advantage is straightforward. A traditional tent may require laying out a footprint, assembling poles, attaching the inner shelter, positioning the rainfly and adjusting guyline tension. A swag with integrated bedding removes some of these separate tasks. Depending on its construction, the camper unrolls the enclosure, positions its support structure, secures it and adjusts ventilation.
The distinction is illustrated by the AOS Tracker Dome Swag specifications on Australian Made. The manufacturer describes a proprietary system using pre-bent alloy poles and a Zip-In Pole System, with an approximate two-minute pitching claim. That is a manufacturer-reported figure for a particular design, not independently verified proof that every swag outperforms every tent.
Approximately 2 minutes
Manufacturer-reported pitching time for the AOS Tracker Dome Swag. This model-specific estimate is not a standardized comparison with conventional tents.
Aussie Outback Supplies, product information published by Australian Made Campaign Limited.
Actual pitching time is affected by more than the number of components. Rocky ground may complicate securing a shelter. Strong wind makes orientation and anchoring more demanding. An attached awning adds work. Someone familiar with a freestanding ultralight tent may finish sooner than a first-time swag user.
A practical comparison begins at home. Lay out each complete shelter as it would be packed for travel, then time the process from opening the bag until the shelter is properly secured, ventilated and ready for sleeping. Repeat the exercise after becoming familiar with the equipment. Record the range rather than selecting only the fastest attempt.
The deeper advantage is not a stopwatch result. A simpler pitching sequence can reduce the mental effort of arriving, unpacking and deciding what happens next. That flexibility may make a short overnight stop feel more manageable, provided there is sufficient daylight to evaluate the site and conditions remain suitable.
Speed is useful, but only when it supports a deliberate choice of shelter and location. A quick overnight system is not automatically the right system for every journey.
Swag or Ultralight Tent: Which Aligns With Minimalist Solo Camping?
A swag is often the simpler choice for vehicle-supported solo camping, where integrated bedding and straightforward setup matter more than carried weight. An ultralight tent generally suits backpacking, where packed volume and walking comfort become priorities. Neither is inherently more minimalist: the better option removes complexity from the particular journey rather than merely containing fewer components.
The distinction starts with what must be transported. A canvas swag can combine a mattress, sleeping enclosure and supporting structure in one roll, but that roll may be relatively bulky and heavy. An ultralight tent separates shelter from bedding and ground insulation, yet its components can pack into smaller spaces.
Comparisons should therefore include the complete sleeping system, not merely the advertised shelter weight.
| Decision criterion | Swag | Ultralight tent |
|---|---|---|
| Carried weight | Often higher with traditional canvas and integrated bedding | Generally favored for weight-conscious backpacking, depending on the complete system |
| Packed volume | Usually a relatively bulky roll | Often easier to divide between smaller bags |
| Setup complexity | Potentially fewer separate operations | Varies from simple freestanding designs to more involved pitching systems |
| Dry, mild conditions | Often well suited, with appropriate ventilation | Suitable when the tent’s weather performance matches the site |
| Wet or cool conditions | Requires attention to waterproofing, ventilation and ground insulation | Appropriate designs can offer better separation of sleeping space and wet equipment |
| Insect protection | Available on models with properly fitted mesh | Common on enclosed mesh-inner designs |
| Ground conditions | Needs enough suitable ground for its footprint and secure pitching | Depends on footprint, anchoring system and whether the design is freestanding |
| Sleeping arrangement | Often includes an integrated mattress | Usually requires a separate sleeping pad |
Neither shelter is automatically more weatherproof, insect-resistant or comfortable. These qualities depend on the exact product and how it is used. Some swags include fine insect mesh and adjustable ventilation, while some ultralight tents prioritize low weight at the expense of interior space.
The psychological difference matters as much as the specifications. A camper who finds pole assemblies and separate bags frustrating may appreciate the unity of a swag. Another person may find the close-fitting canvas enclosure restrictive and prefer a small tent with sitting space and a vestibule.
Consider the daily pattern. If most of the trip involves driving between established campsites, the weight of a traditional swag may matter little. If the day involves extended hiking, steep ground and carrying water, every bulky item becomes a recurring burden.
Before buying, borrow or rent a suitable shelter for one night. Pack it, transport it, pitch it, sleep in it and repack it under realistic conditions. Record what felt simple and what required extra effort. This trial measures lived convenience rather than theoretical minimalism.
The right shelter should simplify both movement and rest. Once that choice is made, the next challenge is becoming comfortable with the unfamiliar sleeping arrangement.
How to Transition From Tent Camping to Swag-Style Without Feeling Exposed?
Transitioning comfortably to swag camping works best as a gradual experiment. Begin somewhere familiar, practice sleeping close to the ground, learn the enclosure’s ventilation and insulation needs, and introduce more remote locations only after the sleeping system feels predictable. The aim is not to suppress discomfort but to distinguish unfamiliar sensations from genuine shelter or safety problems.
Traditional tents provide psychological space even when that space is seldom used. A vestibule conceals equipment. Vertical walls create visual separation. A larger sleeping area allows people to organize belongings without opening the shelter. A swag changes each of these habits.
Feeling exposed may come from having no covered place for boots, being closer to insects or ground noise, or having less privacy while entering and leaving the enclosure. Some campers also dislike not being able to sit upright.
These concerns have practical responses. Choose a screened, sheltered campsite where permitted rather than the most exposed clearing. Store equipment in weather-resistant bags. A lightweight tarp awning, installed where appropriate, can provide a covered area for belongings and brief activities outside the swag. It adds equipment, however, and should earn its place through a genuine need.
Adaptation can follow three stages:
- Practice close to home. Spend a night in a backyard or developed campground. Learn how to enter, close, ventilate and pack the swag without weather pressure.
- Try a familiar solo campsite. Choose an established location with straightforward access and a practical option to end the trip if necessary. Test your complete evening routine.
- Increase remoteness gradually. Move to more demanding sites only after shelter use, navigation, weather assessment and overnight comfort have become reliable.
Ground insulation deserves particular attention. A thick foam mattress may feel comfortable without offering sufficient resistance to heat loss. Sleeping-pad R-value measures thermal resistance: higher values indicate greater insulation.
REI‘s sleeping-pad selection and R-value advice presents general guidance ranging from values below 2 for warm-weather conditions to 5.5 or higher for extremely cold conditions. These are broad selection categories, not guarantees of warmth or safety in every environment.
Do not infer an included swag mattress’s R-value from its thickness alone. Look for a documented rating where available and evaluate the complete sleep system, including the sleeping bag, clothing, ground conditions and expected nighttime temperatures. An additional insulated pad may be necessary.
Condensation creates another adjustment. Moisture from breathing and humid air can accumulate against a cooler enclosure. Use adjustable ventilation according to the design and weather, avoid unnecessarily blocking mesh openings, and dry the swag thoroughly before prolonged storage. During a trial night, check whether the inner fabric or bedding becomes damp by morning.
Comfort becomes easier to judge after repeated use. Once the sleeping arrangement is familiar, the remaining equipment can be evaluated with the same deliberate approach.
How to Build a Full Swag Camp Kit That Weighs Less Than 12 Kilograms?
A complete swag camping kit can be planned around a 12–kilogram target by weighing every packed category, then adjusting the heaviest items without removing essential supplies. However, 12 kilograms is a personal planning target, not a recognized safety threshold or a verified weight for all swag systems. Traditional canvas swags may consume so much of that allowance that the target proves unsuitable.
Start by deciding what the figure means. A base-weight target normally treats consumables separately, while an all-in carried-weight target includes items such as water and food. For meaningful planning, record both values. Otherwise, a seemingly light kit may become unexpectedly heavy when the water required for a dry route is added.
The main categories are shelter, sleeping equipment, clothing, cooking supplies, water, navigation and safety equipment. Every object should appear on the list, including containers, batteries, repair materials and the bag used to carry it.
The following is a hypothetical budget allocation, not measured product data or a recommended standard. It illustrates how a 12-kilogram ceiling could be divided before weighing actual equipment.
| Category | Hypothetical allowance | What to verify |
|---|---|---|
| Swag and shelter accessories | 5.0 kg | Actual rolled shelter, pegs, poles and attachments |
| Sleeping insulation and bedding | 1.5 kg | Sleeping bag and any supplemental insulation |
| Clothing and weather protection | 1.2 kg | Layers appropriate to expected conditions |
| Cooking and food | 1.0 kg | Required supplies and realistic trip consumption |
| Water and containers | 2.0 kg | Capacity and water required for the route |
| Navigation, lighting, first aid and miscellaneous equipment | 1.3 kg | Complete safety equipment, communications and carrying system |
| Total | 12.0 kg | Accept only if the actual route and conditions are adequately supported |
This example deliberately assigns much of the budget to the swag. Actual shelter weights and water requirements may leave substantially less room for other categories. A longer unsupported route, more demanding weather or heavier model can make the entire allocation impractical.
Instead of trimming small objects indiscriminately, first look for duplicated functions. A suitable cooking pot may handle boiling and meal preparation. Appropriately chosen clothing layers can serve both during the evening and inside the sleeping system. A bandana can perform simple cleaning tasks or serve as a coarse pre-filter, but it cannot by itself make untreated water safe to drink.
An integrated swag mattress may remove the need for a separate comfort pad, provided the existing mattress also delivers adequate ground insulation. Removing a warmer sleeping pad without checking insulation would be false economy.
A kitchen scale works for smaller items, while a suitable luggage scale can help weigh larger packed components. Record each measurement and check that the scale is appropriate for the item’s weight. Weighing the actual kit matters more than assembling a list of advertised product specifications.
Once the inventory is complete, test the full load on a walk resembling the intended route. Comfort while carrying the equipment is part of the decision, particularly when terrain or distance makes a heavy canvas shelter burdensome.
Five checks before accepting a 12 kg swag kit
- Weigh the fully packed swag, including all required fittings, and record its actual mass in a shelter inventory.
- Weigh each remaining equipment category and produce a complete itemized packing list with a calculated total.
- Record the expected overnight conditions and confirm that the insulation and weather-protection choices address them.
- Calculate water and food requirements from the actual route and resupply opportunities, producing a separate consumables allowance.
- Pack the final configuration, complete a loaded practice walk and verify navigation, lighting, communication and first-aid equipment against a departure checklist.
Weight reduction should stop when a necessary capability begins to disappear. Water availability, temperature and remoteness are not flexible simply because the equipment target is attractive. If the essentials push the kit beyond 12 kilograms, change the target, the equipment or the trip plan.
A lighter inventory is useful only when it remains capable of supporting the journey. Sometimes that assessment leads to an entirely different shelter.
When Should You Abandon Swag Philosophy and Bring a Proper Tent?
Choose a tent instead of a swag when the planned conditions demand features the specific swag cannot reliably provide, such as better wet-gear separation, lower carried weight or a more suitable sleeping footprint. Prolonged rain, difficult ground and demanding backpacking routes may justify switching. However, changing shelter types never makes an unsafe campsite safe.
A minimalist approach should remain reversible. Trouble begins when the camper treats one preferred item as proof of commitment and keeps using it after the environment makes another option more appropriate.
Rain is an important example. A properly maintained, suitable swag may handle wet conditions, but its close-to-ground construction and limited storage space can make sustained rain inconvenient. Where water begins accumulating beneath a shelter, the response is to leave the hazardous site, not merely replace a swag with a tent.
National Weather Service explicitly warns about flood-prone low ground near streams, including hazards caused by rainfall upstream. Its outdoor flooding safety guidance reinforces a broader principle: weather and terrain determine whether a location is acceptable, regardless of the equipment used.
“Never camp on low ground next to streams since a flash flood can catch you while you’re asleep”
Other triggers require similar judgment:
- Persistent wet weather: consider a suitable tent offering more usable protected space for organizing wet belongings, while ensuring the chosen site is safe from flooding.
- Heavy insect activity: verify that the swag’s mesh closes completely and is intact. Some swags have effective insect screens, so the category alone does not determine protection.
- Rocky or sloping terrain: choose a shelter whose required footprint and anchoring arrangements are compatible with an acceptable camping surface.
- Long walking routes: compare the complete carried weights and packed volumes. A compact tent system may be more practical than a traditional canvas roll.
- Severe cold or exposed weather: use equipment with documented performance appropriate to expected conditions, supported by adequate ground insulation and sleeping equipment.
A useful reversibility check happens before departure. Review the forecast, terrain, route length and actual equipment limitations. Write down the conditions that would require choosing a different shelter, changing the location or postponing the trip. Decisions made before fatigue and worsening weather are easier to evaluate calmly.
Hybrid approaches can preserve simplicity. A swag can serve as a vehicle-based sleeping system while a compact daypack supports local hikes. A tarp can provide additional covered space when conditions warrant it. A compatible insect-protection accessory may solve a specific problem, although extra layers can reduce ventilation or create condensation concerns. Any combination should be tested rather than assumed effective.
Borrowing a tent for a particularly demanding segment may be more minimalist than purchasing specialized additions that will rarely be used.
The same willingness to adapt becomes especially valuable when camping alone, where there is no companion to compensate for an impractical decision.
How to Progress From Group Camping to Confident Solo Wilderness Camping?
Progress toward solo wilderness camping by increasing independence one competency at a time. Start with an overnight stay at a familiar developed campground, then move to a previously scouted site before attempting unfamiliar or multi-night routes. Confidence should come from demonstrated ability to navigate, evaluate conditions, manage equipment and respond to problems without relying on another camper.
Group camping can conceal skill gaps. One person chooses the campsite, another manages cooking, and someone else handles navigation or watches the forecast. The group succeeds because responsibilities are distributed, even when individual members are not equally prepared.
Solo camping transfers every decision to one person. Before the first independent trip, assess five areas:
- Navigation: Can the planned route be followed and revised without depending entirely on a phone?
- Campsite judgment: Can suitable ground, drainage, exposure and local restrictions be evaluated?
- Weather decisions: Can changing conditions trigger a practical change of plans?
- Daily logistics: Can food, water, clothing and shelter be managed without assistance?
- Time management: Can travel and camp routines be completed without rushing into darkness?
This self-audit is more useful than asking whether solitude feels frightening. Fear and skill are related but not identical. Someone may feel nervous while already possessing the necessary abilities, while a confident group camper may never have practiced essential independent decisions.
Build experience progressively. At a familiar developed campsite, take responsibility for every part of the overnight routine. On a later outing, use a site previously visited with companions. Next, plan a short independent journey to a new location with conservative conditions and an uncomplicated return route. Multi-night routes should follow only when previous stages are consistently manageable.
Assign a learning objective to each trip. One outing might focus on navigation, another on campsite selection, and another on managing the complete evening routine. After returning, record what worked without help and what still required improvisation.
A simplified kit can support this progression. Fewer distinct assembly components may mean fewer things to forget or misplace. Familiar equipment also reduces the number of unfamiliar tasks competing for attention near the end of the day.
That advantage should not be confused with proof of safety. A quickly pitched swag cannot compensate for poor route choice, missing water or an inability to respond when the weather changes.
As those skills develop, timing becomes particularly important: a solo camper must reserve enough margin to choose and establish a safe site without rushing.
When Should You Start Pitching to Finish Before Poor Light or Wind Picks Up?
Start pitching early enough to assess the campsite, secure the shelter, prepare food and complete essential tasks comfortably before darkness. There is no universal pitching deadline because daylight, terrain, weather and individual routines vary. Calculate a personal deadline from local sunset, the full duration of camp preparation and an additional margin for unexpected delays.
The most useful measurement is not the time required to erect the shelter alone. A swag that pitches quickly still needs an appropriate location, stable anchoring and suitable orientation. Cooking, water preparation and securing loose equipment can take longer than the shelter itself.
Practice the complete routine in safe conditions. Begin with equipment packed as it would be on arrival and finish only when the camp is ready for the evening. Include basic site assessment, pitching, organizing essential items and preparing a simple meal.
For a hypothetical example, suppose this complete routine takes 45 minutes and the camper chooses another 30 minutes as a buffer. With a hypothetical sunset at 7:00 p.m., the corresponding latest planned start would be 5:45 p.m. This is an arithmetic planning illustration, not a validated outdoor-safety threshold. Actual trips may require substantially more time or an earlier stopping point.
Wind changes the calculation. Forecast gusts matter, but the terrain around the campsite may also influence exposure. Narrow valleys and passes can channel wind, while exposed ridgelines offer little shelter. In some landscapes, daytime heating contributes to afternoon wind patterns; these vary by location and should not be assumed without a relevant forecast.
Review the local weather forecast, any applicable warnings and the shelter manufacturer’s instructions. No universal safe gust limit applies to all swags. A shelter’s resistance depends on its construction, condition, anchoring and orientation.
With suitable ground and no other hazards, natural windbreaks may reduce exposure. Avoid positioning beneath unstable branches or where falling material, runoff or other terrain hazards could threaten the campsite. Secure the shelter as its design requires rather than relying on its weight alone.
A short setup time provides flexibility, but that flexibility should not be spent on unnecessary last-minute travel. If conditions begin deteriorating before the planned stop, reassess the route and seek an appropriate safe option rather than assuming the shelter can be erected anywhere.
Time management is one part of a larger solo safety system. Without a companion available to recognize mistakes or seek help, preparation must also account for what happens when the original plan fails.
What matters before camping alone
- Make the journey recoverable. Select a route and campsite where changing plans or ending the trip remains practical.
- Separate convenience from resilience. A fast shelter reduces effort, while communication, navigation and emergency supplies address different risks.
- Verify the entire system. Practice with the loaded kit and confirm that the planned route, weather and essential equipment match.
How to Camp Alone Safely Without Backup Support?
Camping alone safely requires overlapping safeguards rather than dependence on a single reliable-looking device or shelter. Share the planned route and return time with a trusted contact, carry navigation alternatives, prepare for communication failures and choose terrain appropriate to your abilities. A simplified kit is beneficial only when shelter, warmth, water and emergency capabilities remain adequate.
Solo safety is not achieved by carrying every imaginable item. It comes from identifying what could interrupt the trip, understanding the consequences of that interruption and preserving practical alternatives.
The National Park Service pre-trip camping safety recommendations advise travelers to share an itinerary, carry appropriate navigational and emergency equipment, and test unfamiliar gear before departure. The guidance also recognizes that mobile phones may fail through lost reception or depleted batteries.
A communication plan should specify where the camper intends to travel, the route and activities, the expected return and when a trusted person should take action if a planned check-in is missed. Agree on the escalation procedure before leaving, including which emergency services or local authorities to contact.
Where mobile reception is unreliable, a suitable satellite communicator or personal locator beacon may provide another way to signal for assistance. Coverage, subscription requirements and operating procedures vary by device and region. Carrying one does not guarantee that a message will be delivered or that rescue will be immediately available.
Navigation needs similar redundancy. A GPS device or phone can be convenient, but an appropriate paper map and compass provide an alternative when electronics are unavailable. These tools are valuable only when the camper knows how to use them. A backup power source can extend electronic-device operation but cannot replace navigation skills or sound route planning.
The most important judgment concerns risk. A solo traveler may be able to reduce the likelihood of an incident through preparation, but should also consider how serious its consequences could become without immediate assistance. A minor navigational mistake near a well-used trail may be manageable; the same mistake in isolated, exposed terrain can develop into a more serious situation.
Early solo trips should therefore favor appropriate, relatively accessible routes with realistic turnaround options. Avoid unnecessary hazardous crossings, exposed terrain and commitments that exceed your experience. Carry first-aid supplies appropriate to foreseeable problems, together with the knowledge needed to use them. Serious injuries may still require outside assistance, so prevention and communication planning remain essential.
Water planning must account for actual distance, weather, physical effort and the reliability of resupply points. Pack a suitable treatment method when relying on untreated natural sources, and do not assume that water marked on a map will necessarily be available or safe.
Finally, make equipment verification a routine. Before departing, check the destination forecast and relevant local guidance, confirm the route and emergency contact arrangements, inspect the shelter and sleeping insulation, and test lighting, navigation and communication equipment. Pack the complete kit rather than assuming that an item used on a previous trip is still present and working.
Minimalism is valuable here because it makes the equipment system easier to understand and inspect. It becomes harmful when removing an item also removes the only practical response to a predictable problem.
For the next overnight trip, choose a familiar, manageable destination and practice the complete routine: route planning, contact arrangements, packing, pitching, sleeping and returning. Keep what demonstrably improves the experience, correct what fails, and let the actual conditions determine how much equipment is enough.
Can a minimalist camping setup still be comfortable?
Yes. Comfort depends on a suitable sleep system, appropriate ground insulation, effective ventilation and enough protection for expected conditions, rather than the number of accessories carried. A swag may offer convenient integrated bedding, but its mattress should not be assumed to provide adequate thermal insulation merely because it is thick. Test the complete arrangement before a demanding trip.
Does a swag always need separate insect netting?
No. Some modern swags include fitted insect mesh as part of their construction. Protection depends on the particular model, the condition of its mesh and how completely the openings close. Additional insect protection may be useful for a model lacking adequate screening, but compatibility and ventilation should be considered before adding accessories.
Is buying less equipment the same as camping more sustainably?
Not necessarily. Using existing equipment longer, repairing serviceable items and borrowing specialized gear can avoid some unnecessary purchases. However, the environmental outcome depends on production, materials, transport, durability and use. Simply owning fewer items does not establish that a particular camping system has a lower overall environmental impact.
Should a beginner buy a swag before attempting solo camping?
No specific shelter purchase is required to begin learning solo-camping skills. A beginner can use a familiar, suitable tent at an established campground while practicing navigation, campsite decisions, weather awareness and independent equipment management. Borrowing a swag for a controlled overnight trial is a practical way to explore whether its simpler setup improves the experience before committing to a purchase.