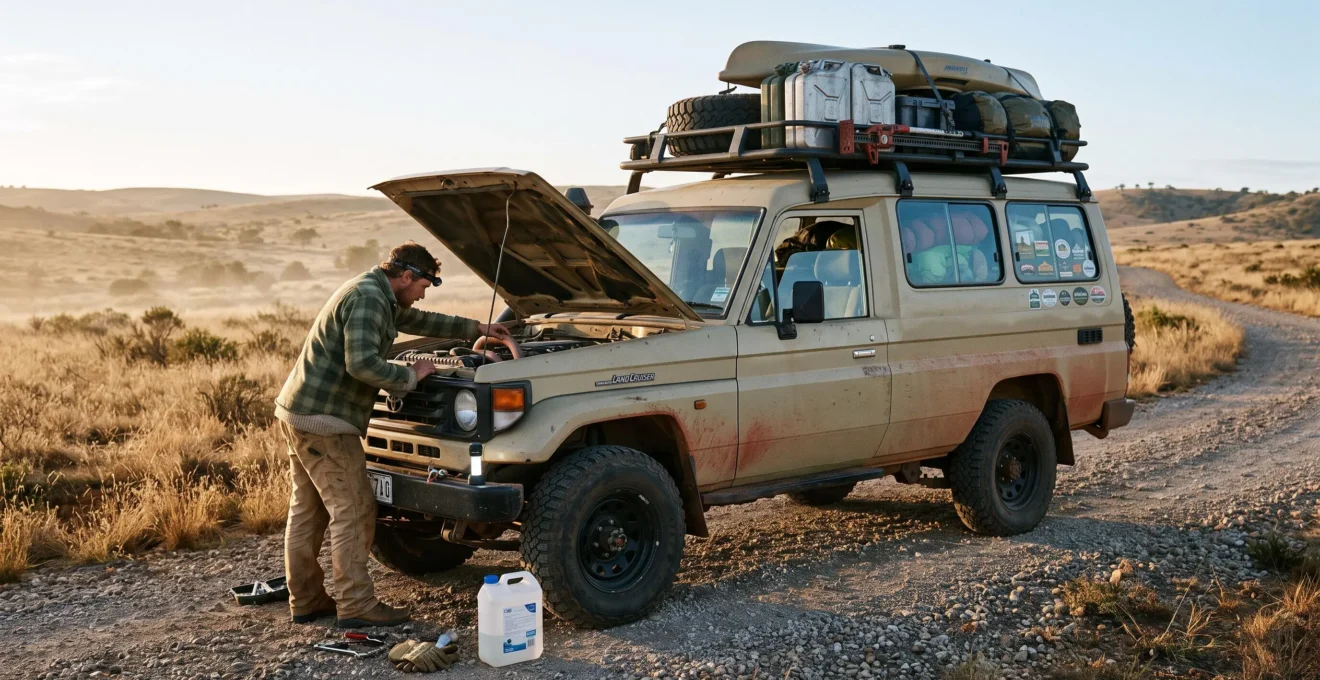
A vehicle that starts reliably every morning can still develop a serious mechanical problem when loaded with camping equipment and driven for hours across remote roads. Long climbs, uneven surfaces, sustained engine loads and limited access to assistance expose weaknesses that short journeys may never reveal.
Preventing roadside failures begins with inspecting the systems most likely to leave a vehicle immobilised: cooling, tyres, brakes, charging and essential roadside equipment. The objective is not to predict every breakdown. It is to identify deterioration early, correct known defects before departure and establish when a warning sign makes the journey too risky.
These checks are particularly important when travelling beyond reliable mobile coverage. A driver should distinguish between inspections that can be performed safely at home and faults requiring professional diagnosis. Vehicle-specific maintenance instructions always take precedence over generic thresholds, especially for modern electrical systems, towing combinations and heavily loaded vehicles.
Remote camping vehicle inspection: essential decisions
- Check cooling-system condition, tyre integrity, brake performance and battery charging before loading the vehicle for departure.
- Use manufacturer specifications for fluid condition, tyre pressures, weight limits and maintenance requirements rather than relying on universal figures.
- Verify that roadside tools actually work, and postpone departure when a safety-critical fault remains unexplained.
- How to Verify Your Cooling System Won’t Fail Miles From the Nearest Garage?
- The Tyre Check That Prevents Blowouts on Remote Mountain Roads?
- How Much Brake Pad Life Must Remain Before Attempting a Remote Camping Tour?
- How to Confirm Your Alternator Will Keep Charging 200 Miles From Assistance?
- What Tools Actually Help You Fix Roadside Breakdowns in Remote Locations?
- How to Prevent Pots and Glass Jars Breaking During Off-Road Driving?
- How to Verify Your Car Can Legally Tow Your Caravan’s Loaded Weight?
- How to Manoeuvre Towing Equipment Safely on UK Roads and Campsites?
How to Verify Your Cooling System Won’t Fail Miles From the Nearest Garage?
Inspect the cooling system with the engine completely cold, checking coolant level, hose condition, connections and evidence of leakage. Then assess its behaviour during a normal driving test. A cooling system that appears healthy while idling may struggle under sustained load, so unexplained coolant loss, overheating or visible deterioration warrants professional inspection before remote travel.
A loaded camping vehicle creates additional thermal demand when climbing steep roads or travelling in warm conditions. Cooling-system weakness may only become apparent when the engine produces sustained power and the radiator must dissipate more heat than it does during ordinary urban journeys.
Begin with the manufacturer’s cold-engine inspection procedure:
- Check the expansion reservoir against its marked cold-level range and confirm that the coolant meets the manufacturer’s specified type.
- If the vehicle has a serviceable radiator cap, inspect the radiator level only when the engine is completely cold and the manufacturer permits opening it. Never remove a hot or pressurised cap.
- Examine accessible hoses for cracks, bulges, unusual softness, hardened sections and dried coolant deposits around joints.
- Look beneath the parked vehicle for fresh fluid and inspect visible hose clamps and connections for leakage.
- Check the maintenance record and arrange cooling-system pressure testing if coolant loss or other suspicious symptoms remain unexplained.
A full expansion reservoir does not necessarily prove that the radiator itself contains sufficient coolant. An abnormal difference between levels can indicate several problems, including faults affecting coolant circulation or recovery. It is not, by itself, proof of a failed head gasket.
Discoloured or oily coolant, repeated unexplained fluid loss and overheating deserve attention before departure. An older thermostat with an uncertain service history warrants assessment, but age alone does not establish that replacement is necessary. Similarly, a radiator fan that does not activate during a driveway test should be evaluated against the vehicle’s actual fan-control strategy rather than automatically declared defective.
The NHTSA summer driving and vehicle safety recommendations advise checking the cooling system for leaks, inspecting hoses and belts, and testing or replacing coolant when needed.
For a pre-departure road test, drive for approximately 20–30 minutes under normal highway conditions, provided the vehicle has no known overheating fault. Observe the temperature indication and heater performance. After parking safely, check for coolant odours, visible seepage or abnormal temperature warnings without opening the hot system or touching hot components.
A road test can reveal developing faults, but it cannot guarantee that the system will withstand every mountain climb. Vehicles showing unexplained coolant loss, overheating or pressurisation abnormalities need diagnosis rather than another longer test.
Once engine temperature control is reasonably assured, attention should move to the components carrying the loaded vehicle over long distances: its tyres.
The Tyre Check That Prevents Blowouts on Remote Mountain Roads?
Check cold tyre pressures, sidewalls, tread condition, inner shoulders, age and load suitability before travelling on remote mountain roads. Underinflation, overloading and existing damage can increase failure risk during prolonged driving. No single inspection can prevent every blowout, but checking the entire tyre and the spare reveals hazards that a quick tread-depth glance may miss.
Tyres flex continuously as they rotate. Excessive flexing from underinflation or overloading generates heat, while high road temperatures, long distances and demanding road conditions can intensify the problem. Mountain descents also place considerable demands on the brakes, although the resulting tyre-temperature change depends on the vehicle and braking arrangement.
Start with the vehicle’s recommended cold tyre pressures for its actual load. Check the tyre information label and handbook for any separate full-load instructions. Never substitute the maximum pressure moulded onto the sidewall for the manufacturer’s operating recommendation.
Inspect the tyre beyond its most visible surfaces. Use a torch to examine sidewalls for cracking, cuts or bulges. Where safe and appropriate, turn the steering to expose areas of the front tyres that are otherwise difficult to see, and inspect the inner shoulders for irregular wear. Creasing can justify closer assessment, but it does not establish a specific history of underinflation by itself.
Tyre age matters even when the tread appears substantial. The final four digits of a DOT tyre identification number show the manufacturing week and year. For example, a code ending in 0308 identifies the third week of 2008. The full marking may be visible on only one sidewall.
According to the NHTSA TireWise tyre-safety information, some manufacturers recommend replacing tyres after six to ten years regardless of remaining tread. This is a manufacturer-dependent recommendation, not a universal legal replacement deadline.
6–10 years
The tyre-age replacement range recommended by some manufacturers, even where visible tread remains. Follow the applicable tyre and vehicle manufacturer guidance.
National Highway Traffic Safety Administration, TireWise.
Compare the tyre load index and the vehicle’s permitted axle loads with the intended loaded configuration. A pressure adjustment cannot make an unsuitable tyre load rating acceptable. The spare needs its own pressure, age and damage inspection, together with confirmation that its permitted use matches the vehicle.
Any bulging, exposed reinforcement, significant cracking or unexplained pressure loss should be assessed before the journey. Tyre condition is only one part of descending safely; the braking system must also be capable of controlling the additional load.
How Much Brake Pad Life Must Remain Before Attempting a Remote Camping Tour?
There is no universal brake-pad thickness that guarantees safe remote travel. Remaining friction material must be assessed against the vehicle manufacturer’s wear limits, disc condition, brake-fluid condition and anticipated driving demands. If pads are near their service limit or braking performance is uncertain, arrange professional assessment before a heavily loaded camping trip rather than relying on a legal minimum alone.
Long mountain descents can subject brakes to sustained heat, particularly when a heavily loaded vehicle relies excessively on friction braking. A pad may have measurable material remaining yet still be part of a braking system vulnerable to overheating, fluid problems or mechanical deterioration.
Where the brake design permits, a torch may reveal the outer pad through the wheel. However, the inner pad can wear differently and may remain hidden. Measuring both pads and checking disc thickness may require wheel removal and specialist equipment.
A noticeable disc lip can indicate wear, but its appearance cannot determine whether the disc remains above the manufacturer’s minimum thickness. Grooves, cracking, contamination, vibration and uneven wear also merit examination.
Brake-fluid condition is equally important. Many conventional brake fluids absorb moisture over time, which can reduce their boiling point. During prolonged braking, excessive heat can produce vapour and a soft or spongy pedal even without an obvious external leak.
Check the maintenance record for the fluid’s last replacement and follow the manufacturer’s specified fluid type and servicing interval. The reservoir cap usually identifies the required fluid specification, not the date it was last changed.
A controlled brake-function check should take place in a safe, suitable environment with no surrounding traffic or hazards. Look for pulling, judder, unusual noises or abnormal pedal travel. Do not conduct an improvised high-speed emergency stop on a public road to test the brakes.
Before departure, distinguish between an acceptable system and one requiring intervention:
- Proceed after routine checks: inspected components meet manufacturer specifications and braking performance is normal.
- Arrange professional inspection: wear measurements are uncertain, servicing history is missing or uneven pad wear is suspected.
- Do not depart: braking effectiveness is compromised, warning indications remain unresolved, the pedal behaves abnormally or components are beyond their service limits.
On extended descents, selecting an appropriate lower gear and using available engine-braking or regenerative-braking functions according to the vehicle handbook reduces reliance on continuous friction braking. Safe stopping places can also provide opportunities to assess unusual heat, smells or changes in performance.
Reliable braking addresses the vehicle’s ability to stop. The next inspection concerns whether it can continue running when electrical demand increases far from assistance.
How to Confirm Your Alternator Will Keep Charging 200 Miles From Assistance?
Check battery condition, drive-belt condition, terminal connections and charging performance under electrical load before travelling far from assistance. A multimeter can reveal obvious charging problems, but voltage readings alone cannot guarantee alternator reliability. Smart charging systems vary their output, so uncertain results should be interpreted using vehicle-specific procedures or professional testing.
Alternators can deteriorate gradually. A glazed or slipping accessory belt, worn bearings, corroded grounds or weakening internal components may produce intermittent problems before the dashboard warning light illuminates.
Inspect accessible belt sections with the engine switched off and follow manufacturer safety instructions. Look for visible cracking or damage and listen for unusual operating noises from a safe position. A rising whine is a reason to investigate, not proof that a specific alternator bearing has failed.
For vehicles using a conventional 12-volt lead-acid electrical system, basic multimeter readings may provide useful clues:
- With the engine off and the battery rested, measure voltage directly across the designated battery terminals.
- A rested reading around 12.4–12.7 volts may be consistent with a reasonably charged conventional lead-acid battery, depending on battery type and conditions.
- Start the engine and measure again according to the manufacturer’s diagnostic procedure.
- Switch on permitted electrical loads, such as headlights, cabin blower and heated rear screen, while observing voltage behaviour.
- Compare the results with the vehicle’s specified charging strategy rather than treating one generic voltage as an absolute pass or fail.
Conventional charging systems often produce readings in the low 14-volt range while charging. A reading around 12.5 volts with the engine running and accessories operating could indicate inadequate charging, but modern smart-charging controls can produce similar readings intentionally. Further testing may be necessary.
Only carry out battery-terminal testing when the terminals are safely accessible, the correct test points are identified and the procedure is permitted by the manufacturer. Keep probes, cables, clothing and hands clear of moving engine components. Hybrid, electric and vehicles with inaccessible or high-voltage components require their own approved procedures.
Remote camping introduces extra electrical demand from coolers, charging devices and lighting. Towing electrics may add further load. These accessories should be assessed against the vehicle’s approved electrical capacity and any auxiliary battery arrangement, rather than assuming the starter battery can support prolonged campsite use.
An ageing battery is another source of uncertainty. Replace a battery when testing or manufacturer guidance indicates that replacement is appropriate; age alone does not establish that the alternator is defective. A suitable, charged jump-starter can provide limited contingency support, but it cannot replace a failed charging system.
Electrical reliability is best established before departure. Where faults still develop despite preventive maintenance, the equipment carried in the vehicle determines which roadside responses are realistically possible.
What Tools Actually Help You Fix Roadside Breakdowns in Remote Locations?
A useful remote-road toolkit addresses predictable problems rather than attempting to replicate a workshop. Prioritise tyre equipment, a compatible jack, basic hand tools, electrical supplies, emergency water and reliable communications. Every item must be checked before departure, and repairs should only be attempted where conditions, equipment and the driver’s competence make the work safe.
A tyre problem is one of the clearest examples. Carrying a spare is helpful only if it is serviceable, compatible and accompanied by the correct wheel-nut tool and a jack approved for the loaded vehicle. Ground conditions also matter: a jack that works on level, firm ground may be unsafe on a soft roadside shoulder.
A compact air compressor and pressure gauge allow inflation checks and may support temporary puncture management where the tyre manufacturer permits it. Puncture sealant or plugs are not suitable for every injury, and sidewall damage or a tyre run while severely underinflated may require replacement rather than repair.
Cooling-system equipment should include suitable spare coolant where practical and additional clean water for emergency needs. Water may serve as a temporary top-up only where the vehicle manufacturer’s instructions permit it; it is not a permanent substitute for the specified coolant mixture. Leak-sealing additives should not be assumed safe for every cooling system.
For electrical problems, useful supplies may include approved jumper cables or a compatible jump-starter, spare fuses of the specified types and basic tools for accessible terminals. Fuses must never be replaced with higher-rated alternatives merely to prevent repeated failure.
The most valuable addition may be an independent method of contacting assistance. Offline navigation, paper maps and a suitable satellite emergency-communication device can help compensate for limited mobile reception, although their coverage, subscription requirements and emergency functions must be checked beforehand.
Five checks to complete before leaving for remote camping
- Check the pressure and condition of every tyre, including the spare, and record the readings against the applicable loaded-vehicle specifications.
- Locate the correct jack, wheel-nut socket and locking-wheel-nut key, and confirm that the manufacturer-approved lifting equipment is accessible and serviceable.
- Inspect the repair kit, compressor and pressure gauge; record any expired sealant or missing component that requires replacement.
- Confirm that the torch, jump-starter and communication devices are functional and sufficiently charged, producing a verified equipment-status list.
- Save offline route information and emergency contact details, then identify the intended check-in procedure for sections without mobile coverage.
Tool familiarity is as important as ownership. Practise approved procedures at home, particularly locating lifting points and accessing the spare. Never work beneath a vehicle supported only by a jack, attempt repairs in an exposed traffic lane or continue driving with unresolved safety-critical damage.
Once essential equipment is organised, secure the remaining camping load. Poor packing can damage supplies and create additional hazards on rough tracks, even when every mechanical inspection has passed.
How to Prevent Pots and Glass Jars Breaking During Off-Road Driving?
Prevent cookware and glass breakage by separating hard objects, immobilising fragile containers and keeping heavy equipment low and securely restrained. Corrugated tracks produce repeated vibration as well as larger bumps, so items that survive a single impact may still suffer abrasion, rattling or movement over an extended journey. Replacing fragile packaging is often the most reliable option.
A tightly packed camping box is not necessarily well protected. Repeated small movements can allow jars to collide with each other, metal cookware to strike glass and lids to loosen. The solution is to prevent contact and limit internal movement rather than simply adding padding around the outside of the box.
Pack fragile supplies in layers:
- Wrap glass containers individually or separate them with fitted cardboard dividers, cloth or purpose-made protective sleeves.
- Place lids, utensils and other hard accessories where they cannot repeatedly strike breakable surfaces.
- Fill unused space inside storage compartments with suitable cushioning so containers cannot slide or tip.
- Secure boxes against movement during braking, cornering and travel over uneven ground.
- Position heavier equipment low and near the centre of the permitted load area, while respecting vehicle-specific load distribution and restraint requirements.
Internal container headspace requires more care than simply filling every jar to the top. Liquid expansion, safe storage requirements and container design still matter. The practical priority is preventing external impacts and using containers appropriate for their contents.
Load position also influences movement. Equipment located far behind the rear axle can experience pronounced motion as the vehicle pitches over uneven surfaces. A box near the tailgate may therefore need particularly secure restraint, although the best position depends on vehicle design and permitted axle loads.
Glass jars should not be placed loose beside heavy tools, metal stove parts or unsecured cooking equipment. A protective sleeve will not compensate for a box that slides across the cargo area.
For consistently rough routes, transferring suitable foodstuffs into food-safe, leak-resistant plastic or metal containers can eliminate the risk of glass fracture during transport. Check that the replacement container is appropriate for the product, storage duration and temperature conditions. Not every food can be safely repackaged or stored outside its original container.
The same packing discipline supports towing stability: loose camping equipment shifts weight, can damage the vehicle interior and complicates emergency access to the spare wheel or roadside tools.
Securing equipment protects both supplies and occupants. When that equipment is carried inside a caravan, its weight also becomes part of a separate towing-capacity assessment.
How to Verify Your Car Can Legally Tow Your Caravan’s Loaded Weight?
Verify towing legality by comparing the car’s permitted towing and combination weights with the caravan’s actual or maximum authorised loaded mass, then checking axle loads, noseweight and driving-licence entitlement. The manufacturer’s vehicle plate and caravan identification documents are essential. A caravan that is within the car’s advertised towing capacity may still create an unlawful or unsafe combination.
Caravan brochures commonly emphasise an unloaded or nominal specification. However, camping equipment, water, gas cylinders, food and personal belongings increase the mass carried on the road.
For a caravan with a specified Maximum Technically Permissible Laden Mass (MTPLM), that figure establishes its permitted maximum laden mass. Actual mass depends on the load carried and is best established by weighing the ready-to-travel caravan where appropriate.
Examine the tow vehicle’s identification plate, handbook and approved towing information. Relevant limits may include maximum vehicle mass, gross train weight, axle loads and the permitted braked-trailer mass. All applicable limits must be met together; staying below one limit does not authorise exceeding another.
In Great Britain, the DVSA caravan and trailer safety checks explain the importance of manufacturer weight specifications, correct coupling, trailer lighting, tyres and secure loading.
Kerbweight is useful context for assessing the relationship between tow car and caravan, but it is not a universal legal towing ceiling. A lighter caravan can provide a more favourable stability margin in some combinations, yet suitability also depends on vehicle design, manufacturer ratings, loading and operating conditions.
Driving-licence entitlement requires a separate check. The categories shown on the licence, applicable national rules and the permitted masses of the combination can affect what a driver may tow. Do not assume that a general rule from another English-speaking country applies to a UK journey or that vehicle approval automatically establishes licence entitlement.
Noseweight is the downward force imposed at the tow-ball or coupling. Measure it using a suitable gauge and the recommended procedure, then compare it with all applicable vehicle, towbar, coupling and caravan limits. Redistribute luggage safely if adjustment is necessary, keeping heavy items low and close to the caravan axle while maintaining secure restraint.
| Requirement | Evidence to check | Decision |
|---|---|---|
| Caravan loaded mass | MTPLM and actual ready-to-travel weight | Within permitted mass |
| Vehicle towing capacity | Manufacturer-approved towing specification | Combination compatible |
| Gross train and axle weights | Vehicle identification plate and loading information | No applicable limit exceeded |
| Licence entitlement | Current rules for the driver’s licence and jurisdiction | Driver authorised to tow |
| Noseweight | Measured coupling load and relevant manufacturer limits | Within the applicable range |
If any required weight information is missing, obtain it from the manufacturer or appropriate authority before towing. Estimating the caravan’s loaded mass from the amount of luggage inside is not a substitute for a reliable weight assessment.
Legal weight compliance establishes a necessary foundation, but it does not replace correct coupling, attentive driving or competent low-speed manoeuvring.
Key takeaways before towing on remote camping routes
- Confirm that the towing vehicle, caravan and driver are all authorised for the actual loaded combination.
- Check coupling security, breakaway equipment, lighting, mirrors and load restraint before each departure.
- Plan for wider turns, longer stopping distances and restricted campsite access, especially when visibility or ground conditions are poor.
How to Manoeuvre Towing Equipment Safely on UK Roads and Campsites?
Manoeuvre a caravan safely by allowing additional stopping space, reducing speed before bends, accounting for trailer wheel tracking and checking the full combination before moving. On UK roads, towing-specific legal requirements also apply to speed, motorway lane use, visibility and equipment. At campsites, slow movements, a clear stopping procedure and a spotter can reduce avoidable collisions.
A caravan does not follow the exact path of the towing vehicle. Its wheels typically track inside the tow car’s turning path, which can cause the caravan to strike kerbs, gateposts or campsite fixtures when a driver turns too tightly.
Its additional mass also affects acceleration, braking and handling. The UK Highway Code warns that towing can significantly increase stopping distances. Allow generous space ahead and adjust speed for traffic, gradients, road conditions and visibility rather than assuming the stopping behaviour of an unladen car.
For relevant towing combinations, UK speed restrictions may be lower than those applying to the car alone. In Great Britain, the commonly applicable limits for cars towing caravans are 50 mph on single carriageways and 60 mph on dual carriageways and motorways, subject to lower posted limits and specific vehicle or road restrictions. Confirm the rules for the actual route and jurisdiction.
Drivers towing trailers must not use the right-hand lane of a motorway with three or more lanes. Rearward visibility must also meet applicable requirements; additional towing mirrors may be necessary when the caravan obstructs the required view.
The Highway Code rules on towing and loading distinguish mandatory obligations from advisory precautions, including licence entitlement, secure loading, towing stability and safe driving behaviour.
Before pulling away, inspect the coupling indicator and locking arrangement according to the hitch manufacturer’s instructions. Attach the breakaway cable to the designated approved attachment point, following the relevant towbar and coupling guidance. A universal prohibition against attaching it to any towbar component would be misleading because approved attachment designs differ.
Verify the electrical connection, indicators, brake lights, number plate illumination and other required lights with assistance where practical. Confirm that the caravan number plate and mirrors meet the applicable requirements, that tyres are suitable for the load and that lockers, doors and stabilising equipment are correctly secured for travel.
Weight distribution strongly influences stability. Keep heavy belongings low and near the axle, maintain approved noseweight and avoid unsecured items that can shift during cornering. If snaking develops, ease off the accelerator and slow gently without abrupt steering or harsh braking.
At a campsite, inspect the approach before committing the combination to a narrow pitch. Soft grass after rain, hidden edging, low branches and restricted turning space may make an apparently straightforward manoeuvre unsuitable.
When reversing, move slowly and use small steering adjustments. The caravan initially responds in a direction that can seem counterintuitive to inexperienced drivers. Practise in a safe open area before the trip, stop whenever visibility is uncertain and pull forward to reset rather than trying to recover an increasingly tight angle.
A spotter should remain visible to the driver, away from the vehicle’s path and never between moving vehicles or fixed obstacles. Agree clear stop signals before beginning. If the spotter disappears from view, stop immediately.
Before departure, complete the vehicle and caravan checks with the combination fully loaded, verify route restrictions and practise unfamiliar manoeuvres in a safe location. If any essential inspection fails, correct the defect before travelling beyond dependable assistance.
Should a vehicle receive a professional inspection even if it recently passed its roadworthiness test?
A recent roadworthiness test does not guarantee reliability throughout a demanding remote journey. Additional checks may be appropriate when the vehicle has uncertain maintenance history, unexplained fluid loss, charging problems, brake concerns or a substantially heavier travel load than usual. A professional inspection can identify issues beyond the scope of a driver’s visual checks.
What should a driver do if an engine temperature warning appears far from assistance?
Follow the vehicle manufacturer’s overheating instructions, reduce demand where appropriate and stop in a safe location as soon as necessary. Switch off the engine if directed or if overheating is severe. Never open a hot pressurised cooling system. If the cause cannot be identified and safely corrected, arrange assistance rather than continuing with a potentially damaged engine.
Can a tyre inflation kit replace carrying a spare wheel on remote roads?
Only within the limits of the vehicle and repair-kit manufacturer’s instructions. Sealant may address certain tread-area punctures, but it cannot reliably remedy major damage or many sidewall failures. Before travelling remotely, verify the approved puncture-management arrangement, its limitations and the availability of recovery assistance.
Is a jump-starter enough protection against alternator failure?
No. A jump-starter can assist with certain starting problems, but a failed alternator may leave the vehicle without sufficient electrical power to continue operating. Testing the battery, charging system and related components before departure remains essential. A backup starter is contingency equipment, not proof of electrical reliability.
How should remote campers respond when mobile coverage disappears after a breakdown?
Use the communication and check-in plan established before departure. Depending on the circumstances, that may involve a satellite emergency device, agreed contact deadlines or an appropriate emergency-response procedure. Prioritise personal safety, avoid hazardous roadside repairs and do not attempt an unsafe walk through unfamiliar terrain solely to find reception. Emergency communication equipment should be tested and its coverage limitations understood before travelling.