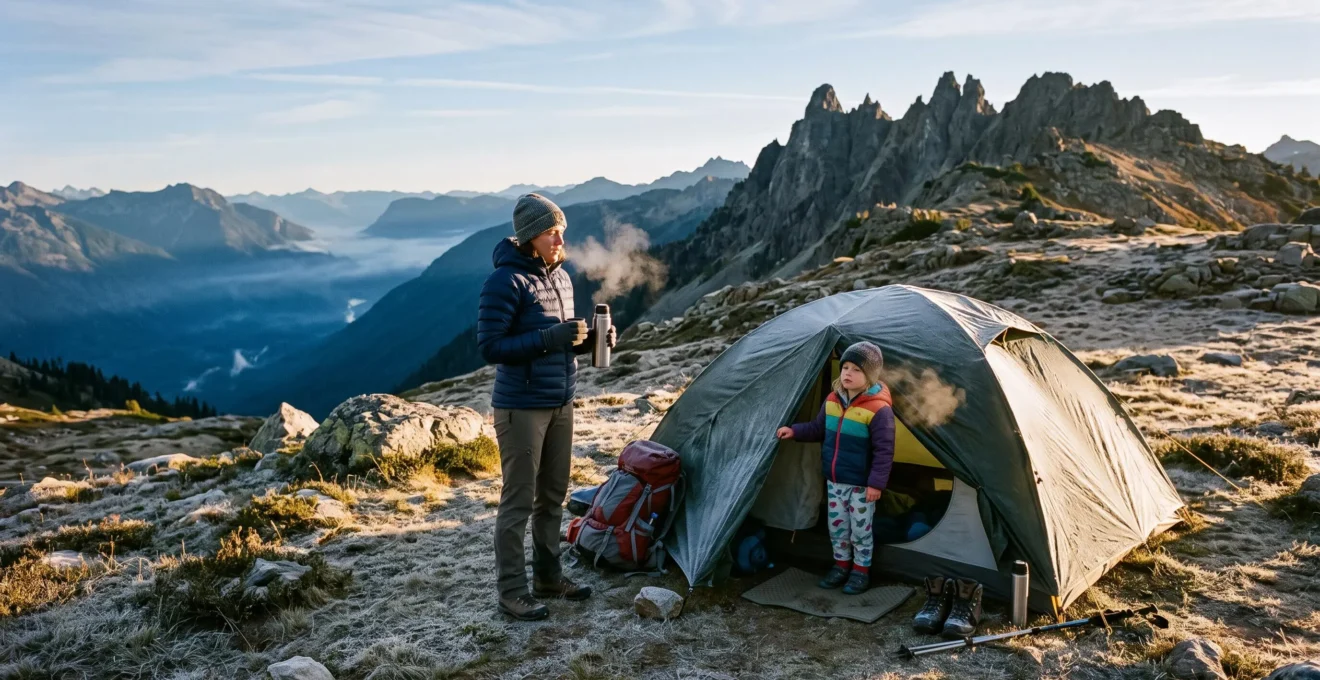
A campsite that feels comfortable at 25°C in the valley can become dangerously cold after a climb into the mountains. A 15°C temperature difference changes more than clothing requirements: it affects how quickly sweat becomes a liability, how well sleeping equipment performs, how batteries behave and whether the entire group can safely spend the night at altitude.
The solution is not simply packing the thickest jacket available. Effective multi-elevation camping requires a clothing system that releases heat during the ascent, preserves warmth during stops and protects against wind and moisture. Overnight equipment must also match the coldest plausible campsite conditions rather than the temperature at departure.
Start with the mountain forecast, estimate the temperature change across your route and build a modular packing system around the expected overnight minimum. Keep essential insulation accessible and account for the needs of children or anyone who becomes cold more easily. The following methods turn those decisions into a practical plan.
Essential rules for camping across a 15°C temperature drop
- Calculate an approximate elevation-related temperature drop, then check a location-specific forecast for overnight lows, wind and precipitation.
- Wear breathable layers while climbing, keep dry insulation accessible and add protection before prolonged stops.
- Match your sleeping bag’s comfort rating and sleeping pad insulation to the coldest expected night, with additional protection for forecast uncertainty.
- How to Predict Summit Temperature From Lowland Starting Conditions?
- The Clothing Error That Makes You Sweat Going Up Then Freeze at the Top?
- Should You Add Warm Layers Before or After You Start Feeling Cold at Altitude?
- How to Stop Cameras and Phones Failing When Moving From Warm Car to Cold Summit?
- What Fabrics Work for Both 25°C Valleys and 5°C Mountain Camps?
- How to Build a Modular Sleep System That Works From 5°C to 25°C?
- At What Altitude Should You Stop Driving and Acclimatise for Safety?
- How to Maintain Comfortable Sleeping Temperatures Across All Seasons When Camping?
How to Predict Summit Temperature From Lowland Starting Conditions?
Estimate the summit temperature by subtracting approximately 6.5°C for every 1,000 metres gained, then compare the result with a mountain-specific forecast. This atmospheric average provides a useful preliminary estimate, not a reliable prediction of campsite conditions. Wind, moisture, temperature inversions and nighttime cooling can all produce different results.
The temperature difference between the valley and summit depends partly on the atmosphere’s vertical temperature gradient, known as the lapse rate. A commonly used environmental average is approximately 6.5 °C per kilometre, although the actual gradient changes with atmospheric stability and moisture.
The National Weather Service explanation of atmospheric lapse rates describes how different temperature gradients correspond to different atmospheric conditions. This makes elevation-based calculations useful as cross-checks rather than substitutes for local weather forecasts.
Consider a hypothetical trip beginning at 25°C in a valley, with a campsite 2,000 metres higher. Applying the approximate environmental lapse rate gives an expected decrease of 13°C and an estimated temperature of 12°C at the higher elevation. That figure describes a simplified comparison under similar atmospheric conditions, not the predicted nighttime minimum.
Actual mountain weather can diverge substantially. Temperature inversions sometimes leave valleys colder than higher slopes. Clear nights can produce strong radiative cooling, while exposed ridges experience greater wind exposure than sheltered locations. Humidity and cloud cover also influence local conditions, but none of these factors supports a universal adjustment that applies to every mountain.
Use a mountain-specific forecast to check the planned campsite elevation and overnight period. Prioritise the minimum temperature, precipitation, wind speed and any significant weather changes. Wind chill describes increased heat loss from exposed skin; it should not be treated as the actual air temperature or as a replacement for sleeping-equipment ratings.
A simple planning worksheet makes the forecast actionable:
| Planning input | Example | Decision |
|---|---|---|
| Valley temperature | 25°C | Record departure conditions |
| Elevation gain | 2,000 m | Calculate approximate cooling |
| Estimated temperature decrease | 13°C | Use as a preliminary comparison |
| Estimated temperature at elevation | 12°C | Cross-check with the mountain forecast |
| Forecast overnight minimum | 5°C, hypothetical | Select sleeping equipment for this colder condition |
| Cold-snap allowance | Trip-specific | Review forecast uncertainty and add suitable reserve insulation |
Record both the forecast minimum and the lowest temperature your equipment can comfortably handle. If the forecast becomes colder than your system can accommodate, revise the equipment or choose a lower campsite.
Once the overnight temperature range is established, the next challenge is preventing clothing from becoming wet with sweat during the warmer ascent.
The Clothing Error That Makes You Sweat Going Up Then Freeze at the Top?
The most common clothing mistake is wearing too much insulation while climbing and then stopping in sweat-damp clothing at the summit. Exercise produces substantial body heat, but that heat disappears when activity stops. Damp fabric, wind and falling temperatures can then accelerate heat loss precisely when the camper needs insulation most.
During an uphill hike, working muscles generate heat. Wearing a heavy insulated jacket throughout the ascent can trap that heat, leading to excessive sweating. Moisture accumulating in base layers becomes problematic when the hiker reaches a cold, windy campsite.
Evaporation removes heat from the body, and wet clothing can increase conductive heat loss. A garment that seemed comfortable while moving may therefore become unsuitable during a long stop.
A useful hiking principle is to begin slightly cool rather than already warm, provided conditions are safe and the person is not shivering. As the body warms during movement, adjust ventilation before excessive sweating develops. The first several minutes are a practical opportunity to reassess clothing, not a mandatory period of remaining cold.
The difference between moving and resting should determine how insulation is carried and worn.
| Situation | Clothing strategy | Main objective |
|---|---|---|
| Warm valley departure | Lightweight moisture-managing base layer | Prevent overheating |
| Steep uphill movement | Ventilate or remove insulation as needed | Limit sweat accumulation |
| Exposed windy trail | Add a breathable wind-resistant shell when needed | Reduce wind exposure without excessive insulation |
| Summit rest | Add a dry insulating layer promptly | Preserve warmth after exertion |
| Cold evening camp | Change damp clothing and add insulation | Maintain warmth while stationary |
Pack the main insulating jacket near the top of the backpack or in a readily accessible compartment. A sudden stop in exposed terrain should not require unpacking the tent, food and sleeping equipment to retrieve warm clothing.
Cotton shirts and denim create additional problems because they absorb moisture and dry relatively slowly. At 25°C, damp cotton may feel merely uncomfortable; at 5°C with wind, the same moisture can contribute to dangerous cooling.
The National Park Service cold-weather clothing recommendations favour wool and synthetic materials over cotton, adjustable layering, protective outerwear and spare dry clothing.
Carry at least one protected dry clothing option appropriate to the conditions. When rain, heavy sweating or unexpected delays are possible, the ability to change into dry layers becomes an important safety reserve.
Managing sweat prevents one source of cooling. The next decision is when to put insulation back on before a stop becomes uncomfortable.
Should You Add Warm Layers Before or After You Start Feeling Cold at Altitude?
Add warm layers before prolonged exposure makes you cold, especially when stopping after strenuous movement. If you are still climbing and sweating, ventilation may be more important than additional insulation. The correct decision depends on wind exposure, whether your clothing is damp and how long you expect to remain stationary.
During exercise, metabolic heat production helps maintain warmth. When movement stops, heat production decreases while wind, evaporation and contact with cold surfaces can continue removing heat.
Waiting until pronounced shivering begins is a poor clothing strategy. Additional insulation helps reduce further heat loss, but it does not guarantee rapid rewarming if the person is already significantly cold.
Use three practical signals to guide layer changes. This decision grid is a planning aid, not a clinically validated hypothermia assessment.
| Conditions | Recommended response |
|---|---|
| Moving, dry clothing, mild wind | Regulate ventilation and avoid unnecessary insulation |
| Moving, damp clothing, increasing wind | Reduce wind exposure and adjust layers to limit further sweating |
| Short stop, dry clothing, exposed ridge | Add suitable wind protection or insulation before cooling develops |
| Extended stop, damp base layer | Replace damp clothing where practical and add dry insulation |
| Cold campsite, little physical activity | Wear appropriate insulating layers before prolonged stationary time |
This resolves an apparent contradiction in mountain clothing advice. Ventilate while producing excess heat; insulate when heat production falls. Both approaches are correct in different circumstances.
For family camping, do not rely entirely on each person’s willingness to report discomfort. Children may be distracted by activities, while quieter group members may hesitate to mention that they are cold.
Build brief clothing checks into rest stops. Ask whether gloves and socks are dry, whether anyone feels chilled and whether the next section involves movement or stationary time. These checks are a practical family routine rather than a substitute for recognising medical warning signs.
Persistent shivering, unusual confusion, loss of coordination or reduced alertness may indicate dangerous cold exposure. Move to shelter, replace wet clothing, provide appropriate warming and seek urgent medical assistance when hypothermia is suspected. Severe symptoms require emergency care.
With clothing managed, protect the other equipment that can behave differently when the journey moves from a warm vehicle to a cold mountain campsite.
How to Stop Cameras and Phones Failing When Moving From Warm Car to Cold Summit?
Protect electronics from cold-related battery performance loss and condensation by controlling where they are stored and how they warm up. Keep essential batteries and devices within their manufacturers’ operating limits, use protected inner pockets when appropriate, and allow cold equipment to warm inside sealed bags before exposing it to humid indoor air.
Two different physical processes explain many cold-weather electronic problems.
First, low temperatures can temporarily reduce the usable performance of batteries. A phone or camera may shut down unexpectedly even though its battery indicator previously showed remaining charge. Battery behaviour depends on chemistry, device design, temperature and electrical load.
Second, condensation can develop when cold equipment enters warmer, humid air. Moisture may collect on external surfaces and potentially inside equipment if humid air reaches sufficiently cold components.
The two problems require different precautions. Keeping batteries appropriately warm helps preserve usable performance, while controlled warming helps limit condensation.
For a phone used as a navigation backup, an inner jacket pocket can offer protection from extreme cold. Avoid direct contact with excessive heat and follow the device’s operating-temperature guidance. A power bank should also remain protected from cold, moisture and physical damage.
For cameras, a practical condensation protocol is:
- Before taking cold camera equipment into a warm, humid environment, place it in a suitable sealed bag while still in the cold.
- Close the bag securely to limit contact with humid indoor air.
- Allow the equipment to warm gradually toward indoor temperature before opening the bag.
- Inspect for visible moisture before use, charging or changing components.
Sealed bags are most useful for the cold-to-warm transition. Simply bagging equipment while moving from a warm car into cold outdoor air does not prevent all condensation, especially if moisture is already trapped inside.
Apply the same general temperature-management approach to headlamps, GPS devices, watches and children’s electronics. Battery-powered safety equipment deserves particular attention because failure may affect navigation or visibility rather than convenience alone.
Carry independent navigation options and avoid treating a phone’s rated battery life as a reliable guarantee in near-freezing conditions. Never charge a battery outside its permitted charging-temperature range.
Electronics need protection from temperature changes, but clothing fabrics must actively manage those changes while remaining comfortable throughout the day.
What Fabrics Work for Both 25°C Valleys and 5°C Mountain Camps?
Merino wool and moisture-managing synthetics work well as base layers across warm valleys and cold mountain camps, while fleece and suitable insulated jackets provide adjustable warmth. No single fabric performs every task equally well. A lightweight base layer, removable mid-layer and protective shell offer greater flexibility than one thick garment.
For a day beginning around 25°C and ending near 5°C, evaluate clothing according to three requirements: moisture management during movement, insulation during rest and the weight or bulk needed to carry each layer.
Different fabrics solve different parts of this problem.
| Material | Advantages | Limitations |
|---|---|---|
| Merino wool | Comfortable temperature regulation, moisture absorption and odour resistance | Can dry more slowly than some synthetics; performance varies by garment weight and construction |
| Synthetic base layers | Often lightweight, quick-drying and effective at moving moisture | Odour retention and comfort vary by fabric and treatment |
| Grid fleece | Breathable insulation with useful warmth for its weight | Typically offers limited wind resistance without a shell |
| Conventional fleece | Practical removable insulation that can retain some warmth when damp | Can be bulky and vulnerable to wind penetration |
| Synthetic insulated jacket | Useful stationary insulation, with performance that can be more forgiving of dampness than down | Warmth and packability vary; not automatically waterproof |
| Windproof shell | Reduces convective heat loss from wind | Provides little insulation by itself and may trap moisture if poorly ventilated |
| Cotton or denim | May feel comfortable in warm, dry conditions | Moisture retention makes them poor choices for cold, wet exposure |
A practical wardrobe might use a lightweight merino or synthetic top during the climb, a fleece for cooler movement and an insulated jacket for long stops. A wind-resistant or waterproof shell adds protection according to the forecast.
The advantage is adjustability. When the temperature changes, individual layers can be added, removed or ventilated without replacing the entire outfit.
Do not overlook smaller garments. Wool-blend or synthetic hiking socks help manage moisture, while suitable gloves protect hands that may become cold quickly during stationary tasks. Carry dry replacements when conditions justify them.
A shell is especially important on exposed ridges because wind can remove heat rapidly. However, a shell alone cannot replace the insulation required for a cold evening.
The goal is not to find a single perfect material. It is to assemble several complementary layers that perform different jobs without unnecessary weight.
Five checks before packing for a multi-elevation trip
- Record the valley temperature, elevation gain and forecast overnight minimum in a trip weather note.
- Lay out the base layer, mid-layer, insulation and weather shell; confirm that each can be worn or removed independently.
- Pack a dry spare base layer and socks in a protected bag; verify the contents before departure.
- Place the main insulating jacket where it can be retrieved without unpacking the main compartment; test access with the pack closed.
- Check the sleeping bag comfort rating and sleeping pad R-value against the planned campsite conditions; record any equipment gap that must be resolved.
Even an effective daytime layering system cannot compensate for inadequate sleeping insulation, particularly when the ground beneath the tent is cold.
How to Build a Modular Sleep System That Works From 5°C to 25°C?
Build a modular sleep system from a temperature-appropriate sleeping bag, an insulated sleeping pad, dry sleepwear and optional adjustable accessories such as a liner. Choose the bag and pad for the coldest expected night, then ventilate or remove components during warmer conditions. A liner alone cannot reliably turn an unsuitable summer bag into a safe cold-weather system.
Sleeping comfort depends on the combined performance of several components. A sleeping bag limits heat loss around the body, while a sleeping pad reduces heat transfer into the ground. Clothing and liners provide additional adjustments, but neither replaces the main insulation.
Sleeping bag ratings require careful interpretation. Under recognised testing systems, the comfort rating is more relevant to many campers than a lower-limit figure. An extreme or survival rating must never be treated as a normal comfortable sleeping temperature.
Individual comfort also varies. Cold-sensitive sleepers may need additional insulation even when equipment is used near its stated comfort rating. Test equipment in controlled conditions when possible rather than discovering its limitations at a remote campsite.
Ground insulation is equally important. The REI sleeping-pad R-value and sleep-system recommendations explain that higher R-values indicate greater resistance to heat transfer. The guide also describes sleeping performance as a combination of the bag, pad and sleeper’s clothing.
For example, a bag suitable for 5°C conditions may still feel cold when used with an inadequately insulated pad. Upgrading the pad can improve the system without necessarily replacing the sleeping bag.
To make the system adjustable, select each component for a distinct function. The pad provides ground insulation, the bag provides the main sleeping insulation, dry sleepwear offers flexibility and a liner can improve cleanliness or make modest comfort adjustments.
At 25°C, a camper may open the sleeping bag, use it as a loose covering or remove optional layers. Ventilation helps avoid overheating, provided insects, weather and campsite conditions are appropriately managed.
At 5°C, the same camper needs the bag’s actual comfort rating and the pad’s insulation to be suitable for those conditions. Wearing dry clothing may help, but it cannot guarantee adequate warmth if the main equipment is insufficient.
If the bag’s comfort rating is warmer than the forecast overnight minimum, do not assume that adding a liner will bridge the difference. Consider a properly rated colder-weather bag, a warmer campsite or a revised trip plan.
After choosing suitable overnight insulation, confirm that the planned sleeping elevation is also appropriate for the group’s acclimatisation.
At What Altitude Should You Stop Driving and Acclimatise for Safety?
There is no universal elevation at which everyone must stop driving, but altitude illness becomes an important consideration when unacclimatised travellers plan to sleep around 2,450–2,500 metres or higher. The critical decision is how quickly sleeping altitude increases, not simply how high a vehicle can travel. Road safety must be assessed separately.
Driving allows campers to gain elevation rapidly without the gradual physical adjustment that often accompanies a long ascent on foot. A family can therefore arrive at a high campsite before recognising how altitude affects its members.
The CDC Yellow Book recommendations for high-altitude travel explain that altitude illness can affect unacclimatised travellers sleeping at approximately 2,450 metres or above, and can occur below that elevation.
Fitness does not reliably protect against altitude illness. Children are also susceptible, and individual responses vary considerably.
500 m per day
The CDC recommends limiting increases in sleeping altitude to approximately 500 metres per day above 3,000 metres, with an additional acclimatisation day for roughly every 1,000 metres of sleeping-altitude gain.
CDC Yellow Book, High-Altitude Travel and Altitude Illness.
The CDC also advises avoiding direct ascent from low altitude to a sleeping elevation of approximately 2,750 metres or higher in a single day. These recommendations guide risk reduction rather than guarantee that altitude illness will not occur.
For family camping, an appropriate plan may involve an easier first day, a lower initial campsite and gradual increases in sleeping elevation. Travelling to a higher point during the day and returning to sleep lower generally places less physiological stress on the body than sleeping at the highest altitude reached.
Early acute mountain sickness symptoms can include headache, nausea, dizziness, unusual fatigue and loss of appetite. Someone experiencing altitude illness symptoms should not continue ascending to sleep higher. Worsening symptoms despite rest or treatment require descent; severe symptoms call for urgent descent and medical care.
Road access introduces a separate set of decisions. A mountain road may become unsafe because of snow, ice, poor visibility, steep gradients, closures or vehicle limitations, regardless of whether its elevation creates a significant altitude illness risk.
Established mountain regions may provide intermediate campsites or accommodation that support staged ascent. Remote trailheads may require deliberate acclimatisation planning because there are fewer places to stop or descend safely.
With the route, clothing and sleeping altitude established, the final step is turning the equipment into a system that remains useful across different seasons.
Key takeaways before planning your next season
- Choose sleeping equipment according to the lowest plausible overnight temperature, not the season or daytime forecast alone.
- Preserve flexibility by upgrading individual components rather than replacing an entire camping kit unnecessarily.
- Review campsite exposure, ground insulation and moisture management together before each trip.
How to Maintain Comfortable Sleeping Temperatures Across All Seasons When Camping?
Maintain sleeping comfort throughout the year by adjusting the sleeping bag, pad, clothing and ventilation to the expected overnight conditions. Ground insulation deserves particular attention because heat can escape into the ground even when the air inside the tent feels relatively mild. Seasonal adjustments should be based on forecast temperatures and equipment performance, not calendar labels alone.
A modular system allows campers to reuse suitable components while changing the insulation that matters most. The same sleeping pad may work across several trips, while a colder destination requires a different bag or additional insulation.
The pad’s R-value measures resistance to heat transfer. Higher values indicate greater insulation, although actual comfort also depends on ground conditions, the sleeping bag and the individual camper.
REI’s practical sleeping-pad guidance groups R-values below 2 with warm conditions, 2.0–3.9 with cool conditions, 4.0–5.4 with cold conditions and 5.5 or higher with very cold conditions. These categories are broad equipment-selection guidance, not guaranteed temperature thresholds.
Use the following seasonal framework as a planning guide. The temperature bands describe illustrative overnight conditions, not universal climate definitions.
| Expected overnight conditions | Sleep-system priority | Adjustment to consider |
|---|---|---|
| Warm nights, around 20–25°C | Ventilation and avoiding overheating | Open the bag, reduce sleepwear insulation and use suitable ground padding |
| Mild nights, around 10–20°C | Adjustable insulation | Use a suitably rated bag and pad, with removable sleepwear |
| Cool nights, around 5–10°C | Reliable bag comfort and ground insulation | Check the bag’s comfort rating, pad R-value and dry clothing |
| Cold nights, around 0–5°C | Greater insulation and weather protection | Choose an appropriately rated colder-weather bag and insulated pad |
| Below-freezing nights | Dedicated cold-weather equipment and planning | Use equipment suitable for the forecast, including adequate ground insulation and appropriate winter precautions |
The table is not a substitute for product specifications or a mountain forecast. It is a way to identify which part of the system needs reassessment as conditions change.
Beyond sleeping equipment, campsite selection affects comfort. Cold air can collect in low-lying hollows and valley floors under suitable weather conditions. Choosing a protected, permitted campsite away from obvious cold-air pooling areas may improve comfort, although exposure to wind, drainage, hazards and local camping regulations must also be considered.
Tent ventilation matters because moisture from breathing and damp equipment can condense on cold surfaces. Maintaining appropriate ventilation can reduce condensation, though it does not make an inadequately insulated sleep system warmer.
Before sleeping, change into dry base layers, eat and drink adequately, and prepare essential nighttime items so they are accessible without prolonged exposure. A warm drink can provide comfort, but it cannot replace insulation or medical treatment for hypothermia.
For a trip that begins at 25°C and ends with a forecast 5°C mountain night, the complete system should therefore include breathable hiking layers, accessible stationary insulation, a suitably rated sleeping bag, adequate pad insulation, dry sleepwear and a weather-appropriate campsite plan.
Before the next departure, write down the valley conditions, campsite elevation, overnight forecast and sleep-system ratings. Use that short comparison to confirm the equipment is adequate, then adjust the route or packing list wherever the forecast exceeds the kit’s capabilities.
Is a 15°C temperature drop enough to cause hypothermia?
A 15°C drop does not automatically cause hypothermia. Risk depends on the resulting temperature, wind, wet clothing, exposure duration and individual circumstances. A camper who becomes soaked and remains stationary in cold conditions can be at risk even when the air temperature is above freezing. Dry insulation, shelter and early recognition of warning signs are essential.
Should a spare insulating jacket go inside a waterproof bag?
Protecting spare insulation from rain and pack moisture is sensible, especially when the garment is intended for emergency warmth. A lightweight waterproof stuff sack or suitable pack liner can help keep it dry. Position the jacket so it remains easy to retrieve during rest stops.
Can a sleeping bag liner compensate for an inadequate temperature rating?
A liner may provide a modest comfort adjustment, but its contribution depends on its material, construction and the rest of the sleep system. It should not be assumed to make a warm-weather bag suitable for a 5°C night. Check the bag’s comfort rating and pad insulation first.
Does a warmer sleeping pad help if the sleeping bag already feels warm enough?
It can. A sleeping pad reduces heat loss into the ground, which a sleeping bag alone may not adequately prevent because its insulation is compressed beneath the sleeper. If ground insulation is insufficient, a higher-R-value pad may improve comfort even without changing the sleeping bag.
Can children develop altitude sickness even if they seem energetic?
Yes. Children are susceptible to altitude illness, and physical fitness or apparent energy does not guarantee protection. Watch for headache, nausea, unusual fatigue, dizziness or behavioural changes. Avoid further sleeping-altitude gain when symptoms suggest altitude illness, and seek appropriate medical assistance for concerning or worsening symptoms.