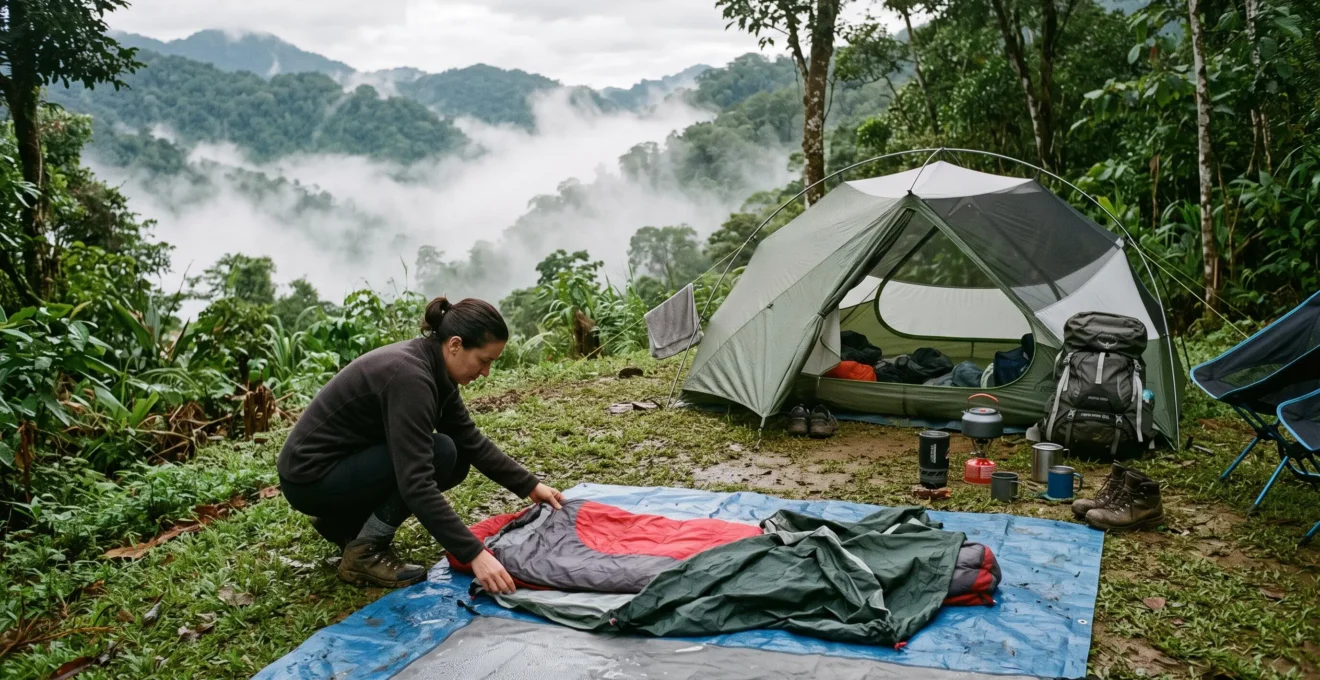
Moisture can shorten the useful life of camping equipment long after a trip has ended. A tent that feels dry on its outer surface may still hold condensation beneath its flysheet. A tightly packed sleeping bag may retain humidity around its insulation, while tent pegs stored with damp soil can develop corrosion before their next outing.
Preventing this damage requires more than wiping equipment before packing. The effective approach combines ventilation during camping, thorough drying after exposure, inspection of moisture-sensitive components and suitable long-term storage. Each stage addresses a different mechanism: fungal growth on damp materials, deterioration of waterproof coatings, reduced insulation loft or corrosion of vulnerable metals.
The greatest practical risk often arises when damp equipment remains enclosed without an opportunity to dry. That makes the period between taking down camp and putting equipment into storage particularly important. With a consistent routine, campers can protect expensive equipment without relying on specialised treatments or assuming that every visible stain means an item must be replaced.
Moisture prevention: the essential rules
- Choose well-drained campsites and manage ventilation without compromising protection from wind, rain or other hazards.
- Dry tents and sleeping bags completely before long-term storage, paying particular attention to seams, folds and insulation.
- Separate damp equipment, inspect for mould or coating damage, and store clean, dry gear in conditions that prevent moisture accumulation.
- How to Select and Prepare for Camping in High-Humidity Tropical Environments?
- How to Dry Tents and Sleeping Bags Thoroughly Enough to Prevent Mould Growth?
- The Packing Error That Causes £150 Sleeping Bags to Lose 50% of Their Warmth?
- What Makes Tent Pegs Rust Even After Just One Camping Weekend?
- How to Detect Hidden Mould on Tents Before It Spreads Across Entire Panels?
- When Should You Stop Using a Tent With Visible Mould or Fabric Weakness?
- The Post-Trip Mistake That Causes £200 Worth of Mould Damage to Camping Gear?
- How to Prevent Pots and Glass Jars Breaking During Off-Road Driving?
How to Select and Prepare for Camping in High-Humidity Tropical Environments?
Camping successfully in tropical humidity starts with choosing a well-drained, sheltered site that allows controlled airflow and packing equipment that can release accumulated moisture. Higher ground may reduce exposure to cool, damp air, but exposed ridges are not automatically safer. Tent construction, rainfall protection and the condition of equipment before departure also determine how effectively moisture can be managed.
Humidity creates a persistent challenge because wet vegetation, saturated soil, rainfall and temperature changes can leave fabrics damp even when no water enters the tent. Condensation may collect beneath a flysheet or inside an enclosed shelter when moist air encounters cooler surfaces.
Site elevation and drainage are useful selection criteria. Low ground between slopes can collect cooler, moisture-laden air, while higher, well-drained positions may offer better conditions. However, a clearing exposed to strong wind or lightning can introduce hazards more serious than condensation.
REI‘s tent setup and campsite selection advice recommends higher, drier ground and explains how wind direction affects tent ventilation and weather protection. The guidance also supports camping at least 200 feet from lakes and streams under Leave No Trace practices. Local campsite rules and environmental restrictions must still be followed.
For the tent itself, a double-wall design with a mesh inner and ventilated rainfly can provide useful separation between occupants and moisture collecting on the outer layer. Ventilation is an advantage only when vents and openings are managed without allowing driving rain inside. Single-wall tents may still be appropriate in particular conditions, so design alone does not establish which shelter will remain driest.
Preparation before departure should address existing moisture rather than merely keeping rain out during transport:
- Inspect the tent floor, flysheet, seams and packed storage bag for dampness.
- Confirm that sleeping bags are dry before placing them in travel sacks.
- Keep damp footwear, towels and cooking equipment separate from insulation.
- Check that flysheet vents, doors and weather protection operate correctly.
- Allow enough packing space to avoid unnecessarily compressing moisture-sensitive equipment.
Waterproof bags can protect equipment from external rainfall during transport, but they also prevent moisture from escaping. They should therefore be used with dry contents and opened for inspection or airing when conditions permit.
Good preparation reduces avoidable exposure, but it cannot eliminate tropical humidity. The next protection is a reliable drying routine whenever equipment becomes wet.
How to Dry Tents and Sleeping Bags Thoroughly Enough to Prevent Mould Growth?
Dry tents by pitching or spreading them so moisture can escape from both surfaces, including the floor, flysheet and seams. Dry sleeping bags fully unzipped and loosely supported so their insulation can regain loft. Do not rely solely on an outer surface feeling dry: inspect folds and thicker sections, and continue drying whenever dampness remains.
Surface dryness is not the same as complete dryness. The outside of a flysheet may feel dry while moisture remains beneath reinforced corners, folded hems or areas where fabric layers overlap. Similarly, the shell of a sleeping bag can lose surface moisture before its insulation has dried.
For tents, pitching the shelter provides space between fabric panels and makes concealed moisture easier to find. If pitching is impractical, drape the components over clean, suitable supports. Turn or reposition sections where necessary, allowing both sides of the fabric to dry.
A practical touch-and-inspection routine is to check the seams, zips, reinforced corners and folded areas for remaining dampness. These observations help identify overlooked moisture, although they are not a scientifically validated measurement of water content. Avoid assuming that a fixed number of hours guarantees dryness in every climate.
Sleeping bags need a different treatment because warmth depends on the loft of their filling. Fully unzipping and loosely hanging a bag exposes more of its surface and helps moisture escape. Where appropriate, turn the bag inside out during part of the drying process.
REI’s sleeping bag guidance describes sheltered outdoor drying for six to eight hours as a practical approach, not a universal guarantee. Fans or dehumidifiers can help when suitable indoor drying space is available.
When persistent rain prevents complete drying, distinguish temporary transport packing from permanent storage. A wet tent may need to travel packed for practical reasons, but it should be unpacked and dried promptly at the next suitable opportunity.
Prioritising sleeping bags, particularly those containing down, can be a reasonable practical choice when drying space is limited because retained moisture can interfere with insulation performance. However, any wet equipment requires attention; there is no universally established drying priority for every camping kit.
A sealed vehicle is not a reliable substitute for a ventilated drying space. Moisture released by wet equipment can remain inside an enclosed vehicle and may condense on cooler surfaces. If indoor drying is needed, choose a location where moisture can actually be removed through ventilation or dehumidification.
Once the equipment is dry, preserving that condition matters just as much. The next mistake is allowing compression and poor packing choices to undo the drying work.
The Packing Error That Causes £150 Sleeping Bags to Lose 50% of Their Warmth?
Packing a slightly damp sleeping bag tightly into a waterproof compression sack and leaving it there can reduce insulation loft and encourage mildew. Both down and synthetic filling need air spaces to retain warmth. However, a £150 bag does not automatically lose 50% of its insulation performance: the effects depend on moisture, filling type, compression and storage conditions.
A sleeping bag insulates by holding relatively still air within its filling. Compression reduces the available space, while water can cause down clusters to clump and lose their normal loft. Synthetic insulation also depends on its ability to expand after packing.
The critical distinction is between temporary insulation impairment and lasting material damage. A damp bag that has lost loft may recover after suitable drying. Persistent compression can make recovery more difficult, and prolonged damp storage can allow mould or mildew to affect the outer fabric and internal filling.
The headline’s price and percentage illustrate an expensive equipment-care problem rather than a measured or universally predictable loss. Neither the purchase price nor a single period of damp packing establishes how much warmth has been lost.
REI’s sleeping bag storage advice explains the importance of insulation loft and recommends removing bags from compression sacks before long-term storage. Large cotton or mesh storage sacks can preserve loft while allowing air circulation in a dry environment.
Compare the roles of the two packing methods:
| Consideration | Short-term travel packing | Long-term storage |
|---|---|---|
| Compression | May be used to save transport space | Avoid prolonged compression |
| Moisture | Protect from external water and inspect after travel | Store only after thorough drying |
| Container | Suitable stuff sack or protective bag | Large, loose storage sack |
| Insulation | Allow time to regain loft before use | Preserve loft between trips |
For a quick household check, unpack the bag and allow its filling to expand. Look for unusual flattened sections, persistent dampness or a musty odour. These are reasons to investigate and dry the equipment rather than proof that a specific percentage of warmth has disappeared.
A bag that fails to recover promptly may be damp, dirty or affected by compression history. Drying and following the manufacturer’s care instructions are more reliable first steps than immediately replacing the insulation.
Fabric insulation is only one vulnerable component. Metal tent hardware can deteriorate for different reasons, even during a relatively short camping trip.
What Makes Tent Pegs Rust Even After Just One Camping Weekend?
Steel tent pegs can develop rust after a weekend when wet soil, damaged protective coatings and damp storage occur together. Scratches expose vulnerable metal, while water and oxygen support corrosion. Salt contamination can accelerate the process. The likelihood depends on the peg material, coating condition and exposure rather than the number of nights spent camping.
Driving pegs into hard or abrasive ground can scratch paint or protective finishes. During removal, wet soil may remain around the shaft and head. If the pegs are immediately placed in a closed pouch, retained moisture can prolong contact with the metal.
However, not every peg behaves the same way. Different metals and surface treatments have different corrosion mechanisms.
| Material | Corrosion considerations | Practical inspection |
|---|---|---|
| Unprotected or scratched steel | Susceptible to iron rust when exposed to moisture and oxygen | Look for exposed metal and reddish corrosion |
| Galvanised steel | Zinc coating provides protection, but worn or damaged areas require monitoring | Check scratches, worn tips and coating condition |
| Aluminium alloy | Does not form iron rust, but can undergo other forms of corrosion | Inspect for pitting, surface deterioration and deformation |
The distinction matters when choosing replacements. Aluminium is not immune to every kind of corrosion, and galvanisation is not a guarantee that steel will remain unaffected indefinitely. Protective surfaces, material quality and maintenance all influence longevity.
A simple post-trip cleaning routine addresses much of the avoidable exposure:
- Remove adhering mud and grit without unnecessarily abrading the surface.
- Rinse off soil residues, especially after coastal or salt-contaminated camping.
- Dry the pegs thoroughly, including bends and recessed areas.
- Inspect their coatings, tips and shafts for corrosion or damage.
- Return them to a clean, dry pouch, preferably separate from tent fabric.
This routine is a practical maintenance method, not a guarantee against corrosion. Severely weakened or bent pegs should be replaced when their ability to hold the shelter securely is in doubt.
The same inspection principle applies to metal pole connections, zip components and buckles. Material compatibility matters: cleaning or lubrication products suitable for one component may not be appropriate for another.
While metal corrosion is often visible, early moisture damage to tent fabric can be harder to recognise, particularly where the material remains folded.
How to Detect Hidden Mould on Tents Before It Spreads Across Entire Panels?
Detect potential hidden mould by fully unfolding the tent in good light and inspecting the underside of the flysheet, seams, folded creases and storage bag. Look for unusual spotting, discolouration and musty odours. Do not judge severity from colour alone: mould can appear in different colours, and coating deterioration can produce similar warning signs.
A packed tent contains multiple surfaces that may have remained damp after the rest of the material dried. Areas around stitching, reinforced corners and folded fabric deserve particular attention because they can be overlooked during a quick surface inspection.
Start with the exterior, then turn components over to inspect their inner surfaces. Check along seam tape and around areas that contact wet ground. Light directed across the fabric at a shallow angle can help reveal surface changes, although it cannot identify the biological cause of a stain.
When inspecting mould, separate visible observations from conclusions about material condition:
- Light spotting or discolouration: investigate and clean according to the manufacturer’s guidance; colour alone cannot establish whether growth is superficial.
- Widespread patches or persistent mustiness: treat the problem as more significant, keep affected equipment separate and assess whether cleaning is practical.
- Peeling, tackiness or coating separation: evaluate waterproofing deterioration independently, because these symptoms do not necessarily indicate mould.
The CDC information on mould and health effects confirms that mould can grow on damp materials, appear as spots of different colours and produce a musty smell. It also explains that spores can travel on clothing, bags and other objects.
These general biological principles support careful equipment inspection, although the CDC guidance is not a tent-specific diagnostic or cleaning standard.
If contamination is suspected, avoid packing the affected tent together with clean sleeping bags or clothing. Physical separation can reduce unnecessary transfer of moisture and debris, although the available guidance does not quantify how much mould spreads between stored camping items.
Equipment should be cleaned using fabric-compatible methods. Harsh household cleaners, machine washing or aggressive scrubbing can damage waterproof coatings and stitching. Removing visible contamination without correcting the moisture problem also leaves the original conditions unchanged.
Inspection establishes where attention is needed. The harder decision comes when visible contamination coincides with deterioration of the tent’s waterproofing or structural fabric.
When Should You Stop Using a Tent With Visible Mould or Fabric Weakness?
Stop relying on a tent when its fabric, seams or attachment points can no longer provide dependable shelter, or when suspected mould contamination cannot be adequately addressed for the intended occupants. Limited surface contamination does not automatically require replacement, but coating failure, torn load-bearing areas and persistent contamination justify repair assessment or retirement before another trip.
Three separate questions determine whether continued use is reasonable: the condition of the material, the ability of the tent to protect against weather and the occupants’ potential exposure to mould.
Health considerations differ between users. People with asthma, mould allergies, weakened immune systems or certain chronic lung conditions may face greater risks from damp or mouldy environments. A tent considered tolerable by one camper may be unsuitable for someone more susceptible.
The condition of waterproof coatings requires a different assessment. Polyurethane-coated fabrics can deteriorate following prolonged moisture exposure, producing tackiness, flaking or unpleasant odours. These changes may occur alongside mould but should not be mistaken for proof of active fungal growth.
The following decision grid helps separate problems that may be repairable from those that challenge the tent’s continued suitability.
| Condition | Recommended decision | Reason |
|---|---|---|
| Limited surface contamination with otherwise sound material | Clean using approved methods, dry and reassess | Contamination alone does not prove structural failure |
| Localized seam-seal or coating defects | Investigate compatible repair options | Some waterproofing failures may be repairable |
| Widespread peeling, sticky coatings or persistent leakage | Avoid relying on the tent until restoration or replacement is evaluated | Weather protection may be unreliable |
| Tears or weakness at guy points, pole sleeves or other loaded areas | Remove from demanding use until professionally or appropriately repaired | Structural failure can compromise the shelter |
| Persistent suspected mould affecting susceptible occupants | Avoid use until contamination is adequately resolved | Potential exposure may present additional health concerns |
A gentle visual and manual inspection may reveal obvious tearing, stretching or weakened stitching, but a home pull test cannot certify structural strength. Applying force may worsen damaged material. Similarly, a controlled water check can reveal leakage without proving that the whole shelter will withstand prolonged driving rain.
Repairability depends on the component. Seam tape, selected coatings and some localised fabric defects may be repairable using compatible products and methods. Widespread material deterioration or damage at important load-bearing locations can make replacement the more dependable option.
Cost is relevant, but so is the consequence of failure. A repair that appears economical at home may provide inadequate protection during heavy rain or wind, especially when children or other vulnerable occupants depend on the shelter.
A tent that passes inspection still needs proper storage. Preventing a new cycle of dampness is often easier than dealing with another round of cleaning or restoration.
The Post-Trip Mistake That Causes £200 Worth of Mould Damage to Camping Gear?
The costly mistake is leaving damp camping equipment packed for days after returning home, or moving it directly into long-term storage without complete drying. Moisture can remain trapped around tent fabric, clothing and sleeping bag insulation, creating conditions favourable to mildew. The £200 figure is illustrative; actual damage depends on the equipment affected and whether it can be restored.
Delayed unpacking is particularly problematic when several damp objects share one large bag. A wet flysheet, dirty footwear and compressed insulation may keep neighbouring materials humid even if some items were dry when packed.
That does not mean one damp tent will necessarily contaminate an entire camping kit. Rather, shared moisture and potential transfer of material make storing damp and dry items together an avoidable risk.
The most dependable response is to begin unpacking as soon as practical after arriving home. If an immediate complete drying session is impossible, separate the damp equipment and provide adequate airing while arranging a suitable drying location.
REI’s tent-care guidance stresses complete drying before long-term storage and identifies moisture-related mildew and waterproof-coating deterioration as important concerns. It also advises against routine storage in damp basements, hot attics and vehicle trunks.
For dry tents in a cool, dry location, loose storage in a mesh bag or pillowcase can be appropriate. Where the surrounding environment itself is damp, a sealed container may protect an already completely dry tent from ambient moisture. Sealing damp equipment inside plastic is a different situation and should be avoided.
Five checks before putting camping equipment away
- Empty all transport bags. Lay out the entire kit and confirm that no equipment remains hidden inside a closed compartment.
- Separate damp and dry items. Create two clearly identified groups so potentially wet fabric does not remain pressed against clean insulation.
- Dry moisture-sensitive equipment. Pitch or hang the tent, open sleeping bags and inspect the areas most likely to retain moisture.
- Clean and inspect accessories. Remove dirt from tent pegs and hardware, then record any corrosion, coating defects or suspicious fabric stains requiring attention.
- Confirm storage readiness. Verify that each item is dry, choose its appropriate loose or protective container, and place it in a suitable storage location.
The checklist can serve as a household routine rather than an estimated one-hour guarantee. How long drying takes depends on the equipment, available space and local conditions. A dehumidified room may be more effective than an open but persistently humid garage.
Periodically inspecting stored equipment is also useful, particularly after changes in room humidity, leaks or extended periods without use. A fresh musty odour or unexpected dampness warrants investigation before the next trip.
Once moisture-sensitive items have been protected, the remaining packing challenge concerns physical damage during transport. Preventing movement and impact becomes especially important on rough tracks.
Key takeaways before loading the vehicle
- Keep dry insulation and tent fabric protected from damp or leaking containers rather than treating all camping equipment as one interchangeable load.
- Prevent objects from shifting during travel; hard cookware and fragile jars require a different packing method from compressible fabrics.
- Make transport inspection part of the equipment-care routine, since damage during the journey can create new cleaning, moisture and storage problems.
How to Prevent Pots and Glass Jars Breaking During Off-Road Driving?
Protect cookware and glass jars on rough tracks by separating hard objects, cushioning fragile items and eliminating movement inside storage boxes. Place heavy equipment low and secure containers against sudden braking, cornering and vertical impacts. Where practical, replace glass with suitable lightweight alternatives and inspect the load after the first rough section.
Off-road driving creates a different mechanical challenge from ordinary storage. Repeated vibration may loosen packed items, while sudden shocks can bring metal pans or glass containers into forceful contact with one another.
A partly empty storage box is especially vulnerable because objects can gain momentum before striking neighbouring equipment or the container walls. Fragile glass may crack or break, while cookware can dent, scratch or develop damage around handles and fittings.
Isolation and load restraint are the central packing principles. Each glass jar should be individually protected with suitable cushioning and separated from other rigid objects. Fill unused space to restrict movement without placing excessive pressure on the glass.
For cookware, use protective layers between metal surfaces and keep heavy pots stable. Rather than relying on a single orientation, secure the contents against forward, sideways and upward movement, and position heavier objects low in the vehicle.
When deciding what to bring, consider whether the original container is necessary. Pantry ingredients can often travel in lightweight, food-safe alternatives, provided the container suits the contents and can close securely. Dedicated camping cookware may also simplify packing where repeated rough-road travel is expected.
For family campers, keep fragile kitchen equipment away from sleeping bags and moisture-sensitive fabrics. A broken jar containing liquid food can turn a mechanical packing failure into a cleaning and dampness problem affecting other gear.
After the first stretch of rough road, stop safely and check for rattling, shifting boxes or loose lids. Reorganise any unstable items before continuing. This inspection is a preventative habit rather than a scientifically established threshold for when breakage occurs.
Before the next journey, pack fragile objects separately, restrain heavy cookware and verify that moisture-sensitive gear is clean and dry. Applying both impact protection and moisture control helps preserve the equipment throughout transport, camping and storage.
Can a tent develop mould even if it never leaks?
Yes. Condensation, wet ground contact and inadequate drying can leave moisture on or beneath tent fabric without a roof leak. Mould can grow when sufficient moisture remains available, so inspect the floor, flysheet and seams even when the tent appeared waterproof throughout the trip.
Should camping equipment be stored in sealed plastic boxes?
Only when appropriate for the equipment and storage conditions. A sealed container can help protect a completely dry tent from a damp storage environment. It should not be used to seal in residual moisture. In a suitable dry room, loose breathable storage may be preferable for tents and sleeping bags.
Does black mould on a tent always mean it is more dangerous?
No. Mould colour alone does not reliably establish species, contamination severity or health risk. Treat visible or suspected mould as a reason to investigate and address moisture. Consider the extent of contamination, fabric condition and potential susceptibility of the people using the tent.
Can a damp sleeping bag recover its original loft?
Sometimes. Moisture-related clumping can improve after thorough drying, especially when the filling has not suffered lasting damage. However, prolonged compression, contamination or material deterioration may limit recovery. Follow the manufacturer’s drying and care instructions before assessing whether the bag remains suitable for use.
Is a dehumidifier useful for storing camping equipment?
A dehumidifier can help reduce moisture in an enclosed storage or drying room, particularly where natural ventilation is insufficient. It does not replace drying wet equipment thoroughly or repairing leaks and other moisture sources. For long-term storage, the priority remains a clean, dry kit kept in stable, suitable conditions.