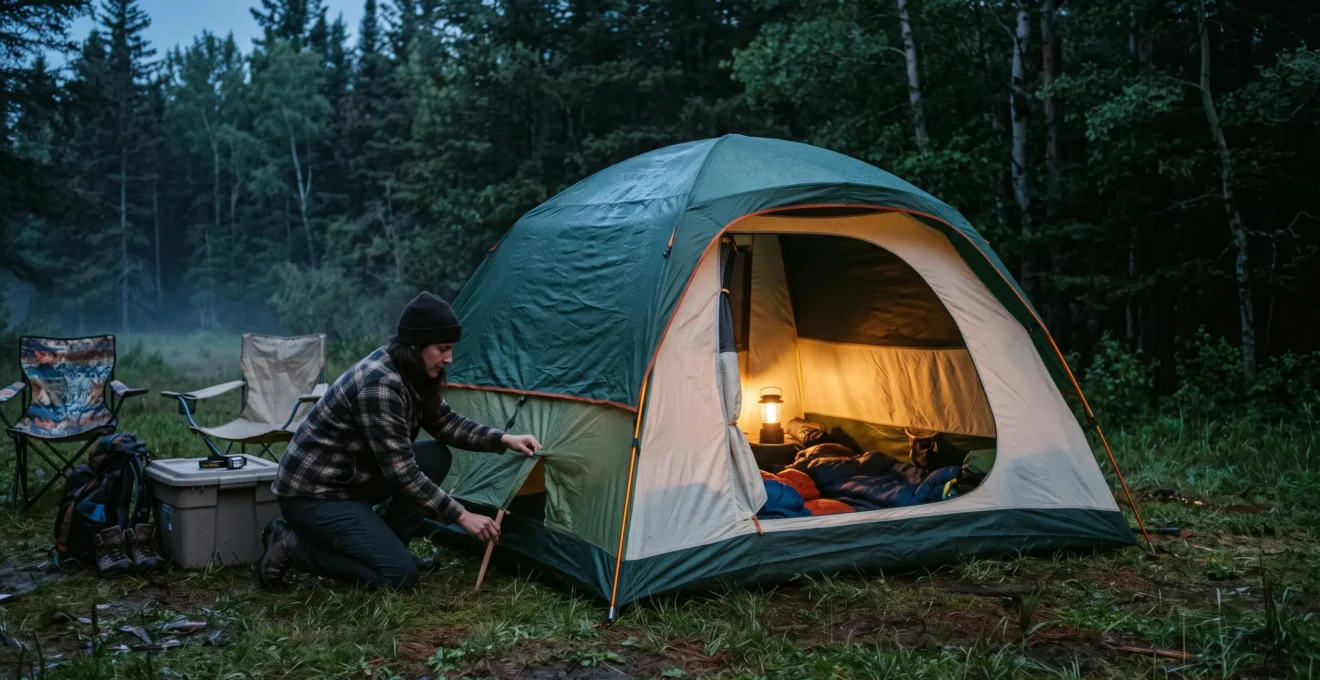
A sleeping bag can feel damp after a rain-free night because the moisture originated inside the tent. Breathing, perspiration, wet equipment and humid outdoor air all contribute water vapour. As temperatures fall, some of that vapour condenses on cooler tent surfaces, sometimes dripping or transferring onto bedding.
A **double-wall tent reduces moisture reaching the sleeping area** by combining a breathable inner canopy, a separate waterproof flysheet and ventilation paths between them. The design helps keep condensation away from occupants, but it does not eliminate the physical process that produces it.
In Britain‘s damp coastal campsites, woodland clearings and rainy upland conditions, the difference between a dry night and clammy bedding often comes down to pitching tension, vent positioning and where wet equipment is stored.
Understanding how these factors interact is more useful than assuming a waterproof tent must always remain dry inside.
Double-wall tent condensation: the essentials
- The breathable inner canopy and separated rainfly help keep condensation away from sleeping bags, provided the layers remain apart.
- Maintain suitable intake and exhaust openings, adapting them to rain, wind and the number of occupants.
- Reduce indoor moisture sources, inspect flysheet tension and distinguish condensation from genuine water penetration before attempting repairs.
- What Is the Science Behind Double-Wall Tents Staying Dry Inside?
- Why Do You Still Wake Up Damp Even in Warm Coastal Summer Camping?
- How to Adjust Vents on Double-Wall Tents for Maximum Dryness Overnight?
- The Setup Mistake That Makes Your Double-Wall Tent Perform Like a Single-Wall?
- How to Re-Proof Flysheets Without Sealing Vents That Prevent Condensation?
- The Setup Mistake That Causes Most « My Tent Leaked » Complaints?
- How to Arrange Vents for Continuous Fresh Air Exchange While Sleeping?
- How to Ventilate Tents Correctly to Prevent Headaches and Sleep Disruption?
What Is the Science Behind Double-Wall Tents Staying Dry Inside?
Double-wall tents manage condensation by separating the sleeping compartment from the waterproof outer flysheet. Moisture-laden air can pass through breathable inner fabric or mesh into the space between the layers, where some vapour escapes through vents and some condenses on the cooler flysheet. Keeping the two fabrics apart reduces the chance of that water reaching bedding.
The underlying mechanism is governed by temperature and humidity, not simply by whether a fabric is waterproof.
Air contains water vapour, and its capacity to hold that vapour before becoming saturated generally increases with temperature. The **dew point** is the temperature at which air reaches saturation for its current water-vapour content. If moist air contacts a surface below that temperature, condensation can form.
During a cool night, the rainfly may become colder than the air around the sleepers. Moist air reaching its underside can then form droplets, even without rainfall.
In a typical double-wall design, three components perform different functions:
- Inner canopy: breathable textile panels and mesh permit air and water vapour to move, while helping separate occupants from the flysheet.
- Air gap: physical clearance helps prevent droplets on the fly from transferring directly to the inner fabric.
- Outer flysheet: waterproof material blocks rain penetration, while appropriately positioned openings allow humid air to escape.
The air gap is not an absorbent layer or a guarantee of drying. It is a separation zone that works alongside ventilation and correctly tensioned fabrics.
The manufacturer’s Cascade Designs‘ technical guidance on tent condensation identifies occupants, weather, wet equipment and ground conditions as contributing factors. It also recommends maintaining separation between the rainfly and inner tent.
Condensation and leakage can initially look similar. Water appearing beneath a flysheet during dry weather suggests condensation, while localised wetting associated with rainfall may indicate penetration. Wiping the surface and observing where moisture returns is useful, but neither observation alone proves the cause.
As a result, a double-wall tent should be understood as a **moisture-management system**, rather than a shelter that prevents condensation altogether.
The remaining challenge is environmental: even a correctly pitched shelter has limited drying capacity when outdoor air already contains substantial moisture.
Why Do You Still Wake Up Damp Even in Warm Coastal Summer Camping?
Warm coastal nights can produce condensation because the surrounding air may already be close to saturation. As the flysheet cools overnight, humid air contacting it can reach its dew point and release liquid water. Double-wall construction limits contact with that moisture, but cannot prevent condensation when temperature, humidity and ventilation conditions are unfavourable.
A summer campsite beside the sea can therefore be more troublesome than its comfortable evening temperature suggests.
Warm air does not automatically mean dry air. Sea breezes, overnight cooling and moisture from vegetation or damp ground can create conditions in which tent surfaces accumulate droplets.
The important variable is the difference between the surface temperature and the dew point. When that margin becomes small, only modest additional cooling may be necessary for condensation.
An expensive tent may offer more convenient vents, improved flysheet geometry or better separation between layers. Those features can improve moisture management, but cannot remove moisture from incoming air that is already very humid.
The practical approach is to reduce additional moisture entering the sleeping compartment.
Check for frequently overlooked sources:
- Damp waterproof jackets or towels hanging inside the inner tent.
- Wet shoes, backpacks and children’s clothing stored beside sleeping bags.
- Dogs returning from wet grass or coastal walks.
- Moisture rising from exposed damp ground or accumulating in poorly ventilated vestibules.
- Cooking steam near the shelter, particularly where it can travel into enclosed spaces.
Keep wet equipment outside the inner sleeping compartment where weather protection and campsite conditions permit. A vestibule can be useful for storage, provided its ventilation is not obstructed.
Never operate a camping stove or other fuel-burning appliance inside a tent or enclosed vestibule. Apart from moisture, combustion introduces serious fire and carbon monoxide hazards.
The overnight sequence helps explain an apparently sudden problem. A tent may feel dry at bedtime, then accumulate condensation as temperatures decline towards dawn. At that point, surfaces can become cold enough for condensation even if ventilation was adequate earlier.
REI‘s educational guidance identifies campsite choice, limiting indoor moisture and ventilation as complementary strategies for reducing the problem.
Because outdoor humidity cannot be controlled, adjustable airflow becomes the next practical tool for limiting the amount of vapour retained inside the shelter.
How to Adjust Vents on Double-Wall Tents for Maximum Dryness Overnight?
Adjust double-wall tent ventilation by keeping a suitable incoming-air opening and a separate route for moist air to escape. Where the design permits, a lower intake and higher outlet support air movement through convection, while openings exposed to a breeze can encourage crossflow. The best arrangement depends on the tent’s vent geometry, wind and rainfall.
A useful evening routine begins before the occupants settle into their sleeping bags.
- Identify the manufacturer’s intended intake and exhaust openings, including any covered flysheet vents.
- Open a suitable lower intake without directing a strong draught onto sleepers.
- Open an upper vent or protected door opening so warmer, moisture-laden air has an escape route.
- Check that mesh, guyline attachments and vent supports are not obstructing the available openings.
- Observe the wind and adjust the openings to preserve airflow without admitting wind-driven rain.
Warm air often rises relative to cooler surrounding air, creating the possibility of buoyancy-driven ventilation. Wind pressure can also drive air through the shelter.
However, neither mechanism guarantees a steady flow in every tent. Low-profile shelters, weak temperature differences and changing winds can substantially alter the direction and strength of ventilation.
Opening only one small vent may provide some exchange through wind fluctuations or diffusion, but it generally offers less predictable through-flow than separated openings.
**Rain protection and ventilation should be balanced rather than treated as competing all-or-nothing choices.**
During drizzle, use covered vent openings, flysheet overhangs and sheltered vestibule configurations according to the manufacturer’s instructions. Avoid exposing an opening directly to driving rain.
If wind direction changes, reassess whether the vent is still protected. A rain-safe configuration in calm weather may not remain safe during a gusty coastal night.
A well-ventilated tent also needs enough exposure to moving air. Pitching immediately behind a large vehicle, wall or dense obstruction may reduce wind-driven exchange. A completely exposed pitch, however, may introduce greater weather hazards.
Choose an orientation that protects against anticipated wind and rain while leaving the manufacturer’s intended ventilation routes functional.
The right settings are therefore adaptable, not universal: maintain a protected airflow path, then reassess if rain intensity or wind direction changes.
Even correctly positioned vents become less effective when the flysheet sags against the inner canopy or its lower edges block the designed ventilation paths.
The Setup Mistake That Makes Your Double-Wall Tent Perform Like a Single-Wall?
Allowing the rainfly to touch the inner canopy undermines one of the main advantages of double-wall construction. Condensation on the flysheet can then transfer through contact, while a collapsed air gap may restrict ventilation. Although the tent does not literally become a single-wall design, the risk of moisture reaching sleeping bags increases.
This problem often begins with pitching tension rather than fabric quality.
An inadequately tensioned rainfly can hang too close to the inner canopy from the outset. Rain or wind may subsequently alter its shape, creating additional contact points.
Some flysheet materials also stretch when wet. A pitch that appears properly tensioned during the afternoon may therefore need adjustment before sleeping.
Concentrate on three areas:
- Roof and sidewall clearance: look for drooping flysheet panels that touch the inner canopy, particularly around sleeping positions.
- Guyline tension: use the designated attachment points to maintain separation without overstressing seams or poles.
- Vent structure: ensure covered openings remain supported and lower airflow routes are not unintentionally closed.
Site selection can magnify the issue. A hollow near a stream or lake may collect cool air and remain relatively humid, while low ground can also accumulate rainwater.
Where permitted and safe, choose a well-drained, slightly elevated pitch with reasonable airflow. Avoid trading moisture protection for exposure to dangerous winds, flooding, falling branches or lightning.
REI’s tent setup instructions specifically recommend appropriate campsite selection, even flysheet tension and periodic tension checks, especially in wet conditions.
Before settling down, inspect the shelter from several angles. Check that the roof and sidewalls maintain clearance, vents are supported and guyline tension is balanced.
A final inspection after rain is especially valuable because damp fabric can behave differently from dry fabric.
Five checks before sleeping in a double-wall tent
- Inspect the roof and sidewalls for flysheet contact; finish with visible clearance around the inner canopy.
- Adjust designated guylines and tensioners; finish with a taut, evenly supported rainfly.
- Open and inspect the intended ventilation points; finish with unobstructed intake and outlet openings.
- Move wet clothing and equipment away from bedding; finish with a sleeping compartment free of unnecessary damp items.
- Check the groundsheet perimeter and nearby drainage; finish with no exposed footprint edges positioned to collect runoff.
The objective is not to stretch the fabric as tightly as possible. Excessive tension can damage components and distort the pitch. Follow the tent manufacturer’s setup instructions and adjust only where needed.
If condensation persists despite a well-pitched, ventilated tent, the next question is whether the waterproof materials need maintenance or whether the problem is still atmospheric moisture.
How to Re-Proof Flysheets Without Sealing Vents That Prevent Condensation?
Re-proof a flysheet by restoring the appropriate water-repellent treatment to its exterior while keeping ventilation openings, mesh and movable vent components functional. Rainfly re-proofing helps the fabric shed rain, but does not replace airflow management. Leaking seams, deteriorated waterproof coatings and condensation are separate problems that require different remedies.
The first step is identifying what has actually deteriorated.
Waterproof tent construction commonly relies on several distinct protective elements:
- Durable water-repellent treatment (DWR): helps water bead and roll off the outer surface.
- Waterproof coating or membrane: provides the fabric’s principal resistance to water penetration.
- Seam sealing: helps prevent rain entering through susceptible stitching and seam areas.
Restoring DWR does not necessarily repair a damaged waterproof coating or a leaking seam.
Likewise, treating the inner canopy with a waterproofing product can interfere with its intended function. A breathable inner should not be coated merely because condensation appears on the outer flysheet.
For detailed distinctions between these treatments, consult REI’s tent waterproofing and maintenance instructions. These describe exterior DWR application, seam-sealing procedures and material-specific coating repairs.
Before applying a treatment, identify the flysheet fabric and existing coating. Silicone-based and polyurethane-based constructions may require different compatible products.
Clean and dry the tent as directed by the manufacturer. Apply only the product specified for the relevant surface, following its instructions for coverage, excess removal and drying.
Around ventilation hardware, avoid unnecessarily coating mesh or accumulating treatment on vent stays, closures and moving flap components. This is a practical precaution to preserve their movement, not evidence that ordinary DWR application inherently blocks ventilation.
After the treatment dries, pitch the tent and test the vent openings manually. Confirm that flaps can be held open, mesh remains clear and closures still work correctly.
A controlled water test can help identify remaining rain penetration, but a closed-tent overnight test cannot reliably prove that ventilation is adequate.
If the tent still feels wet after maintenance, diagnosing the location and timing of moisture is more informative than repeatedly adding waterproofing products.
The Setup Mistake That Causes Most « My Tent Leaked » Complaints?
There is no reliable evidence in the supplied guidance that one pitching mistake causes most tent-leak complaints. However, a poorly tensioned flysheet, incorrectly sized footprint or inadequate ventilation can create wet conditions that resemble waterproofing failure. The practical solution is to identify whether the water comes from condensation, rain penetration or moisture entering at ground level.
These causes can overlap, so a wet sleeping bag alone is not sufficient evidence of a leaking tent.
The following comparison provides a starting point for diagnosis.
| Possible cause | Typical observations | Useful inspection |
|---|---|---|
| Interior condensation | Droplets on cool surfaces, potentially without rainfall | Inspect several inner flysheet surfaces and note ventilation conditions |
| Rain penetration | Localised wetting near a seam, zip, fabric defect or opening during rainfall | Inspect the suspected entry point and repeat a controlled water test where appropriate |
| Ground-level water | Moisture concentrated around the floor, corners or areas exposed to pooled water | Check floor integrity, drainage and footprint positioning |
A wipe test can provide additional clues. Dry a wet area and observe whether moisture returns as widespread droplets or appears at a particular entry point during rain. Treat the result as indicative rather than definitive.
Groundsheet positioning deserves special attention.
A footprint should normally remain within the perimeter of the tent floor. If a tarpaulin projects beyond the edges, rainfall may collect on the exposed material and run underneath the shelter.
Water can also enter through damaged floors, vulnerable seams or openings, while wet ground in contact with tent materials may contribute to moisture transfer. A correctly sized footprint reduces some exposure but does not guarantee waterproofness.
Rainfly tension creates another complication. Fabric that stretches in wet weather can develop sagging panels or contact points that were absent during pitching.
Recheck the flysheet before sleeping and after substantial changes in weather.
For a suspected product defect, record the conditions rather than relying on a general description of a wet interior. Useful evidence includes photographs of the affected location, rainfall conditions, vent positions, floor condition and pitching arrangement.
Such documentation helps communicate the problem to a retailer or manufacturer without assuming either product failure or user error.
Once material defects and ground-level water have been considered, continuous ventilation becomes the main adjustable factor for managing moisture generated by sleeping occupants.
How to Arrange Vents for Continuous Fresh Air Exchange While Sleeping?
Continuous overnight air exchange works best when the tent has separate, appropriately protected routes for incoming and outgoing air. A low intake and higher outlet can encourage buoyancy-driven movement, while openings on different sides may support wind-driven crossflow. Occupancy, weather and tent geometry determine how much ventilation is practical.
A family tent occupied by several people has more potential internal moisture sources than the same shelter occupied by one person.
Every sleeper adds water vapour through breathing and evaporation from the skin. Wet clothing, pets and damp equipment increase the moisture load further.
The aim is not to achieve an arbitrary vent-opening percentage. It is to maintain a functional airflow path while preserving weather protection and sleeping comfort.
Where the tent design supports it, a lower opening away from faces and an upper outlet near the sleeping compartment provide a useful starting configuration.
The following grid offers qualitative adjustments rather than measured ventilation requirements.
| Occupancy and conditions | Suggested arrangement | Main consideration |
|---|---|---|
| Solo camper, calm and dry | Use separated intake and outlet openings where available | Maintain airflow without unnecessary exposure |
| Two sleepers, humid conditions | Keep multiple protected openings clear and monitor condensation | Manage moisture from occupants and outdoor humidity |
| Family group, mild weather | Use available mesh panels and separated vents for wider air exchange | Avoid obstructing openings with equipment |
| Multiple sleepers, wind-driven rain | Prioritise covered vents and sheltered openings | Preserve safe ventilation without admitting rain |
These arrangements should be adapted to the actual tent. A small backpacking shelter may not offer the same openings as a family dome tent.
In larger tents, mesh doors on opposite sides can support crossflow during suitable weather. Ensure all mesh barriers remain secured against insects, and use door configurations that do not create an escape or trip hazard for children.
A low vent near the foot end and a high opening near the head end may be practical in some designs. However, exhaled moisture does not follow a fixed path directly from the face to a particular vent. Internal mixing and airflow patterns determine where it travels.
Avoid blocking vents with backpacks, blankets or storage boxes.
Closing every opening in cold weather may reduce immediate draughts but can allow humidity to accumulate. Conversely, excessively wide openings can increase heat loss and discomfort.
The appropriate compromise depends on wind, insulation, exposure and the shelter’s intended use. Ventilation should never require occupants to remain dangerously cold.
Alongside condensation control, this approach supports a more comfortable sleeping environment, although humidity management should not be confused with a complete assessment of indoor air quality.
Key takeaways before your next night under canvas
- Check that the flysheet remains separated from the inner canopy before making ventilation adjustments.
- Choose protected intake and outlet openings according to occupancy and forecast conditions, rather than sealing the tent completely.
- Keep damp gear away from sleeping areas and investigate persistent wet patches before attributing them to condensation.
How to Ventilate Tents Correctly to Prevent Headaches and Sleep Disruption?
Ventilate a sleeping tent by maintaining suitable openings for fresh-air exchange, minimising indoor moisture and avoiding direct draughts onto occupants. Poor airflow can contribute to a stuffy, humid environment, but morning headaches and disrupted sleep have several possible causes. Tent ventilation guidance alone does not establish that accumulated carbon dioxide or humidity caused those symptoms.
Air quality and moisture management overlap because occupants both exhale carbon dioxide and add water vapour to the interior.
In a small enclosed shelter, several sleepers can change the internal atmosphere more rapidly than a single occupant. Nevertheless, the resulting concentrations depend on ventilation, tent volume, occupancy and external conditions.
There is no validated universal vent configuration in the supplied sources that guarantees particular carbon dioxide levels or prevents headaches.
The practical priority is to avoid unnecessary enclosure while maintaining protection from the weather.
A straightforward family routine can help:
- Before bedtime, inspect the campsite conditions and identify protected ventilation openings.
- During suitable weather, temporarily open mesh doors or vents more widely to refresh the interior after occupants and equipment have settled.
- Set the openings for sustained, rain-protected ventilation overnight.
- Position bedding so incoming air does not blow directly across children’s faces or sleeping bags.
- Reassess airflow if the wind changes, rain enters or condensation becomes noticeable.
An optional period of wider ventilation before sleep can help exchange humid air, but there is no evidence in the supplied sources that a specific duration, such as 10–15 minutes, produces a predictable improvement in sleep or air quality.
For children, place sleeping bags away from exposed vent openings and use the tent’s intended mesh panels to separate the sleeping space from insects. Avoid blocking the actual ventilation route with bedding.
The health distinction is particularly important with camping appliances.
**Never use fuel-burning heaters, stoves, barbecues or lanterns inside tents or enclosed vestibules.** These devices can create deadly carbon monoxide exposure, and opening a vent does not make their use safe.
If anyone develops a headache alongside dizziness, nausea or unusual drowsiness where combustion equipment may have been used, leave the enclosure immediately for fresh air and seek emergency assistance. Do not assume the problem is ordinary condensation or stale air.
Humidity control is principally a matter of comfort and keeping bedding dry. Medical symptoms require separate assessment rather than a ventilation adjustment alone.
Families can therefore treat nightly ventilation as a routine part of pitching and sleeping arrangements without assuming that airflow prevents every possible cause of poor sleep.
Before the next camping trip, practise pitching the tent, identify its protected vents and check that sleeping bags remain clear of the inner walls. Those simple preparations provide a more useful starting point than buying another shelter solely because condensation appeared overnight.
Can a double-wall tent develop condensation without any rainfall?
Yes. Moisture from occupants, equipment, ground conditions and humid outdoor air can condense on a sufficiently cold flysheet even during dry weather. Double-wall construction helps keep that moisture away from sleeping areas but does not prevent its formation.
Should the inner tent ever touch the rainfly?
In designs intended to maintain separation, avoid sustained contact between the inner canopy and flysheet. Contact can transfer accumulated condensation towards the sleeping compartment. Correct pitching, evenly tensioned guylines and periodic adjustment help preserve clearance.
Does waterproofing spray stop condensation inside a tent?
No. Exterior DWR treatment helps the flysheet shed rainwater. Condensation occurs when moisture-laden air encounters sufficiently cold surfaces. Ventilation, reduced indoor moisture and separation between tent layers address that problem more directly.
Is it better to leave tent vents open during rain?
Where conditions permit, keep manufacturer-designed rain-protected ventilation openings functional rather than sealing the shelter unnecessarily. Adjust openings according to wind direction, rain intensity and the tent’s construction. Never leave an exposed opening positioned to admit driving rain.
Can a footprint prevent moisture from reaching a sleeping bag?
A properly fitted footprint can help protect the tent floor and reduce exposure to ground moisture, but it cannot prevent condensation forming on the flysheet. Keep the footprint within the floor perimeter so it does not collect and direct rainwater beneath the tent.