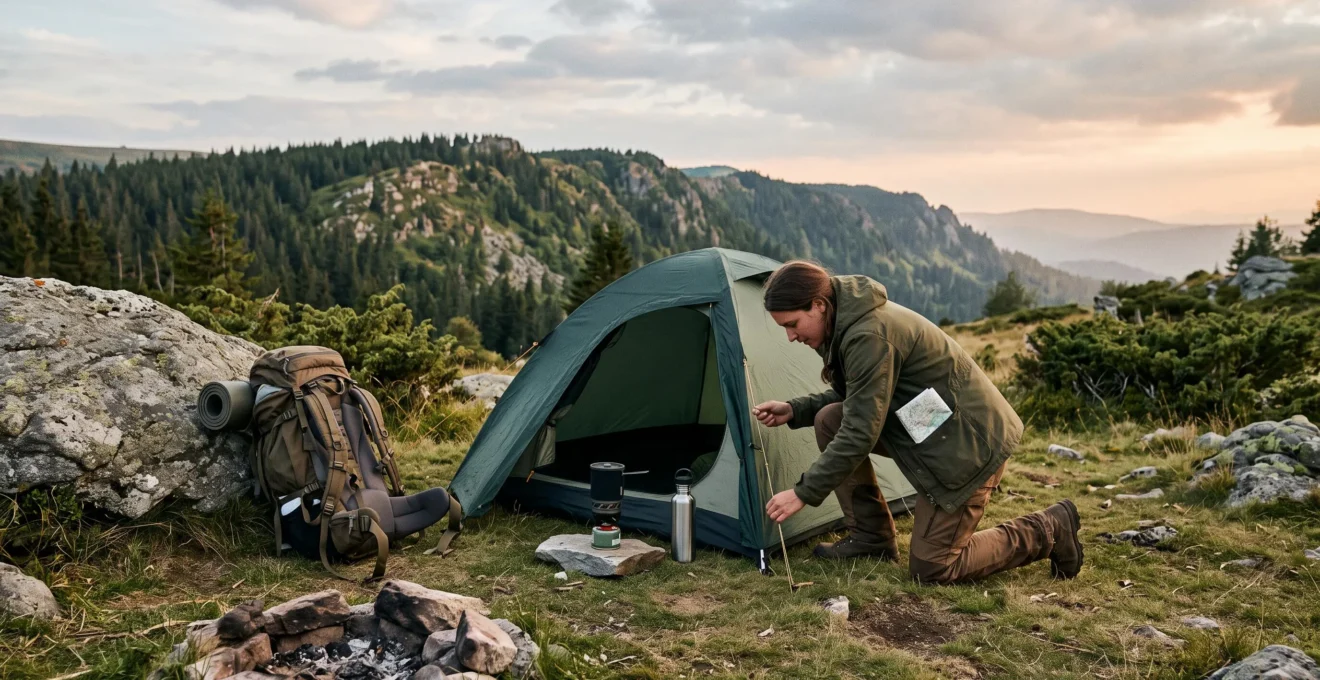
Camping alone safely without immediate backup requires more than reliable equipment or the courage to spend a night outdoors. It requires independent navigation, practiced emergency responses, realistic route planning and a communication system that can activate outside assistance if necessary.
The greatest difference between group camping and solo camping is not solitude itself. It is the absence of someone who can notice a developing problem, share decisions or take over when something goes wrong. A minor navigation mistake, damaged shelter or unexpected injury can have more serious consequences when every response depends on one person.
Fortunately, self-reliance is a trainable capability. Beginning with manageable overnight trips, practicing essential skills and establishing clear turnaround conditions allows new solo campers to gain independence without accepting unnecessary exposure. The objective is not to eliminate every uncertainty in the wilderness. It is to recognize problems early, maintain options and know when to retreat.
Solo camping safety essentials
- Progress gradually from familiar campsites to remote terrain, advancing only when basic tasks and decisions feel manageable.
- Practice navigation, self-rescue and shelter setup before depending on those abilities alone.
- Leave a detailed route plan, establish an overdue-response protocol and verify water, weather and emergency exits before departure.
- How to Progress From Group Camping to Confident Solo Wilderness Camping?
- The Mental Barrier That Stops Many Campers Going Solo More Than Once?
- What Three Skills Must You Master Before Your First Solo Remote Camping Trip?
- How to Design a Safety Check-In System for Solo Camping Without Helicopter Parents?
- Why Should You Leave a Detailed Route Plan Even for ‘Just One Night’ Solo Trips?
- Why Most Campers Run Out of Water on Day Two of Remote Expeditions?
- Swag Bag or Ultralight Tent: Which Aligns With Minimalist Solo Camping?
- How to Design Camping Expeditions That Balance Remote Adventure With Safety Checkpoints?
How to Progress From Group Camping to Confident Solo Wilderness Camping?
Progress from group camping to solo wilderness camping through increasingly independent trips, not an immediate jump into remote terrain. Begin with an overnight experience close to home, move to an established campground, then try accessible backcountry terrain before considering remote routes. Advance when you can manage essential tasks, sleep adequately and make sound decisions without relying on companions.
Group camping often conceals individual skill gaps. One person navigates, another prepares meals and someone else remembers where the first-aid kit is stored. Those arrangements work when the group stays together, but they leave important abilities untested when camping alone.
Before attempting independent wilderness travel, deliberately take responsibility for every essential task during a familiar group trip. Navigate the route yourself, prepare your own meals, manage your water and pitch your shelter without assistance. Companions can observe, but the purpose is to discover what you cannot yet accomplish independently.
A practical progression uses four stages:
- Backyard or nearby overnight: Test your complete sleeping system, cooking routine and nighttime comfort where leaving is straightforward.
- Established campground: Camp independently at a managed site with clear access, predictable facilities and other visitors nearby.
- Accessible backcountry site: Choose a permitted campsite reached by a familiar, well-marked trail with a realistic exit route.
- Remote solo trip: Attempt more isolated terrain only after demonstrating the necessary skills under conditions similar to those expected.
Evaluate each stage using three personal indicators: whether you obtained enough sleep to function, completed essential tasks without assistance and maintained reasonable judgment despite fatigue or uncertainty. These are practical self-assessment criteria, not scientifically validated certification thresholds.
Another useful training exercise is a shadow trip. Camp separately from experienced companions following an agreed plan, while remaining within a distance that allows assistance if needed. Perform every task independently and treat the arrangement as supervised practice rather than a genuinely unsupported expedition.
The emotional transition matters too. Group conversations normally fill the evening, while solo camping creates silence and uninterrupted responsibility. Prepare a simple evening routine, finish critical camp tasks before dark and avoid scheduling demanding navigation after an exhausting day.
As REI‘s expert advice on solo backpacking recommends, smaller trips on familiar terrain provide a sensible starting point. The next challenge is learning to interpret the anxiety that often accompanies those first independent nights.
The Mental Barrier That Stops Many Campers Going Solo More Than Once?
The mental barrier that discourages some campers from repeating a solo trip is the feeling of being solely responsible when something unexpected happens. Nighttime noises, isolation and imagined emergencies can make an otherwise manageable campsite feel threatening. The solution is not to suppress fear, but to rehearse realistic responses and choose a first trip with limited consequences.
There is no reliable abandonment percentage established by the supplied sources. The important distinction is between temporary discomfort, which may be manageable, and anxiety that interferes with essential safety decisions.
During the first solo night, three stressors deserve particular attention.
- Unfamiliar nighttime sounds: Practice identifying ordinary environmental noises during supervised outings. Before dark, inspect the campsite and follow local wildlife food-storage guidance rather than assuming every sound is harmless.
- No immediate second opinion: Rehearse decisions such as changing campsites, abandoning a route or responding to deteriorating weather. Write down your decision criteria before departure.
- Imagined emergencies: Consider specific situations, including injury, losing the trail or becoming overdue. Identify the appropriate response and the communication or evacuation options available.
A short mental rehearsal can make these scenarios less ambiguous. Before departure, picture arriving at camp, completing your evening routine and hearing an unfamiliar sound after dark. Practice checking for an actual hazard, remaining inside a secure shelter when appropriate and following your established emergency plan rather than reacting impulsively.
During the trip, use a brief self-assessment:
- Can you still prepare food and drinking water safely?
- Can you read your map and identify your exit route?
- Can you distinguish an observable hazard from an imagined possibility?
- Can you rest sufficiently to make safe decisions the following morning?
If anxiety remains manageable and the environment is safe, continuing a low-stakes overnight may be reasonable. If panic prevents basic tasks, situational awareness or sound judgment, retreating is the safer decision. Persistent difficulty may indicate a need for additional supervised practice.
Keep the first trip’s objective deliberately small: arrive safely, establish camp, complete a calm overnight and return as planned. Do not combine your first independent night with an ambitious summit, difficult navigation or extreme weather.
A miserable first night does not prove that solo camping is unsuitable. It may simply reveal a mismatch between the challenge and current preparation. Review what happened before deciding whether to repeat, simplify or postpone the experience.
Confidence becomes more reliable when it is supported by demonstrated competence. Three practical skills deserve particular attention before moving into remote terrain.
What Three Skills Must You Master Before Your First Solo Remote Camping Trip?
Before remote solo camping, master navigation with backup exits, basic wilderness self-rescue and independent shelter setup under difficult conditions. These skills address situations in which a companion would normally help identify mistakes, provide treatment or establish protection from the weather. Each must be practiced independently before being relied upon far from assistance.
The three skills are essential foundations, not a complete qualification for every wilderness environment. Weather, wildlife, terrain, seasonal conditions and local hazards may require additional training.
Navigation with exit-route redundancy. Learn to use a topographic map and compass, identify landmarks and recognize when your actual position differs from the intended route. Carry appropriate offline navigation tools, but do not depend entirely on a phone.
Before departure, identify at least one feasible alternative exit. Practice navigating an unfamiliar but low-risk route without cellular service, under conditions where an instructor or experienced companion can intervene if needed.
Self-rescue and emergency judgment. Wilderness first-aid training should cover serious bleeding, suspected fractures, hypothermia and decisions about movement versus sheltering in place. A first-aid kit is useful only when its owner understands how and when to use its contents.
Practice realistic scenarios through an appropriate training course. For example, determine how you would respond to a painful ankle injury that prevents normal walking. Moving might worsen some injuries, while remaining in place creates exposure risks. The correct response depends on injury severity, conditions and available assistance.
Independent camp setup. Practice selecting a suitable campsite, pitching shelter, protecting equipment from weather and preparing safe drinking water without another person helping.
Test shelter setup in controlled wind and reduced daylight. Record how long the process takes under realistic conditions, then repeat until you can complete it reliably with enough time remaining to manage other camp tasks. There is no universal safe setup time; the standard depends on the equipment, weather and environment.
These abilities interrupt potential failure chains. A navigation error becomes less dangerous when you recognize it early and have a planned exit. An injury becomes more manageable when you know how to stabilize yourself and request help. Deteriorating weather becomes less threatening when shelter can be established before exposure becomes severe.
Additional equipment cannot replace those abilities. A satellite device may provide emergency communication, but it cannot independently treat an injury, identify unsafe terrain or compensate for a poorly selected campsite.
Once the practical skills are in place, the next safeguard is ensuring someone outside the wilderness knows when and how to respond if you fail to return.
How to Design a Safety Check-In System for Solo Camping Without Helicopter Parents?
A reliable solo camping check-in system combines scheduled contact points, an agreed overdue window and clear escalation instructions. Give one trusted person your itinerary and specify when silence is expected versus when action is required. This preserves independence without leaving the contact person to improvise if you become overdue.
Think of the arrangement as a protocol rather than constant supervision. A trusted contact does not need continuous access to your location to help initiate an appropriate response.
The system has three layers:
- Scheduled check-ins: Agree on specific locations or times when communication is expected, taking account of known signal limitations.
- Overdue window: Establish a realistic grace period based on terrain, expected travel delays and available communication. Do not treat missed contact as automatically harmless.
- Escalation: Specify whom the contact should call, what information to provide and which circumstances require immediate emergency assistance rather than waiting.
The contact should receive your planned route, trailhead, campsite, alternative exits, vehicle registration details, expected return and relevant emergency information. Confirm that the person understands the plan and is available to act.
Communication technology should match the trip’s isolation.
| Option | Useful capability | Important limitation |
|---|---|---|
| Mobile phone | Calls, messages and navigation where service is available | Coverage gaps, battery limitations and device damage |
| Satellite messenger | Model-dependent messaging, location sharing and emergency functions | Service requirements, sky visibility and battery constraints vary |
| Personal locator beacon (PLB) | Dedicated emergency distress alert through a compatible rescue network | Generally not designed for routine two-way conversations; rescue is not instantaneous |
According to NOAA‘s satellite search-and-rescue system overview, compatible 406 MHz emergency beacons communicate distress signals through the international COSPAS-SARSAT system. Registration requirements and responsible rescue authorities depend on the country and device.
Check device registration, subscriptions where applicable, operating instructions and battery performance before departure. Cold conditions and obstructed sky views may affect some devices, so equipment specifications matter.
For autonomy, agree that no additional updates are required before the next scheduled contact unless an emergency occurs. The trusted person follows the established plan rather than interpreting every period of silence as a crisis.
If a serious emergency occurs, activate the appropriate emergency response immediately when possible. A routine grace period should never delay action when there is evidence of immediate danger.
Communication is most useful when it is attached to a precise itinerary. Without one, even a responsible contact may struggle to explain where assistance is needed.
Why Should You Leave a Detailed Route Plan Even for ‘Just One Night’ Solo Trips?
Leave a detailed route plan for every solo overnight because an unexpected delay can become an emergency even on a short trip. Your trailhead, intended campsite, alternative routes and expected return help responders narrow their initial search. A plan is especially important when you cannot reliably communicate from the wilderness.
The phrase « just one night » can create misleading confidence. Short trips sometimes encourage campers to carry fewer supplies or skip contingency planning. Yet an injury near dusk, a navigation mistake or unexpected weather can extend a simple overnight beyond its intended duration.
A useful route plan identifies where you expect to travel and what someone should do if you do not return. It cannot guarantee a rapid rescue, but it gives search coordinators more specific information than a vague description of the destination.
The National Park Service Trip Planning Guide recommends sharing a trip plan, checking current conditions, preparing backup options and notifying a trusted contact after completing the activity. Its general guidance covers day and overnight visits; longer backcountry expeditions require additional preparation.
Prepare a one-page document containing the information a contact could pass to emergency responders:
| Field | Information to record | Why it matters |
|---|---|---|
| Identity and contact | Name, emergency contact and relevant medical information | Supports identification and appropriate emergency response |
| Starting point | Trailhead, parking location and vehicle registration | Establishes a potential last known location |
| Planned movement | Route, direction, waypoints and intended campsite | Defines the expected travel corridor |
| Alternative plans | Possible exit trails and alternate campsites | Identifies other plausible locations |
| Personal description | Clothing colors, shelter type and experience level | Helps responders recognize the camper and assess likely decisions |
| Timing and escalation | Departure, check-ins, return deadline and emergency instructions | Clarifies when and how to initiate a response |
Keep sensitive information with the trusted contact and share it with relevant responders if needed. The document should be sufficiently detailed to be useful without creating unnecessary public exposure of personal information.
A route plan also needs a closure procedure. If your itinerary changes, communicate the revised destination and return time before taking a different route whenever possible. If communication is unavailable, follow the previously agreed rules and avoid unnecessary deviations.
Once safely back, explicitly close the plan with your contact. A camper who returns home but forgets to send the final message can trigger an avoidable search response.
A clear itinerary establishes where you intend to travel. The next step is checking whether the route provides enough water to complete that journey safely.
Why Most Campers Run Out of Water on Day Two of Remote Expeditions?
Water shortages during remote expeditions can emerge on the second day when consumption exceeds the original estimate and expected refill sources prove unavailable. Cooking requirements, physical exertion, heat and elevation gain can all contribute. However, the supplied evidence does not establish that most campers run out of water specifically on day two.
The underlying problem is cumulative miscalculation. A camper may use more water than anticipated on the first day without noticing an immediate shortage. By the following morning, the remaining supply may be insufficient to reach the next reliable source or exit.
Water planning should therefore begin with a route-specific budget rather than a universal daily allowance.
- Estimate drinking needs for each travel day based on expected exertion, temperature, terrain and personal requirements.
- Add water required for meals, particularly dehydrated food, and any other essential uses.
- Identify how much treated water must be available between verified refill opportunities.
- Include a contingency reserve appropriate to the route’s uncertainty and possible delays.
- Recalculate the remaining supply at each planned checkpoint and turn back before the reserve becomes inadequate.
For example, a hypothetical camper planning a hot uphill route with dehydrated evening meals should account for both increased drinking demand and cooking water. The exact quantity must be determined from the individual and trip conditions rather than copied from a fixed generic figure.
Water sources marked on maps are not guarantees. Seasonal streams can dry out, access can be restricted and apparently clear water can contain harmful microorganisms. Cross-check topographic maps with recent route reports, land-manager notices and other available information. Satellite imagery may provide context but cannot confirm current water availability or safety.
Identify a backup source or an exit that remains feasible if the primary refill point is dry. If neither can be verified, reconsider the route or carry enough water to avoid depending on that uncertain source.
Treatment capability is part of the water budget. The CDC recommendations for treating water while camping explain that boiling is an effective way to kill disease-causing germs. For clear water, the CDC specifies a rolling boil for one minute at elevations up to 6,500 feet (approximately 1,981 metres), or three minutes above that elevation.
Filtering followed by appropriate disinfection is another recommended approach. Follow product instructions, account for treatment time and protect equipment from freezing or damage. Boiling and ordinary disinfection do not make chemically contaminated water safe.
Carry a suitable backup treatment method when failure of the primary system would leave you without safe drinking water. A spare method is useful only if it addresses the hazards expected along the route.
Reliable water planning reduces one major uncertainty, but the shelter system must also match the conditions in which you may need to stop, rest or wait for assistance.
Swag Bag or Ultralight Tent: Which Aligns With Minimalist Solo Camping?
A swag and an ultralight tent represent different approaches to minimalist solo camping. A traditional Australian swag combines a rugged bedroll with weather protection, often favoring comfort and straightforward vehicle-based camping. An ultralight tent prioritizes portability and flexible backpacking use. The better choice depends on terrain, weather, transport and the complete sleeping system rather than shelter weight alone.
For campers unfamiliar with Australian outdoor equipment, a swag is generally a durable canvas-based sleeping shelter that may integrate bedding or a mattress. Designs vary considerably, from simple covered bedrolls to more structured enclosed shelters.
An ultralight tent is designed to reduce carried weight, often through lighter fabrics, compact poles or trekking-pole-supported construction. Its reduced packed size can make walking-based trips more practical, although durability and setup complexity vary by model.
Compare the two systems against the conditions of the actual trip:
| Decision factor | Swag | Ultralight tent |
|---|---|---|
| Transport | Often better suited to vehicle access | Usually better suited to carrying on foot |
| Rain exposure | Depends on canvas condition, design and ventilation | Depends on fabric, waterproof construction and pitching |
| Cold conditions | May accommodate integrated bedding, but insulation still needs assessment | Requires a suitable sleeping bag and insulated sleeping pad |
| Terrain | Works well where adequate space and a suitable ground surface exist | Compact designs may offer more pitching flexibility |
| Trip duration | Convenient for repeated vehicle-based overnight stays | More practical when carrying shelter over multiple walking days |
| Field repairs | Depends on canvas, seams and structural components | Lightweight fabrics may require specialized repair materials |
| Relocating camp | Bulk can complicate movement on foot | Smaller packed volume can simplify relocation |
The hidden weight matters. A swag’s comfort may come from a heavier mattress and bedding, making it practical near a vehicle but less suitable for extended backpacking. An ultralight tent may require a separate sleeping pad, insulation and additional stakes or support components.
Minimalism should therefore be evaluated as total system weight and operational reliability, not simply the advertised weight of the shelter.
Solo safety adds another consideration: deployment under fatigue or deteriorating weather. Test the complete system with cold hands, reduced light and realistic wind conditions in a safe training environment. A shelter that is easy to pitch in calm weather may require different techniques when conditions change.
For vehicle-based camping, a suitable swag may offer a straightforward and comfortable arrangement. For longer walking routes, an appropriate ultralight tent usually provides greater transport flexibility. Neither option automatically provides sufficient protection in severe conditions.
The shelter must also support your exit strategy. If the route may require moving camp quickly, consider packed volume and setup time. If vehicle access is central to the plan, verify that the vehicle remains reachable and that weather will not compromise the return route.
With navigation, communication, water and shelter considered together, the final challenge is designing an expedition where every increase in remoteness is matched by an appropriate safety margin.
Key takeaways before planning your route
- Remote terrain increases the consequences of delays, equipment problems and navigation errors, even when the intended trip is short.
- Checkpoints should be meaningful decisions where you can assess conditions, supplies and remaining exit options.
- The safest route is not necessarily the shortest or least remote; it is one that remains manageable if an expected condition changes.
How to Design Camping Expeditions That Balance Remote Adventure With Safety Checkpoints?
Design a remote solo camping expedition by matching each increase in isolation with stronger preparation, communication and exit options. Identify decision points before departure, verify water and shelter requirements, and establish conditions that trigger a turnaround. Safety checkpoints preserve the freedom to explore while preventing small problems from becoming unmanaged emergencies.
Think of remoteness as a practical risk budget. Distance from a road, difficult terrain, limited communications and exposure to severe weather can each reduce your margin for error. More isolated routes therefore demand stronger independent skills and more robust contingency arrangements.
Begin by mapping the intended route and identifying locations where important decisions must be made. Useful checkpoints include a trail junction with an alternative exit, a verified water source, a campsite with another accessible approach or the last practical turnaround point before entering more difficult terrain.
At each checkpoint, evaluate the conditions that determine whether continuing remains reasonable:
- Is the weather consistent with the equipment and experience available?
- Is there enough daylight to reach the next safe stopping point?
- Are drinking water and emergency reserves adequate?
- Can you still navigate accurately and perform essential tasks?
- Is the planned exit still available if conditions deteriorate?
Set turnaround rules before departure. For instance, decide that you will not continue beyond a particular junction if the expected water source is unavailable or the remaining daylight is insufficient. This turns retreat into a planned response rather than an emotional judgment made under pressure.
The appropriate system also changes with the trip profile. A first overnight at an established campground can use a straightforward route plan and a confirmed return message. A vehicle-based swag trip requires attention to road access, vehicle reliability and local communications. A multi-day remote expedition may need more detailed waypoints, stronger navigation capabilities, reliable emergency alerting and additional training.
There is no universally correct check-in frequency or fixed overdue grace period. Both must reflect the environment, available technology, trip duration and the instructions agreed with the trusted contact.
Five actions to complete before your first independent expedition
- Verify essential skills: Complete independent navigation, first-aid scenario and shelter setup practice; record any skill gaps that still need training.
- File the route plan: Send a document containing your trailhead, route, intended camp, alternative exits and expected return to a trusted contact.
- Activate the check-in protocol: Confirm the scheduled contact points, overdue window and escalation instructions with the person responsible.
- Validate water and conditions: Prepare a written water budget, verify expected sources and check current weather, restrictions and route hazards.
- Test the complete shelter system: Confirm that shelter, sleeping insulation, cooking equipment and emergency supplies suit the expected conditions; document your turnaround criteria.
Before leaving, make sure the route plan and the actual trip agree. Check whether permits, camping restrictions, fire regulations or wildlife precautions apply to the destination. Requirements vary between countries, parks and land-management authorities.
A successful solo expedition is not defined by reaching the most isolated campsite. It is defined by maintaining enough control over decisions and resources to return safely, including when the original plan becomes unsuitable.
Choose one manageable solo overnight, complete the five pre-departure actions and establish a clear turnaround point. After returning, review what worked and what required improvisation. Use that evidence—not the desire to prove independence—to decide when the next remote adventure is appropriate.
Is it safe to camp alone for the first time?
A first solo camping trip can be approached with manageable risk when the destination matches your skills, weather conditions are suitable and a trusted contact knows your itinerary. Begin at a familiar, established campsite with a straightforward exit rather than a remote wilderness location. No outdoor trip is completely risk-free.
Can you camp alone safely without mobile phone coverage?
Camping beyond cellular coverage requires stronger preparation, independent navigation and a reliable emergency plan. A suitable satellite emergency device may provide an additional alerting option, but its limitations must be understood. Share your route and return deadline with a trusted contact before departure.
What should you do if you become lost while camping alone?
Stop before uncertainty becomes a larger navigation problem. Assess your location using available maps, compass and recognizable terrain features. Avoid continuing blindly. If you cannot establish a safe route, evaluate whether remaining in a sheltered location and requesting assistance is safer than moving. Activate emergency communication when the situation warrants it.
Should a solo camper carry a personal locator beacon?
A compatible personal locator beacon can provide an important emergency alerting option, particularly in remote areas without cellular service. It is not a substitute for navigation, first-aid training, suitable equipment or a shared itinerary. Check the device’s registration requirements and operating instructions for the country in which it will be used.
How do you know when you are ready for a longer solo wilderness trip?
Readiness is better judged through demonstrated performance than confidence alone. You should be able to navigate independently, establish shelter in expected conditions, manage water and food, respond appropriately to foreseeable emergencies and follow a clear check-in plan. If any critical task still depends on another person, practice it in a lower-risk setting before extending your trip.