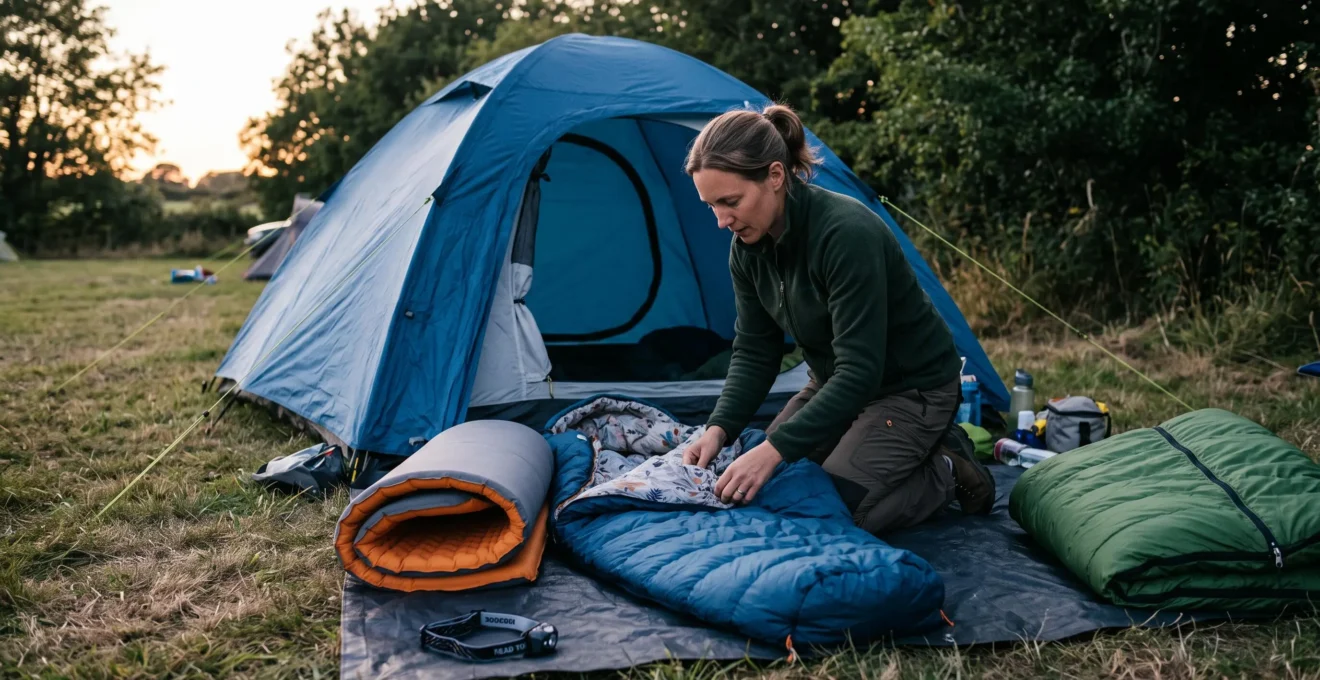
Comfortable year-round camping depends on controlling heat loss, excess warmth and moisture throughout the night. A sleeping bag alone cannot solve all three problems. Ground insulation, adjustable bedding, tent ventilation and campsite exposure determine whether a sleeping setup remains comfortable when temperatures change.
The most reliable approach is to build a modular sleep system around the coldest expected overnight conditions, then remove or adjust layers when the weather is warmer. In summer, airflow and shade often matter more than additional equipment. In winter, sufficient sleeping pad insulation and moisture protection become essential.
Conditions can also change substantially between a sheltered campsite and an exposed mountain pitch. A forecast that seems comfortable at the trailhead may not describe the conditions where the tent will actually stand.
Understanding how these factors interact makes it possible to choose equipment more accurately, avoid unnecessary purchases and recognise when familiar three-season gear is no longer appropriate.
Year-round camping temperature essentials
- Build an adjustable sleeping system using a suitable sleeping pad, temperature-rated bag or quilt and removable layers.
- Manage summer heat with shade and low-to-high ventilation; manage winter cold by prioritising ground insulation and dry bedding.
- Choose tents and clothing for the coldest, wettest and most exposed conditions expected, not simply the calendar season.
- How to Build a Modular Sleep System That Works From 5°C to 25°C?
- Single-Season or Four-Season Tent: Which for Year-Round UK Camping?
- The Ventilation Mistake That Makes Summer Tents Unbearably Hot
- How to Stop Ground Cold Penetrating Your Sleeping Bag on Winter Camping Trips?
- At What Temperature Should You Stop Using Three-Season Gear and Upgrade to Winter Equipment?
- How to Predict Summit Temperature From Lowland Starting Conditions?
- What Is the Science Behind Double-Wall Tents Staying Dry Inside?
- How to Pack for Camping Trips Where Temperature Drops 15°C From Base to Summit?
How to Build a Modular Sleep System That Works From 5°C to 25°C?
A modular sleeping system covering approximately 5°C to 25°C combines a temperature-appropriate sleeping bag or quilt, an insulated sleeping pad and removable layers. Rather than buying separate bags for every season, campers adjust insulation and ventilation according to the forecast. The system must still provide adequate warmth at its coldest intended temperature.
Start with the sleeping bag’s tested comfort rating rather than its advertised lower limit. An adjustable quilt offers more ventilation in warm weather, while a properly fitted sleeping bag reduces unwanted draughts on cooler nights. A liner can improve cleanliness and offer supplementary comfort, but its warmth contribution is not a dependable fixed number.
The sleeping pad provides a separate thermal barrier against the ground. Its R-value measures resistance to heat transfer: higher values indicate greater insulation. An insulated inflatable pad can form the core of the system, with a closed-cell foam mat added when conditions become colder.
REI Co-op‘s sleeping pad insulation guide explains how pad R-values relate to seasonal use and why stacked pads can provide additional thermal resistance.
The following configurations are illustrative planning options, not laboratory-validated comfort guarantees for each temperature band.
| Expected overnight air temperature | Sleeping layers | Ground insulation and adjustment |
|---|---|---|
| 20–25°C | Light liner or breathable quilt | Comfortable pad; uncover or remove bedding as needed |
| 15–20°C | Light quilt or loosely opened sleeping bag | Pad selected for ground conditions; ventilate bedding |
| 10–15°C | Sleeping bag with a suitable tested comfort rating | Consider a pad around R 2–3.9 for cool conditions |
| 5–10°C | Bag with comfort rating at or below the expected low; dry sleepwear | Consider R 4 or higher when ground conditions are cold |
Air temperature does not perfectly predict ground temperature. A warm evening following prolonged cold weather may still require more ground insulation than expected. Conversely, carrying a highly insulated pad in summer may add weight without solving overheating caused by the tent or bedding.
Moisture management is equally important. Damp base layers, condensation and wet insulation can reduce real-world comfort. Down insulation is particularly vulnerable when wet. Keep dedicated sleeping clothes dry, air bedding whenever conditions allow and avoid trapping damp equipment against the sleeping bag.
Modularity has a weight limit. Multiple liners, quilts and supplementary pads can eventually weigh or occupy more space than a dedicated cold-weather setup. Compare the complete packed system, not individual components, before choosing a combination.
Once the sleeping layers are appropriate, the tent becomes the next important variable: it must protect against weather without trapping unnecessary heat or moisture.
Single-Season or Four-Season Tent: Which for Year-Round UK Camping?
For many UK campers, a robust three-season tent is more versatile than an expedition-style four-season model. The correct choice depends on wind exposure, snow loading, campsite location and winter frequency rather than the label alone. A true winter tent becomes more appropriate when severe winds, drifting snow or exposed mountain conditions are realistic possibilities.
Tent categories describe intended conditions, but their construction matters more than the marketing terminology. Pole geometry, fabric coverage, guyline attachment points and ventilation openings determine how a shelter performs.
| Design factor | Typical three-season tent | Typical four-season tent |
|---|---|---|
| Pole structure | Designed for ordinary recreational weather, with strength varying by model | Often reinforced or more extensively supported for severe exposure |
| Mesh coverage | Often greater for airflow | Frequently reduced or adjustable for weather protection |
| Flysheet | Rain protection with ventilation-focused openings | Often more extensive coverage against wind-driven precipitation |
| Snow loading | Generally not intended for substantial accumulation | Selected designs are better suited to snow, subject to manufacturer limits |
| Warm-weather comfort | Usually easier to ventilate | May retain more heat and condensation |
The UK presents a particular challenge: mild but damp winters in many lowland areas, frequent wind-driven rain and potentially severe conditions in exposed uplands. A well-built three-season tunnel or geodesic tent may suit sheltered, snow-free camping across much of the year, provided its actual wind and weather capabilities are adequate.
However, that recommendation does not extend automatically to Scottish winter mountains or exposed snow-covered terrain. Mountaineering Scotland‘s winter camping advice emphasises robust shelter, reliable anchoring and careful site selection in demanding winter conditions.
Before selecting a tent, consider four practical questions:
- Will the tent be used mainly on established, sheltered campsites or exposed wild-camping pitches?
- Could heavy snowfall, drifting snow or severe winds occur?
- How often will camping take place during colder shoulder seasons or winter?
- Will the tent also need to remain comfortable during warm summer nights?
Buying a stronger tent than necessary can introduce disadvantages. Additional poles increase packed weight, while reduced mesh and smaller ventilation openings may increase condensation or overheating in mild weather.
Likewise, a lightweight summer shelter should not be treated as suitable for winter simply because it has survived occasional cold nights. Weather resistance and snow-load capability must be evaluated separately from sleeping warmth.
Even an appropriately selected tent can become uncomfortable when its ventilation is poorly managed, particularly during hot summer afternoons.
The Ventilation Mistake That Makes Summer Tents Unbearably Hot
The most common practical ventilation mistake is closing or obstructing both low and high openings. Solar radiation warms the flysheet and enclosed air, while restricted airflow slows heat removal. Opening low and high vents together allows warmer air to escape and replacement air to enter, although ventilation cannot fully compensate for strong sunlight.
During sunny weather, the flysheet absorbs and transfers heat into the enclosed space. When vents remain closed for privacy, rain protection or insect avoidance, warm air can accumulate faster than it escapes.
Low and high openings work together because warmer air tends to rise. Wind can also drive cross-ventilation when openings are appropriately positioned. Opening only a roof vent may provide less airflow than maintaining both an inlet and an outlet.
A useful setup method is to choose a shaded pitch where possible, orient the tent to reduce afternoon solar exposure and open compatible low and high vents without compromising rain protection. Keep mesh insect screens closed when needed, and avoid blocking ventilation with bags or clothing.
Ventilation also affects condensation. Occupants release moisture through breathing, while damp clothing and equipment add humidity. Completely sealing the tent overnight can trap that moisture, allowing it to condense on cooler surfaces as temperatures fall.
Rain complicates the decision but does not always require closing every opening. A sheltered vestibule can provide an air buffer, and many tents have protected vents designed to remain open during ordinary rainfall. Adjust openings according to wind direction and the manufacturer’s guidance.
Ventilation is not active cooling. When outside air is already very hot, airflow may improve comfort but cannot reliably lower the tent below ambient air temperature. Strong solar gain can also overwhelm modest ventilation improvements.
In those conditions, site selection becomes more important. Natural shade, reduced afternoon exposure and a suitable flysheet can help limit heat accumulation. Avoid placing the tent where changing sunlight will expose it during the hottest part of the day.
Privacy and airflow can often coexist by using screened vents, partially opened vestibules and the tent’s designed ventilation features rather than fully opening sleeping compartments.
Warm-weather comfort depends on removing excess heat, but winter comfort reverses the priority: limiting heat transfer into the cold ground becomes essential.
How to Stop Ground Cold Penetrating Your Sleeping Bag on Winter Camping Trips?
Prevent ground-related heat loss by using a sleeping pad with sufficient thermal resistance for the conditions. Sleeping bag insulation becomes compressed beneath body weight, reducing its ability to resist downward heat transfer. A properly insulated pad, or a compatible combination of pads, protects against cold ground more effectively than relying on a thicker sleeping bag alone.
A sleeping bag traps air within its insulation, slowing heat transfer. Under the sleeper, compression reduces the thickness of that insulating layer. Heat can then move through the compressed material into the colder surface below.
This does not establish that most total body heat loss always occurs downward. The relative contribution depends on the sleeping system, temperature difference, exposed surfaces and environmental conditions. Nevertheless, inadequate ground insulation can make an otherwise suitable bag feel cold.
Sleeping pad R-values provide a useful comparison. The general seasonal guidance presented by REI Co-op is:
| Pad R-value | General application | Planning consideration |
|---|---|---|
| Below 2.0 | Warm weather | Limited insulation for cold ground |
| 2.0–3.9 | Cool weather | Suitable for many mild conditions |
| 4.0–5.4 | Cold weather | Consider for colder ground and winter use |
| 5.5 or higher | Extremely cold weather | Useful where substantial ground insulation is required |
These are general categories, not guarantees tied to specific ground temperatures. Individual cold sensitivity and the complete sleep system still matter.
Stacking a closed-cell foam mat beneath an insulated inflatable pad can increase overall resistance to heat flow. Under the additive approach described in the sleeping pad guidance, a hypothetical R 2 foam pad combined with an R 4 inflatable pad gives an estimated total R-value of 6.
The foam layer also provides some protection against punctures and remains usable if an inflatable pad fails. However, stacking adds bulk, and a single adequately insulated pad may be lighter or more convenient.
Snow requires particular attention. Although snow can act as insulation in some circumstances, sleeping directly above a snow-covered surface still creates a substantial thermal challenge. The snow’s structure, moisture and temperature influence the conditions beneath the pad.
Where snow cover is shallow, clearing a suitable patch of ground may be appropriate. In deeper snow, compacting a stable platform helps prepare the pitch. Snow anchors and site selection must also account for wind and accumulation.
Moisture beneath the sleeping system should be controlled through appropriate tent flooring, groundsheet protection and careful site choice. A reflective emergency blanket or spare clothing cannot be assumed to replace a sleeping pad with a known insulation rating.
If a camper feels cold mainly around the hips, shoulders or contact points against the ground, inadequate pad insulation is a plausible cause. If cold is concentrated around the upper body or exposed openings, the bag’s fit, draught control or insulation may be responsible instead.
Diagnose the direction of the cold before replacing equipment. Compare the pad rating, ground conditions and bag comfort rating together rather than assuming that the sleeping bag is always the problem.
Once ground insulation is sufficient, the next question is whether the remaining three-season equipment can safely handle the expected weather.
At What Temperature Should You Stop Using Three-Season Gear and Upgrade to Winter Equipment?
There is no universal temperature at which three-season camping equipment becomes unsuitable. The upgrade point depends on overnight temperature, ground conditions, wind, precipitation, snow and campsite exposure. Equipment should be upgraded when its tested capabilities no longer provide an appropriate margin for the forecast, rather than when a particular calendar date or temperature threshold is reached.
A sheltered campsite at a temperature near freezing presents different challenges from an exposed mountain pitch at the same air temperature. Wind-driven precipitation, drifting snow and freezing condensation may create equipment problems that a simple temperature forecast does not reveal.
Sleeping bag ratings also need careful interpretation. Standardised EN and ISO testing distinguishes between comfort and lower-limit values.
The comfort rating is the more conservative reference for someone who tends to sleep cold. The lower-limit rating represents a different laboratory comfort condition and should not automatically be treated as a suitable target for every camper.
REI Co-op’s explanation of sleeping bag temperature ratings describes these distinctions and the limitations of laboratory testing.
Standardised tests use controlled assumptions, including a mannequin wearing base layers and resting on a sleeping pad. Real campers differ in their sensitivity to cold, and their equipment may be affected by dampness, wind exposure and other environmental factors.
Extreme or survival-oriented ratings should never be interpreted as comfortable planned sleeping temperatures.
Equipment warning signs include frost interfering with zips, excessive flysheet movement or sagging, frozen condensation affecting the interior, persistent moisture in insulation and inadequate anchoring in changing ground conditions.
These signs are not all definitive proof that a tent has failed, but they should prompt immediate reassessment. If the shelter cannot remain stable or the sleep system cannot maintain warmth, continuing to rely on it may be unsafe.
Five checks before committing to a cold-weather campsite
- Record the forecast overnight low at the intended pitch and identify the coldest expected period.
- Write down the sleeping bag’s tested comfort rating, or mark it as unverified if no standardised rating is available.
- Record the sleeping pad’s R-value and calculate the estimated combined value if compatible pads will be stacked.
- Check the tent’s stated wind and snow suitability against the forecast, producing a clear shelter suitability decision.
- Inspect insulation, zips, poles, guylines and moisture protection, then prepare a written alternative plan if conditions exceed equipment capability.
For campers extending their season gradually, upgrading the sleeping pad may be the most effective first purchase when ground insulation is inadequate. A suitable additional clothing layer or supplementary quilt may also extend comfort within reasonable limits.
However, partial upgrades become a false economy when the tent cannot withstand the expected conditions or the sleeping bag lacks sufficient insulation. More bedding cannot compensate for a structurally unsuitable shelter.
Temperature forecasts also become less straightforward when the campsite is higher than the starting point, making mountain-specific weather assessment necessary.
How to Predict Summit Temperature From Lowland Starting Conditions?
Summit temperature can be estimated from a lowland forecast using the environmental lapse rate, which describes how air temperature generally changes with altitude. The UK Met Office gives an average cooling rate of approximately 2°C per 300 metres of ascent. This provides a starting estimate, but local mountain forecasts should take priority because atmospheric conditions can produce substantial variations.
The calculation begins with the altitude difference between the starting location and the intended summit or campsite. Applying the average lapse rate gives an approximate temperature reduction.
2°C per 300 m
Approximate average cooling with altitude given in UK mountain weather guidance; actual changes vary with atmospheric conditions.
Met Office mountain safety guidance.
Consider a hypothetical journey beginning at 12°C with a summit 750 metres above the starting point. Using the average lapse rate gives an estimated cooling of approximately 5°C, producing an illustrative summit air temperature of 7°C.
This is a planning estimate, not a forecast. Temperature inversions can produce warmer conditions above colder valleys, particularly when fog or cold air is trapped at lower elevations. Cloud, precipitation and changing weather systems can also alter the expected pattern.
Wind adds another important distinction. Wind chill describes how exposed people experience accelerated heat loss under windy conditions. It does not mean that the actual air temperature has fallen by the same amount.
For mountain travel, compare the lapse-rate estimate with a mountain-specific forecast, then assess wind speed, precipitation and exposure separately. A summit forecast can reveal conditions that a nearby town forecast misses.
Translate the resulting assessment into clothing and shelter choices. Exposed, wet or windy conditions may require a windproof and waterproof shell, additional insulation, gloves and suitable head protection even when the estimated air temperature appears moderate.
For overnight trips, evaluate the forecast at the actual camping elevation rather than using the trailhead reading. The coldest overnight conditions may occur after the ascent has finished.
Temperature predictions should also include uncertainty. If forecasts disagree or conditions are changing rapidly, a more conservative equipment choice or a lower, sheltered campsite may be appropriate.
Once the likely temperature and exposure are understood, moisture control inside the tent becomes especially important because cold surfaces can encourage condensation.
What Is the Science Behind Double-Wall Tents Staying Dry Inside?
Double-wall tents reduce contact between occupants and condensation by separating the inner sleeping compartment from the outer flysheet. Warm, humid air can condense on the colder flysheet, while the inner layer provides a physical barrier between that moisture and sleeping equipment. The design reduces direct exposure to condensation but does not eliminate moisture formation.
Condensation occurs when humid air reaches a surface cold enough for water vapour to change into liquid water. Occupants contribute moisture through breathing, while wet boots, clothing and other equipment increase the humidity inside the shelter.
The outer flysheet is exposed to cooler outside conditions and may become a condensation surface. In a correctly pitched double-wall tent, the gap between the flysheet and inner tent helps keep droplets away from occupants.
That air gap must remain intact. If the flysheet sags against the inner, moisture can transfer through contact. Poorly tensioned fabric, blocked ventilation and overcrowded interiors can all undermine the benefit of the two-layer construction.
Double-wall tents are often convenient in damp recreational camping conditions because the inner compartment provides separation from the outer weather barrier. Single-wall shelters may offer advantages in packed weight and simplicity, but moisture management depends heavily on their materials, ventilation and intended environment.
Neither construction is universally superior. A well-ventilated single-wall shelter may perform better in a suitable environment than a poorly pitched double-wall tent. Conversely, a double-wall design can be particularly useful where prolonged rain and cool, humid conditions are expected.
To make the design work, tension the flysheet correctly, maintain clearance from the inner tent and keep ventilation openings functional. Store wet equipment in an appropriate porch or vestibule when possible, without obstructing airflow or exits.
Condensation can still develop on the inner tent when humidity is high or the inner fabric becomes sufficiently cold. Double-wall construction should therefore be understood as a moisture-management strategy rather than a guarantee of a dry interior.
Wipe away excessive moisture when practical, avoid packing wet fabric directly against dry sleeping equipment and air the shelter during suitable weather.
These practices are particularly important during multi-night trips, when moisture accumulation can progressively affect insulation and sleeping comfort.
Effective moisture control preserves the performance of the sleep system, but trips involving substantial altitude changes also require careful decisions about what equipment to carry and when to use it.
Key takeaways before packing for altitude
- Plan the overnight sleep system around the coldest expected campsite conditions, not the warmer departure temperature.
- Keep weather protection and essential insulation accessible during the ascent so changing conditions do not require unpacking the entire bag.
- Reduce duplicated clothing where practical, but do not sacrifice essential ground insulation, shelter capability or protection from wet and windy conditions.
How to Pack for Camping Trips Where Temperature Drops 15°C From Base to Summit?
For a camping trip with a forecast 15°C temperature difference between the base and summit, organise equipment around the conditions expected at each stage of the journey. Wear breathable layers while moving, keep insulation and weather protection accessible, and pack the overnight sleeping system for the coldest expected campsite conditions rather than the departure temperature.
A 15°C difference should be treated as a trip-specific planning scenario, not as a guaranteed result of a particular elevation gain. Mountain forecasts, wind exposure and precipitation remain essential inputs.
The simplest packing method divides equipment into three functional groups: clothing worn during movement, layers that must be accessible quickly and equipment that can remain deeper in the pack until camp is established.
| Journey phase | Equipment arrangement | Main purpose |
|---|---|---|
| Warm departure | Breathable base layer and suitable walking clothing | Limit overheating and moisture accumulation |
| Cooling ascent | Accessible insulating layer, waterproof shell and gloves | Adapt promptly to wind, rain and falling temperature |
| Exposed summit | Additional insulation and protective outer layers as conditions require | Reduce heat loss during rest and exposure |
| Overnight campsite | Dry sleeping clothes, rated sleeping bag or quilt and insulated pad | Maintain warmth through the coldest overnight period |
| Descent | Removable layers and accessible storage space | Adjust insulation as temperature and activity change |
For an illustrative trip starting at 20°C and reaching 5°C at the summit, the clothing used comfortably at the trailhead is unlikely to provide adequate protection during prolonged rest at the higher location.
However, sleeping at the summit requires more than selecting clothing for 5°C. The overnight minimum may be lower than the daytime summit temperature, so the sleep system must be planned using the campsite’s overnight forecast.
Reuse the modular approach established earlier: select a sleeping bag with an appropriate comfort rating, a pad with sufficient R-value and dry sleepwear. Avoid packing several overlapping insulation pieces unless each has a clear role.
When balancing weight against warmth, prioritise equipment that addresses a distinct risk. An adequately insulated sleeping pad prevents ground-related heat loss; a waterproof shell helps manage wet and windy exposure; a dry insulating layer supports warmth during inactivity.
Compare complete systems rather than individual item weights. A lightweight sleeping bag combined with multiple supplementary layers may not save weight compared with a more suitable dedicated bag.
Families or groups may be able to share certain communal items, such as appropriate shelter components or other group equipment. Personal essentials—including sufficient sleeping insulation, protective clothing and access to necessary safety equipment—should not depend on another person’s availability.
Pack critical insulation in waterproof protection, and keep frequently needed layers near the top or in accessible compartments. A system that requires extensive unpacking in wind and rain can discourage timely clothing adjustments.
During descent, remove excess insulation before sweating heavily, while keeping protective layers available if the weather changes. Damp clothing worn into the sleeping bag can undermine overnight comfort even after temperatures become milder.
For the next trip, write down the expected temperature at departure, summit and overnight campsite, then assign every clothing and sleeping component to a specific condition. This creates a practical packing plan that can be adjusted without sacrificing essential warmth or weather protection.
Can one sleeping bag work for both summer and winter camping?
One adjustable sleeping bag or quilt can cover a useful range of temperatures when combined with appropriate ground insulation and removable layers. However, very warm summers and severe winter conditions may exceed the practical comfort range of a single system. Choose equipment according to tested ratings and expected conditions rather than assuming that additional liners can compensate for insufficient insulation.
Does a thicker sleeping bag eliminate the need for an insulated sleeping pad?
No. Sleeping bag insulation compresses beneath the body, reducing its effectiveness against ground heat loss. An appropriately rated sleeping pad provides the necessary thermal barrier. The bag and pad should be selected as complementary parts of the same system.
Should tent vents remain open during cold nights?
Maintaining suitable ventilation can help remove humid air and reduce condensation, even in cold weather. Openings should be adjusted to wind, precipitation and the tent’s design. Ventilation should not compromise shelter stability or allow substantial rain or snow into the sleeping compartment.
Can wearing extra clothes compensate for a sleeping bag with an insufficient temperature rating?
Dry, appropriately fitted clothing can contribute additional insulation, but its benefit varies and should not be treated as a guaranteed temperature extension. Excessively bulky clothing can also compress sleeping bag insulation. If the forecast falls below the system’s dependable comfort range, a more suitable sleeping bag and pad combination is the safer planning choice.
Why does a sleeping bag sometimes feel colder on the second night of a camping trip?
Possible explanations include accumulated moisture, damp sleeping clothes, reduced insulation loft, colder ground or a change in overnight weather. Inspect the bag and pad, dry equipment when conditions permit and compare the actual conditions with the system’s ratings. A colder second night does not necessarily mean the sleeping bag itself is defective.