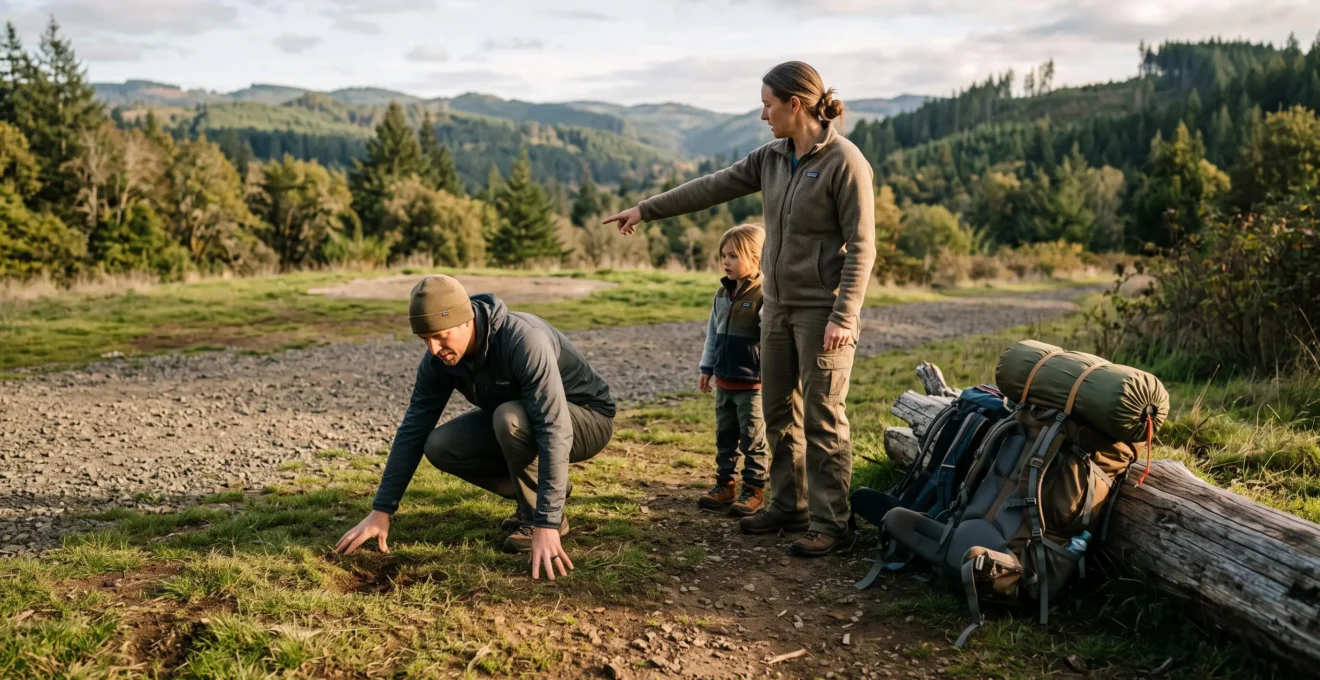
A clearing can look ideal at sunset and become dangerous after dark. Water collects in shallow depressions, dead branches fall during gusts, and a sheltered hollow may leave campers without reliable emergency communications. These risks are easier to identify before unpacking than after a tent is standing.
A practical 15-minute campsite assessment begins with a simple rule: **inspect first, pitch second**. Check the ground, examine overhead hazards, assess weather exposure, confirm that camping is permitted, and establish how to leave or request help if conditions deteriorate.
The 15-minute target is a field-planning framework, not a scientifically validated safety guarantee. Difficult terrain, uncertain weather or poor visibility may require considerably longer. If a serious hazard remains unresolved, reject the site rather than rushing the assessment.
For UK woodland and moorland camping, permission and local access rules matter as much as physical suitability. A location that appears safe is not automatically a lawful place to spend the night.
Safe campsite selection in three decisions
- Inspect the ground: reject drainage channels, flood-prone hollows, unstable surfaces and unsuitable sleeping slopes.
- Look above and around: identify dead branches, unstable trees, exposed terrain and deteriorating weather before unpacking.
- Confirm your fallback: check camping permission, communications, remaining daylight and a safe exit route.
- How to Check Ground Suitability for Your Tent in Five Minutes or Less?
- The Overhead Hazard That Injures Campers During Night-Time Windstorms
- What Leave No Trace Actually Requires When Wild Camping for One Night?
- When to Walk Away From a Campsite Even If You’re Exhausted?
- Why Your Phone Signal Matters More Than Comfort When Choosing Wild Campsites?
- When Should You Start Pitching to Finish Before Poor Light or Wind Picks Up?
- Why Do Swag Users Set Up Camp in 90 Seconds While Tent Campers Take 20 Minutes?
- How to Pitch Tents Correctly to Withstand Overnight Wind and Rain?
How to Check Ground Suitability for Your Tent in Five Minutes or Less?
Check tent ground suitability by walking the entire footprint, testing surface firmness, identifying obstacles and tracing where rainwater would flow. A five-minute inspection can reveal obvious problems before equipment is unpacked. However, apparently dry, level ground is not necessarily safe: drainage position and surrounding terrain matter as much as immediate surface comfort.
Begin by identifying an area large enough for the tent and its guy lines without disturbing vegetation or obstructing a path. Keep the tent packed while examining the ground.
A practical five-minute routine follows this sequence:
- First minute — walk the footprint. Check the intended sleeping area and the surrounding space for rocks, exposed roots, sharp debris, animal activity and uneven ground.
- Second minute — test firmness. Press a boot heel or trekking pole gently against several points. Notice whether the surface gives way, feels saturated or differs significantly across the footprint.
- Third minute — examine drainage. Look for shallow hollows, compacted sediment, debris lines or vegetation that suggests previous water movement.
- Fourth minute — check the slope. Identify whether the sleeping surface is sufficiently level and whether the tent can be anchored securely.
- Fifth minute — make the decision. Accept the ground, adjust the footprint or reject the location.
This is a suggested field routine, not a formally validated soil-testing method. A firm surface does not prove that the ground will remain dry.
The most important drainage question is: **Where would the water go if it rained hard tonight?**
Avoid dry streambeds, channels at the bottom of slopes, flood-prone flats and depressions that could collect runoff. Sediment deposits or vegetation marked by previous water movement can be warning signs, although their absence does not establish safety.
The National Park Service campsite selection and setup guidance recommends level ground outside low-lying drainage areas and advises campers to keep their heads uphill when a slight sleeping slope is unavoidable.
A gently sloping surface may be manageable if it is stable and does not direct runoff beneath the tent. Position the sleeping mat lengthwise with the head marginally higher than the feet, without digging or modifying the terrain.
Do not confuse comfortably flat with safely flat. A smooth patch of grass beneath a hillside may be less suitable than a slightly uneven area on stable, well-drained ground.
Once the ground passes inspection, look upward. A suitable sleeping surface offers little protection from unstable trees and falling branches.
The Overhead Hazard That Injures Campers During Night-Time Windstorms
Dead, broken or suspended branches—often called widowmakers—are serious campsite hazards because they can fall during strong winds without warning. A tree may appear healthy while supporting a damaged limb above the intended pitch. Inspect the entire overhead area and avoid positions within the potential fall path of unstable trees or branches.
A 60-second canopy scan is a useful initial screening method when visibility allows.
Stand back from the intended pitch and look upward across the entire area the tent would occupy. Examine nearby trees from different angles rather than checking only the trunk closest to the tent.
Look for:
- Dead branches suspended above the proposed sleeping area.
- Broken limbs caught among otherwise healthy branches.
- Standing dead trees, visibly leaning trunks or damaged crowns.
- Unstable-looking trees uphill or beyond the immediate clearing.
- Branches that could strike the tent if displaced by wind.
The distance from a tree trunk is not, by itself, an adequate safety measure. A falling trunk or large limb can reach beyond the tree’s immediate base. There is no universal safe fall radius in the supplied guidance, so avoid uncertain fall zones rather than relying on a guessed distance.
Wind exposure may change after sunset. In some landscapes, changing temperatures and weather systems alter wind direction or strength overnight. Darkness then makes damaged branches much harder to identify.
A common mistake is pitching beneath a lone tree because its trunk appears to offer shelter. The same position may expose campers to falling limbs. Low, dense vegetation or suitable terrain can provide some wind protection without requiring a tent directly beneath overhead hazards.
Never assume that a tree is safe merely because it has green leaves. Conversely, do not attempt to remove heavy suspended branches yourself.
If visibility is too poor to inspect the canopy reliably, choose a more open location away from trees where conditions and access permit.
A site that passes the canopy inspection still needs to meet environmental responsibilities and local camping rules.
What Leave No Trace Actually Requires When Wild Camping for One Night?
Leave No Trace requires campers to reduce their impact before arrival, throughout the overnight stay and when departing. For a single night, this means selecting an appropriate durable surface, avoiding unnecessary disturbance, managing waste responsibly, minimizing fire impacts and respecting wildlife and other visitors. Staying for only one night does not remove these responsibilities.
The seven Leave No Trace principles provide the framework for these decisions.
For rapid campsite assessment, it is useful to organize their practical implications by stage.
| Stage | Action | Purpose |
|---|---|---|
| Before arrival | Check regulations, weather and access conditions. | Avoid unsuitable or unauthorized camping. |
| Site selection | Use an existing suitable site or durable surface where permitted. | Limit damage to vegetation and soil. |
| During the stay | Control waste, food and disturbance; respect wildlife. | Reduce environmental and visitor impacts. |
| Cooking | Prefer a suitable camping stove where permitted. | Reduce fire damage and associated risks. |
| Departure | Remove belongings and rubbish without altering the site. | Leave the area without unnecessary evidence of occupation. |
Rock, gravel and suitable dry ground may offer durable surfaces, but physical stability and environmental suitability must both be assessed. Fragile vegetation, saturated soil and sensitive habitats should not be treated as acceptable simply because a tent can fit.
In the UK, wild-camping permission is location-dependent. Much of England and Wales requires landowner permission for ordinary wild camping, while specific areas may operate under different rules. Scotland has broader responsible-access arrangements, subject to restrictions and local exceptions. Do not assume that remote moorland or woodland is automatically available for overnight camping.
Campfires require particular caution. A one-night stop does not justify building a new fire ring, damaging vegetation or collecting wood indiscriminately. Fire restrictions and landowner requirements take precedence. A stove may be the more appropriate option, but it must also be used safely and legally.
Human waste needs advance planning. Use available toilets where possible. Where facilities are absent, follow the destination’s specific waste-management requirements rather than assuming that burying waste is always permitted. Pack out hygiene products and other rubbish.
Arriving late and leaving early may reduce the duration of disturbance, but neither practice guarantees compliance with Leave No Trace principles or local law.
Environmental suitability belongs in the initial go/no-go decision. If camping would damage a sensitive area or breach access restrictions, the correct response is to move on.
When to Walk Away From a Campsite Even If You’re Exhausted?
Walk away from a campsite whenever an immediate hazard, uncertain legal permission or lack of a viable emergency exit cannot be resolved safely. Exhaustion, fading daylight and the effort already spent reaching the location do not make it acceptable. Distinguish minor inconveniences from non-negotiable risks before fatigue begins to influence your judgment.
A sloping sleeping area may be inconvenient. A flood channel is potentially dangerous. Missing a scenic view is disappointing; pitching beneath a damaged tree is unacceptable.
Use a simple decision grid rather than debating every warning sign after a long hike.
| Observation | Decision | Required response |
|---|---|---|
| Small stones or uneven sleeping surface | Adjust if practical | Choose another suitable footprint without damaging the site. |
| Dead limbs above the pitch | Reject | Move outside the potential fall area. |
| Drainage channel or flood-prone hollow | Reject | Find safer, better-drained terrain. |
| Camping permission absent or uncertain | Do not assume permission | Verify access or use an authorized alternative. |
| No safe exit if conditions deteriorate | Reject | Choose a location with a viable fallback. |
| Uncertain wind exposure | Reassess | Check forecast and terrain before deciding. |
Fatigue encourages sunk-cost thinking: after spending time and energy reaching a clearing, campers may interpret warning signs as acceptable compromises.
A useful countermeasure is to agree on rejection criteria before the hike. When camping with another adult, either person can veto a site on safety grounds without needing to persuade the other.
Moving on has a cost, but the time required depends on terrain, visibility, pack weight and physical condition. A short distance on a maintained trail may be manageable; the same distance across wet moorland in darkness may be hazardous. Do not rely on a universal walking-speed estimate.
When daylight is almost gone, backtrack toward the last known safe and permitted location if the route remains safe. Otherwise, assess the least hazardous available option and avoid unnecessary movement over unfamiliar terrain.
A minimal emergency bivouac may be appropriate in a genuine emergency, provided it does not expose you to greater danger. It is not a substitute for planning an authorized overnight stop.
Five-action campsite go/no-go checklist
- Confirm the ground: identify a stable footprint and a plausible drainage route away from the tent.
- Clear overhead exposure: verify that no obvious dead branches or unstable trees threaten the pitch.
- Verify permission: establish that overnight camping is permitted at the intended location.
- Check emergency options: identify communications capability and a safe exit or fallback location.
- Make the decision: record a clear verbal or written “pitch” or “move on” decision before unpacking.
After rejecting immediate physical hazards, evaluate communications. A campsite is easier to manage when someone can be contacted if an unexpected emergency develops.
Why Your Phone Signal Matters More Than Comfort When Choosing Wild Campsites?
Reliable emergency communication can be more important than minor campsite comforts because it affects your ability to request assistance when something goes wrong. However, phone reception does not outweigh immediate dangers such as flooding or falling trees. Choose physically safe ground first, then assess communication options and whether the remaining risk is acceptable.
Remote UK woodland and moorland can contain mobile coverage gaps. A phone showing signal bars does not guarantee that a voice call, message or emergency request will connect.
A practical connectivity check should happen before the tent is pitched.
First, inspect reception at the intended camping location rather than assuming that coverage observed on a nearby ridge extends into a valley or woodland clearing.
Second, where appropriate, verify ordinary connectivity with a permitted test call or message to a trusted contact. Do not place a test call to emergency services.
Third, check the battery level and preserve enough charge for navigation and emergency communication. Cold conditions and prolonged screen use can affect practical battery availability.
Fourth, identify the available alternatives if mobile coverage disappears overnight.
The Parks Canada emergency communication and trip-planning advice warns that mobile coverage may be unreliable in remote areas and recommends leaving a trip plan with a trusted person.
That warning is relevant beyond Canada, although emergency numbers and service arrangements differ by country.
In the UK, 999 and 112 are emergency numbers. Emergency calling may sometimes be possible through another available network when normal service is unavailable, but this must never be assumed. Coverage, handset capability and network conditions all affect connectivity.
When reception is absent, use a layered backup approach:
- Download maps for offline navigation before departure.
- Leave the planned route, overnight location and expected return or check-in time with a trusted contact.
- Agree on what the contact should do if you fail to check in.
- Understand whether your phone supports satellite emergency features in the destination.
- Consider a dedicated satellite communicator for remote travel where appropriate, while recognizing its limitations.
Offline maps support navigation but cannot independently summon assistance. Satellite messaging is also dependent on device compatibility, service availability and operating conditions.
A beautiful clearing without reception is not automatically unsafe, but it requires a more deliberate emergency plan than an otherwise comparable location with reliable communication.
Communications are one part of readiness. The next decision is whether enough daylight and stable weather remain to complete the pitch correctly.
When Should You Start Pitching to Finish Before Poor Light or Wind Picks Up?
Start pitching early enough to complete shelter setup, secure the guy lines and inspect the finished tent before visibility or weather deteriorates. Calculate your personal deadline using a practiced setup time, the expected loss of usable daylight and an additional safety margin. If strong winds or darkness are approaching, reassess whether pitching remains safe.
There is no universal pitching deadline because shelter design, experience, terrain and weather conditions vary.
Instead, establish your own setup duration before the trip. Practice assembling the complete shelter in daylight, including the rainfly, stakes, guy lines and final adjustments.
Then work backward from the earlier of two limits: the expected end of usable daylight or the onset of forecast hazardous weather.
For example, consider a hypothetical camper who needs 20 minutes to complete a practiced setup and chooses an additional 15-minute contingency allowance. That camper would aim to start pitching at least 35 minutes before the relevant deadline, assuming the campsite assessment has already been completed.
These numbers illustrate a calculation, not an established safety standard. More difficult conditions may require a larger margin or a decision not to pitch.
Watch for changing environmental conditions, including:
- Rapidly decreasing visibility or fading contrast across the terrain.
- Cloud development consistent with deteriorating forecast conditions.
- Strengthening or shifting wind.
- Increasing difficulty handling loose fabric and poles.
- Fatigue that slows routine tasks or compromises attention.
Cloud formations and wind changes are not reliable substitutes for a weather forecast. Use them as additional warning signs rather than as proof that a particular weather event is imminent.
The sequencing matters. Assess the ground and surrounding hazards before fully unpacking. Otherwise, equipment becomes scattered across a site that may need to be abandoned.
A sensible order is site inspection, go/no-go decision, shelter unpacking, anchoring, assembly and final verification.
If conditions deteriorate faster than expected, stop and reassess. Rushing to finish a tent on exposed ground during hazardous wind may be less safe than retreating to an established fallback.
The shelter itself affects that deadline. Different designs require different assembly steps, which can become particularly important during late arrivals.
Why Do Swag Users Set Up Camp in 90 Seconds While Tent Campers Take 20 Minutes?
A swag can be faster to deploy than a conventional tent because its sleeping arrangement and shelter components may be integrated into a compact roll. A tent often requires separate pole assembly, anchoring, rainfly positioning and guyline adjustments. However, 90 seconds and 20 minutes are illustrative figures, not verified universal setup times.
A traditional swag is a portable sleeping system commonly associated with Australian outdoor camping. Designs vary considerably, from simple canvas bedrolls to structured swags with poles and weather protection.
A tent provides a separate enclosed shelter, often with more interior space and storage flexibility.
The comparison becomes useful when broken into actual tasks.
| Setup factor | Swag | Conventional tent |
|---|---|---|
| Initial deployment | Unroll and position | Unpack and spread the shelter |
| Structure | May need poles or supports | Usually requires pole or frame assembly |
| Anchoring | Depends on design and conditions | Stakes and guy lines as specified |
| Weather protection | Check closure, ventilation and cover | Position and tension the rainfly |
| Interior space | Generally limited | Varies from solo to family-sized |
Neither shelter type eliminates the need for ground inspection, hazard assessment or appropriate anchoring. A rapidly deployed swag in a flood-prone hollow remains an unsafe choice.
Tent campers can reduce avoidable delays by practicing assembly and organizing equipment before departure.
Keep poles and their connectors together, prevent guy lines from tangling, check that stakes are present and pack components in a predictable order. Some designs permit partial preassembly, but only where the manufacturer recommends it.
Do not assume that every tent should have its poles pre-threaded or that a particular packing arrangement will deliver a measurable reduction in setup time.
For solo campers, a compact shelter may simplify arrival. For families, a tent’s extra sleeping and equipment space may justify the additional assembly work.
The practical comparison is not which shelter wins a speed contest. It is whether the camper can safely complete the chosen setup within the available conditions.
Once the shelter is selected and the site approved, correct pitching becomes the final defense against overnight wind and rain.
Key takeaways before pitching
- Site selection and shelter setup are separate decisions: passing the ground inspection does not guarantee a stable pitch.
- Wind orientation and anchoring depend on the tent’s design, not a universal rule about which side must face the weather.
- Finish the pitch with enough light to inspect stakes, guy lines, rainfly tension and nearby drainage.
How to Pitch Tents Correctly to Withstand Overnight Wind and Rain?
Pitch a tent for overnight wind and rain by selecting well-drained ground, orienting the shelter according to its structural design, securing the appropriate anchors and tensioning the rainfly correctly. The strongest setup depends on the tent’s construction, soil conditions and manufacturer instructions. No pitching technique can compensate for a dangerously exposed or flood-prone location.
Wind orientation is an early decision because changing it after the tent is assembled can require substantial work.
Many campers instinctively point the narrowest side into the wind. This may reduce exposure for some designs, but it is not universally correct. A tent’s strongest pole-supported side may provide better resistance.
Follow the manufacturer’s recommended orientation where available, taking account of the expected wind direction and terrain.
Suitable terrain or low, dense vegetation may reduce exposure. Avoid relying on damaged trees as windbreaks or placing the tent in a hollow that collects water.
During assembly, secure the shelter before loose fabric can be caught by gusts. On many designs, anchoring the initial corners early helps prevent uncontrolled movement.
Stake placement must suit the tent and ground. For most ordinary soils, vertically driven stakes are a practical general recommendation, although different stake types and manufacturers may specify alternative techniques.
The critical requirement is adequate holding strength in the expected pull direction. If the soil cannot retain the anchors, do not assume that tightening the guy lines will solve the problem.
Guy lines attached near structural pole positions help stabilize many tents. Other loops may serve primarily to tension fabric or maintain ventilation.
The distinction is explained in REI‘s tent setup and guyline instructions, which also recommend preparing guy lines before poor weather arrives.
For rain protection, keep the fly correctly positioned and sufficiently taut to shed water. Maintain the intended separation between inner and outer tent fabrics where the design requires it.
Avoid leaving a groundsheet or footprint projecting beyond the tent floor. Exposed material can collect rainwater and direct it beneath the shelter.
Do not dig drainage trenches around a modern tent. Trenching disturbs the ground and cannot make an inherently unsuitable site safe. Choose naturally well-drained terrain instead.
Before settling in, perform a final verification:
- All required anchors are secure and holding.
- Structural guy lines are attached and appropriately tensioned.
- The rainfly is correctly fitted, with no obvious pooling areas.
- Ventilation openings are managed according to conditions and shelter design.
- Water runoff will not be directed beneath the sleeping area.
- Access to the tent and the planned exit route remain unobstructed.
If anchors repeatedly pull free, runoff approaches the tent or wind loads exceed the shelter’s practical capability, reassess the campsite itself. A failed pitch can indicate a site-selection problem rather than merely an assembly error.
On your next overnight trip, complete the site inspection before unpacking, reject unresolved hazards and pitch only when enough time and suitable conditions remain for a secure setup. The goal is not to use every second of the 15-minute allowance; it is to make a defensible decision before darkness removes your options.
Can a campsite be declared safe after exactly 15 minutes?
No. Fifteen minutes is a useful target for an initial structured assessment, not a guarantee of safety. Uncertain drainage, unstable trees, poor visibility or changing weather may require additional investigation or rejection of the site.
Is wild camping legal everywhere in the UK?
No. Rules differ between England, Wales, Scotland and Northern Ireland, and additional restrictions can apply locally. Much of England and Wales requires landowner permission for ordinary wild camping. Scotland has broader responsible-access provisions, subject to conditions and exceptions. Check the applicable rules before travelling.
What should campers do if heavy rain begins after the tent is pitched?
Monitor drainage and shelter stability without taking unnecessary risks. If water begins flowing toward the sleeping area, the ground becomes unstable or flooding threatens the location, prioritize moving to safer terrain when this can be done safely. Do not attempt to protect an unsuitable pitch by digging trenches.
Can a campsite without mobile reception still be suitable?
Potentially, provided physical hazards are acceptable and the camper has an appropriate emergency plan. Offline navigation, a route shared with a trusted contact, agreed check-in arrangements and suitable emergency communication equipment can reduce risk. None guarantees rescue or replaces sound site selection.
Should campers prioritize wind shelter or higher ground?
Neither factor should be considered in isolation. Higher ground may reduce some drainage concerns while increasing wind exposure. Sheltered hollows may be calmer but vulnerable to runoff. Choose stable, adequately drained terrain with acceptable wind exposure, no dangerous overhead hazards and a viable exit route.