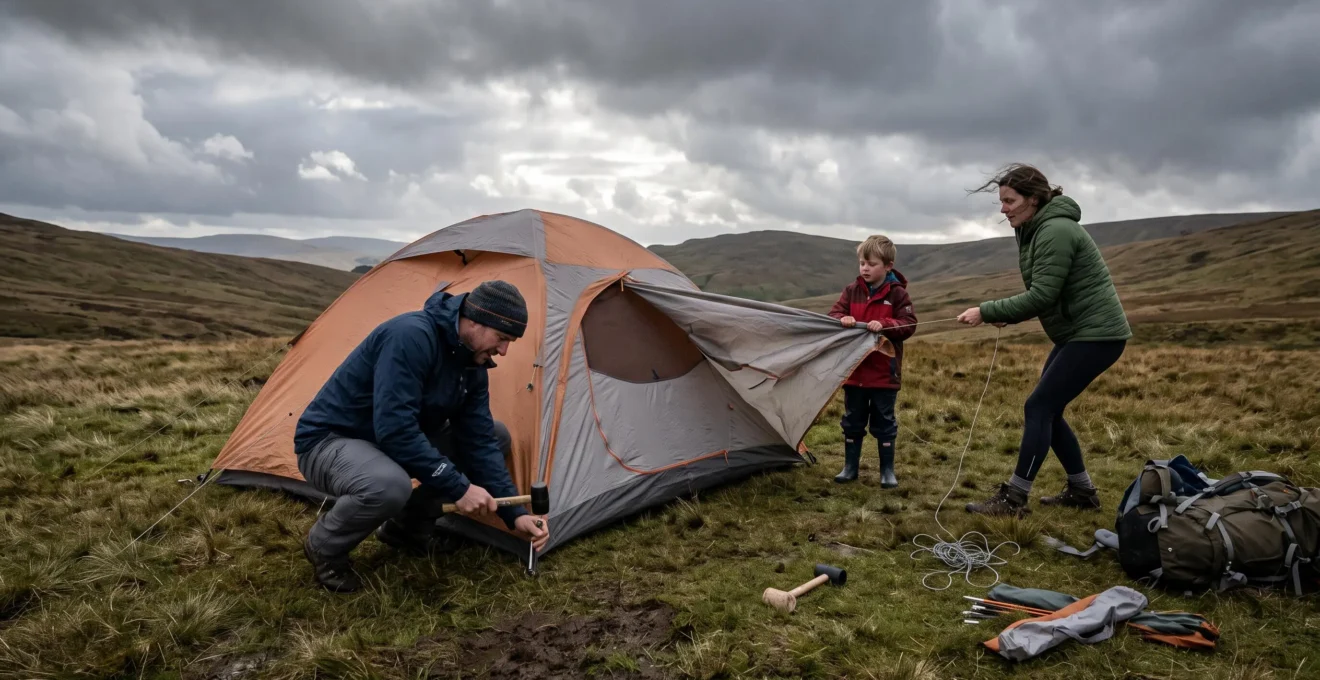
A tent that stays dry and stable overnight depends on more than waterproof fabric. Its position, pole structure, ground anchors, guylines and ventilation must work together to resist changing wind and rain.
For UK campers, this matters particularly on exposed moorland, coastal campsites and upland pitches where conditions can deteriorate after sunset. A tent that appears secure in calm afternoon weather may develop loose fabric, strained anchors or condensation once temperatures fall and gusts increase.
Correct pitching begins with choosing suitable ground and checking the forecast. It continues through securing the tent in the right sequence, tensioning its outer layer without overstressing the structure, and checking the finished shelter before sleeping.
The following field techniques explain how to make those decisions, identify common setup failures and distinguish a genuine waterproofing problem from moisture caused by poor ventilation or fabric contact. No pitching method can make an unsuitable tent safe in severe weather, so equipment limits and the option to relocate remain essential.
Essential rules for a weather-resistant tent pitch
- Choose sheltered, well-drained ground and orient the tent according to its structure and the forecast wind direction.
- Secure the corners, select pegs appropriate to the soil and tension every necessary guyline without overstressing attachment points.
- Keep the flysheet separated from the inner tent, maintain safe ventilation and recheck tension as conditions change.
- Single-Season or Four-Season Tent: Which for Year-Round UK Camping?
- How Double-Wall Tent Systems Prevent Moisture Buildup During Sleep
- The Setup Mistake That Makes Your Double-Wall Tent Perform Like a Single-Wall
- How to Adjust Guy Lines for Maximum Wind Resistance in Exposed Campsites
- Why Standard Tent Pegs Fail in Much UK Ground Conditions
- How to Test Ground Drainage Before Pitching in Potentially Wet Conditions
- The Setup Mistake Behind Most « My Tent Leaked » Complaints
- When Should You Start Pitching to Finish Before Poor Light or Wind Picks Up?
Single-Season or Four-Season Tent: Which for Year-Round UK Camping?
For most UK spring-to-autumn camping, a well-pitched three-season tent provides a practical balance of rain protection, wind resistance and ventilation. A four-season mountaineering tent becomes more appropriate when strong exposed winds, winter conditions or substantial snow loading are realistic possibilities. Choose according to the campsite and expected weather, not simply the month.
Although shoppers sometimes encounter the term “single-season”, the more useful technical comparison is between lightweight summer shelters, three-season tents and four-season mountaineering designs. These categories describe intended use rather than a universal performance certification.
Three-season tents generally use substantial mesh panels, relatively lightweight fabrics and pole arrangements intended to balance strength with portability. Four-season designs typically provide stronger pole structures, more protective fabric panels and configurations designed to resist severe wind and snow loads.
As explained in REI Co-op‘s advice on choosing a backpacking tent, a properly pitched three-season model can handle substantial rain, while mountaineering tents are designed for more demanding wind and snow conditions.
The distinction is particularly relevant across the United Kingdom. A sheltered summer campsite in southern England presents different demands from an exposed ridge in the Lake District, Dartmoor or the Scottish Highlands.
| Decision factor | Three-season tent | Four-season tent |
|---|---|---|
| Sheltered spring or summer camping | Generally suitable when forecast conditions match the model’s limits | Usually unnecessary |
| Exposed coastal or upland camping | Suitable only where the specific design and forecast permit | Consider a stronger design for demanding conditions |
| Winter snow loading | Generally not intended for substantial accumulation | Purpose-built models provide greater structural protection |
| Ventilation in mild weather | Typically more mesh and airflow | May retain more moisture and heat |
| Weight and packing | Often lighter | Often heavier, with specialised exceptions |
A stronger tent also involves compromises. Additional poles, protective panels and heavier materials can increase weight and cost. Reduced airflow may make a four-season shelter uncomfortable during humid summer nights.
More importantly, a four-season label does not establish a guaranteed wind-speed limit. Actual performance depends on the particular model, its condition, anchoring, pitching technique and exposure. Manufacturer instructions should take priority over generic seasonal descriptions.
Once the appropriate structure is selected, controlling moisture inside it becomes the next priority. Even a tent that excludes rain successfully can become wet internally overnight.
How Double-Wall Tent Systems Prevent Moisture Buildup During Sleep
A double-wall tent manages moisture by separating the sleeping compartment from the waterproof outer flysheet. Warm, humid air produced by occupants can reach the colder outer layer and condense there. When the flysheet is correctly tensioned and ventilated, droplets can run down its inner surface without contacting bedding or the inner tent.
Moisture accumulates in a sleeping shelter through breathing, perspiration, wet clothing, damp equipment and humid outside air. As the temperature drops overnight, the outer fabric may become cold enough for water vapour to condense into droplets.
The two layers perform different functions. The inner tent provides an occupied space, often with breathable or mesh sections. The flysheet provides the primary barrier against precipitation while offering a separate surface on which condensation can form.
The air gap between these layers is critical. It reduces direct contact between condensed moisture and the sleeping compartment. However, it does not prevent condensation from forming in the first place.
REI Co-op’s advice on preventing tent condensation recommends tensioning the flysheet to maximise separation and using appropriate vents to improve airflow.
Ventilation matters even during rain. Closing every opening can trap humid air, increasing condensation on cold surfaces. Where the tent design allows, protected vents and sheltered openings can remain partially open without admitting wind-driven rain.
Practical moisture control involves several complementary measures:
- Keep wet boots and clothing outside the sleeping compartment where a protected vestibule permits.
- Maintain unobstructed ventilation openings.
- Avoid placing sleeping bags against the inner walls.
- Ensure the flysheet is tensioned without touching the inner tent.
- Inspect the outer fabric for condensation before assuming rain has penetrated it.
High humidity, still air and cold nights can produce condensation even when the tent is pitched correctly. The realistic objective is to reduce moisture accumulation and keep liquid water away from occupants, rather than promise a completely dry flysheet.
The next concern is maintaining the physical separation that makes this system effective. A loose flysheet can undermine otherwise sound moisture management.
The Setup Mistake That Makes Your Double-Wall Tent Perform Like a Single-Wall
The critical mistake is allowing the waterproof flysheet to sag against the inner tent. This reduces the air gap that helps separate condensation from the sleeping area. Contact between wet surfaces can transfer moisture, particularly when fabric remains pressed together, leaving occupants with a damp interior despite an intact waterproof outer layer.
This often happens when campers secure the outer fabric unevenly, neglect attachment points or assume that the initial tension will remain unchanged overnight.
Fabric tension can change after pitching. Moisture, temperature variation and the behaviour of different textile materials may cause panels to relax or tighten. The amount depends on the tent’s construction, so there is no universal adjustment interval.
A useful field check is to inspect the flysheet shortly after assembly and again when conditions change. An optional check after approximately 15–30 minutes can reveal early settling, but it should be treated as a practical reminder rather than a manufacturer-certified requirement.
Stand back and inspect the shelter from several angles. The outer panels should have reasonably even tension, with no broad folds hanging against the inner tent. Check vulnerable areas around pole intersections, door panels and vestibule corners.
Do not correct sagging by tightening a single corner excessively. Instead, adjust the relevant anchor points progressively so the structure retains its intended shape.
The pitching sequence also matters:
- Inner-first tents: erect the inner structure according to the instructions, then attach and tension the flysheet before rain reaches the exposed inner.
- Flysheet-first tents: establish the weatherproof outer structure first, then attach or suspend the inner compartment as designed.
- Integrated-pitch tents: follow the manufacturer’s sequence and check that the inner has not been pulled into contact with the flysheet.
Not every tent provides the same clearance or attachment arrangement. Some designs intentionally bring materials close together at reinforced structural points. The important test is whether the shelter maintains the separation and drainage intended by its manufacturer.
Correct fabric spacing is only part of weather resistance. Once wind loads increase, guylines become essential to maintaining that spacing and supporting the pole structure.
How to Adjust Guy Lines for Maximum Wind Resistance in Exposed Campsites
For maximum practical wind resistance, attach the guylines specified by the tent manufacturer, anchor them securely and tension them evenly. Prioritise structural guyout points facing the incoming wind while supporting the rest of the shelter as required. Lines should control excessive fabric movement without pulling poles or attachment points out of their intended alignment.
Guylines do more than prevent loose fabric from flapping. They transfer part of the wind load from the tent structure into ground anchors. When multiple lines are correctly positioned, those loads are distributed instead of concentrating at a small number of vulnerable points.
Before tensioning, identify the forecast wind direction and gust conditions. Position the tent according to its strongest supported orientation, while keeping doors and vestibules away from direct wind-driven rain where practical.
The shortest end is not automatically the strongest wind-facing side. Pole geometry, reinforcement and manufacturer guidance may dictate a different orientation.
A line extending outward at approximately 45 degrees can provide useful separation from the shelter in some configurations, but there is no universal optimum guyline angle. The correct direction depends on the attachment point, the loads it is intended to resist and the available anchoring ground.
Use the following sequence when preparing an exposed pitch:
- Secure the tent’s structural corners before attempting to tension the outer fabric fully.
- Attach the manufacturer-designated structural guylines, beginning with windward support points.
- Position each anchor in the direction appropriate to its attachment point and expected loading.
- Tighten gradually, alternating between relevant lines to preserve the tent’s shape.
- Inspect the completed shelter for excessive flapping, distorted poles and loose anchors.
In gusty conditions, some fabric movement is normal. Severe flapping can accelerate wear, but rigidly over-tensioning every line can create concentrated stress at stitching, webbing and pole junctions.
Where the forecast indicates dangerous exposure, better tension is not a substitute for moving to a sheltered location or abandoning the pitch.
Even perfectly adjusted lines are ineffective when their pegs pull free. Ground conditions therefore determine whether the completed guyline system can withstand overnight gusts.
Why Standard Tent Pegs Fail in Much UK Ground Conditions
Standard tent pegs can fail because their shape, length or material does not suit the ground. Soft peat may provide insufficient resistance to pulling, rocky soil may prevent full insertion, and loose sand may not hold narrow stakes securely. Reliable anchoring requires matching the peg to the soil and checking its holding power after installation.
The UK presents widely varying ground conditions, sometimes within a single campsite. Moorland peat, compacted gravel, rocky upland soil, coastal sand and softened grass pitches behave differently under tension.
Failure generally follows three mechanisms: the peg pulls through weak soil, bends or breaks against an obstruction, or becomes loose as the surrounding ground shifts.
A narrow peg that works in firm turf may offer little resistance in saturated peat. Conversely, forcing a lightweight peg into stony ground can damage it before it provides useful support.
The following comparison offers practical starting points rather than guaranteed performance rankings.
| Ground condition | Potential anchoring approach | Key precaution |
|---|---|---|
| Firm grass or compact soil | Standard pegs or suitable Y-profile stakes | Check full insertion and holding strength |
| Soft peat or loose soil | Longer, broader V- or Y-profile stakes | Test for pull-out under load |
| Rocky ground | Suitable robust stakes or permitted rock anchors | Avoid damaging pegs or disturbing protected ground |
| Loose sand | Purpose-designed sand anchors, suitable screw anchors or buried anchors | Check holding power in the actual sand |
| Very soft or saturated ground | Broader anchors or an alternative pitch | Relocate if reliable anchoring is impossible |
In many soils, inserting a suitable stake vertically provides good holding power, although specialised anchors and manufacturer instructions may require a different method.
On difficult ground, a buried horizontal anchor, sometimes called a deadman anchor, can provide an alternative when properly constructed. It relies on buried material resisting the pulling force, but requires suitable ground, adequate depth and an appropriate attachment method. It is not automatically reliable in shallow, saturated or easily disturbed soil.
Never assume that adding more pegs compensates for unsuitable ground. Additional anchors must each be positioned to take an appropriate share of the load.
Once installed, apply a controlled pull along the expected loading direction. If an anchor shifts easily, reposition it, select a more suitable design or choose another campsite. Avoid sudden high-force testing that could damage the tent.
Anchoring strength and ground drainage are closely connected. Rain can soften soil and weaken holding power, while surface runoff can threaten the tent floor even when the pegs remain secure.
How to Test Ground Drainage Before Pitching in Potentially Wet Conditions
To assess drainage before pitching, examine the slope, soil condition, vegetation and evidence of previous water flow. Avoid depressions, drainage channels and ground that is already saturated. A slightly elevated, reasonably level pitch with no incoming runoff is generally preferable to a perfectly flat hollow that may collect rain overnight.
Drainage assessment begins beyond the tent’s footprint. Look uphill and consider where rainwater would travel during prolonged rainfall. A dry-looking patch at the bottom of a shallow basin can become waterlogged if surrounding slopes feed water towards it.
Five visible indicators deserve attention:
- Soil colour and texture: unusually wet, soft or saturated ground may indicate poor drainage.
- Debris and sediment: accumulated plant material or sediment lines can indicate previous surface runoff.
- Vegetation: rushes and sedges may suggest persistently damp conditions, although vegetation alone is not conclusive.
- Slope and surrounding terrain: identify where water would collect or cross the intended pitch.
- Existing puddles or water marks: these reveal areas where water may accumulate again.
Where campsite rules and land protection requirements permit, a small, carefully restored test hole may provide additional evidence of shallow saturated ground. Water appearing in the hole suggests wet subsurface conditions, but a dry hole does not guarantee the site will drain safely during heavy rain.
Do not excavate drainage trenches around a tent. They can damage the campsite and are generally unnecessary when an appropriate pitch is chosen.
A slight natural slope can help direct surface water away, but the sleeping area should remain comfortable and stable. If the entrance can face gently downhill without exposing it to prevailing wind or runoff, this may reduce water accumulation at the threshold.
Wind direction, drainage and tent geometry must be considered together. No single orientation rule takes precedence in every location.
Five checks before committing to a wet-weather pitch
- Inspect the surrounding slope and identify any route for incoming runoff; confirm that no visible drainage path crosses the tent footprint.
- Examine the ground for puddles, sediment lines and persistent wetness; confirm that the selected area shows no obvious pooling.
- Check the soil and vegetation for saturation indicators; identify a firmer alternative if the surface is unstable.
- Confirm that the tent can be oriented for both drainage and wind protection; establish the intended door and windward sides.
- Test a suitable anchor in the chosen ground; confirm that it holds under a controlled pull before unpacking the full shelter.
These checks cannot predict every flash flood or local runoff event. Avoid stream banks, dry channels and flood-prone areas when heavy rainfall is possible, and follow local site restrictions.
Once a suitable pitch has been selected, remaining water problems are more likely to involve fabric contact, condensation, groundsheet placement or genuine waterproofing defects.
The Setup Mistake Behind Most « My Tent Leaked » Complaints
Many apparent tent leaks are caused by condensation, poor flysheet tension, contact between wet surfaces or incorrectly positioned groundsheets rather than damaged waterproof fabric. The most useful first step is to locate the moisture and trace its likely path. However, no reliable evidence establishes that one pitching mistake causes a particular percentage of leak complaints.
Water inside a tent does not automatically mean rain has passed through the flysheet. Condensation can collect on cold surfaces and drip into the sleeping area, especially when ventilation is restricted or the outer fabric touches the inner.
Contact between tent layers can transfer liquid moisture where condensation is present. Pressing equipment or bedding against an inner wall can also interfere with the intended separation. This does not mean touching a properly waterproof outer fabric necessarily causes rain to penetrate it.
Groundsheet placement creates another avoidable problem. A separate footprint extending beyond the tent floor can catch rainfall and channel it beneath the shelter, increasing the risk of water collecting under the floor.
The footprint should remain inside the outer perimeter of the tent floor unless the manufacturer specifies a different configuration.
When investigating dampness, distinguish among three locations:
- Walls or ceiling: inspect for condensation, flysheet contact, poor tension and water tracking from above.
- Floor or lower edges: inspect the footprint, pooling beneath the shelter, damaged floor fabric and ground-level seams.
- Seams or isolated points: examine stitching, seam tape, coatings and any punctures for genuine water ingress.
A useful diagnostic sequence begins with a visual inspection during safe conditions. Check whether the outer surface is wet, whether the inner tent touches it, and whether water is concentrated at a particular seam.
Next, review ventilation and the location of wet belongings. If the moisture appears widely distributed across cold surfaces, condensation is a plausible explanation. If water repeatedly enters at the same seam during rain, a waterproofing defect becomes more likely.
Do not dismiss a genuine leak simply because condensation is common. Damaged seam tape, worn coatings, punctures and manufacturing faults can all require repair or product assessment.
Many of these failures can be prevented through careful preparation. The final variable is timing: a correct pitching method is much harder to execute when daylight disappears or strong wind arrives during assembly.
Key takeaways before the final setup
- Allow enough time to inspect the campsite, not just assemble the poles and fabric.
- Use forecast gusts and changing weather conditions to decide whether pitching remains appropriate.
- Plan a final anchor, flysheet and ventilation inspection before darkness.
When Should You Start Pitching to Finish Before Poor Light or Wind Picks Up?
Start pitching early enough to complete assembly, anchoring, tension adjustments and a final inspection in usable daylight, before forecast conditions deteriorate. Base the schedule on your own practised setup time, then allow extra time for wind, rain, fatigue and unfamiliar ground. If conditions may exceed the tent’s limits, choose shelter or postpone pitching instead.
The time printed in a tent’s product description may not reflect the experience of a first-time camper. Identifying poles, sorting guylines and selecting suitable pegs all take longer when the procedure is unfamiliar.
Practice pitching the complete tent at home or in a safe, permitted location before travelling. Time the process from unpacking to the final guyline check, rather than stopping when the poles are standing.
For a novice, a first setup may take substantially longer than a rehearsed one. In some circumstances, allowing two or three times the practised assembly time may be a useful planning buffer, but this is not a validated universal multiplier.
Weather planning is especially important in UK upland and coastal areas. The Met Office mountain forecast guide explains how wind, gusts and other hazards vary with elevation and location.
Check the forecast for the actual campsite or the most relevant forecast area. Pay particular attention to gusts, wind direction, rainfall and the expected timing of changes, rather than relying on the daily average wind speed.
The Met Office’s mountain hazard categories describe meteorological conditions, not safe pitching limits for particular tents. A suitable decision depends on the model, ground, exposure and camper experience.
Fatigue also affects pitching quality. After a long walk or drive, campers may be more likely to overlook attachment points, rush peg placement or postpone tension adjustments.
For a tent designed to pitch flysheet-first, a staged approach can protect the sleeping compartment during worsening rain:
- Choose and inspect a safe pitch while conditions permit.
- Secure the outer structure and essential anchors according to the manufacturer’s instructions.
- Complete the weatherproof flysheet configuration.
- Install or adjust the inner compartment as the design permits.
- Finish guyline tensioning, ventilation settings and the final safety inspection.
Do not attempt to apply this sequence to an inner-first tent unless its manufacturer provides an approved alternative method. Improvising a different assembly order can leave the structure unstable or damage attachment points.
Before sleeping, inspect the windward pegs, confirm the flysheet remains separated from the inner, check that the footprint does not project beyond the floor and ensure ventilation openings are appropriately protected.
For the next camping trip, practise a complete pitch in daylight, record the actual time required and use that experience to set an earlier arrival target. When severe weather is forecast, prioritise a safer campsite or alternative accommodation over attempting to make an exposed pitch work.
Should I pitch my tent under a tree to avoid strong wind?
Natural shelter can reduce wind exposure, but avoid pitching beneath dead branches, unstable trees or other overhead hazards. During strong winds or thunderstorms, a wooded position is not automatically safe. Choose a permitted location that balances shelter, drainage and falling-branch risks.
Can I tighten tent guylines too much?
Yes. Excessive tension can distort poles, strain stitching and overload attachment points. Tighten lines progressively until the tent holds its intended shape and the flysheet is properly supported. Follow the manufacturer’s instructions rather than trying to eliminate every small movement of fabric.
Should tent ventilation stay open when it rains?
Where the tent design and wind direction allow, protected ventilation openings should remain open enough to help humid air escape. Close or adjust openings that admit wind-driven rain. The aim is to balance weather protection with moisture control, not to leave every opening fully exposed.
How often should tent pegs and guylines be checked overnight?
Inspect them after pitching, before sleeping and when conditions change significantly, provided it is safe to do so. Wet ground, stronger gusts and fabric movement may require adjustments. There is no universal inspection interval suitable for every tent and weather condition. Do not go outside into dangerous weather solely to retension equipment.
What should I do if the tent starts collapsing in strong wind?
Prioritise personal safety over saving equipment. If poles deform, anchors repeatedly fail or the structure becomes unstable, move to a safer location when it is safe to do so. Avoid attempting extensive repairs in dangerous gusts. Seek substantial shelter and follow local weather warnings and emergency guidance.