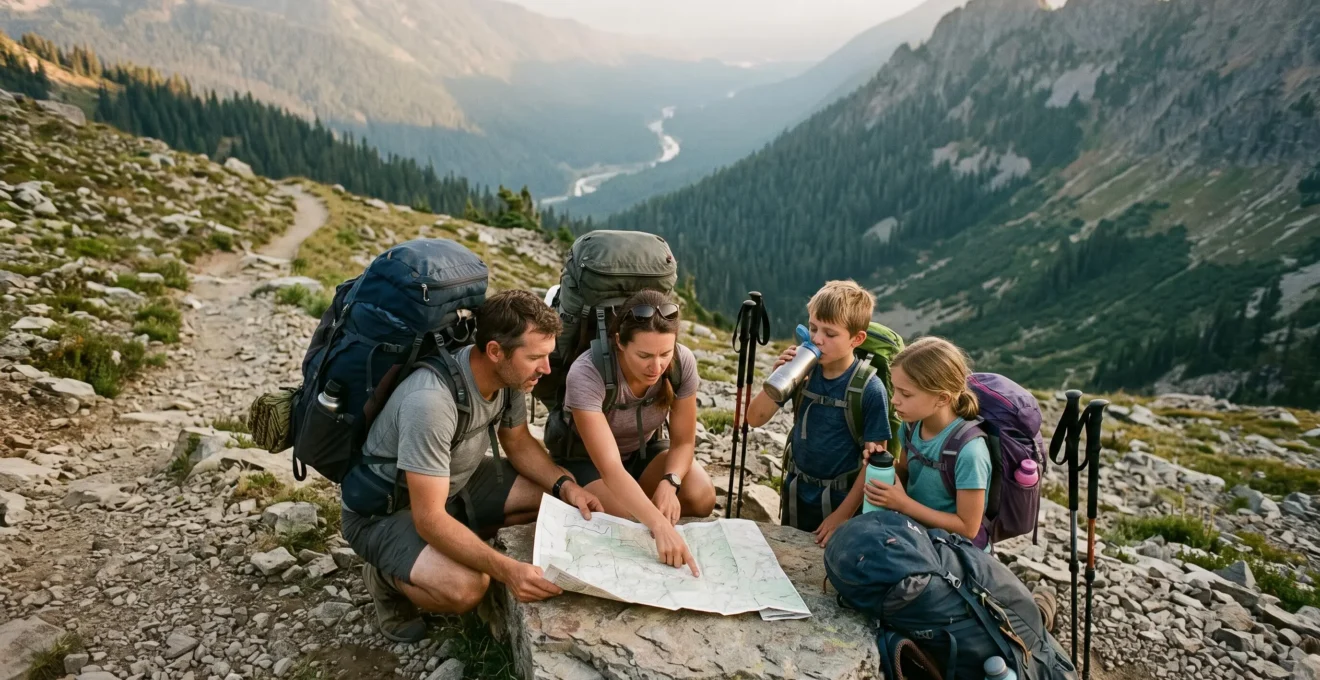
A multi-day wilderness expedition becomes manageable when every demanding section has a defined entry decision, a realistic completion window and a credible alternative if conditions deteriorate. The aim is not to eliminate uncertainty from remote travel. It is to prevent ordinary setbacks—slower walking, an unreliable stream or an approaching weather front—from becoming emergencies.
For hikers preparing their first extended expedition in the Scottish Highlands, Lake District, Eryri (Snowdonia) or other UK upland areas, the central planning challenge is balancing wilderness immersion with access to assistance. A route can feel remote without requiring every day to end beyond the reach of roads, settlements or established paths.
Start by identifying reliable water, realistic daily walking capacity, exposed terrain, exit opportunities and communication limitations. Then build checkpoints around those constraints. A checkpoint might be a road crossing, a sheltered campsite, a verified water source or a predetermined decision point before an exposed ridge.
Camping permissions, land access and overnight restrictions also vary across UK destinations. Check the rules for the specific park, landowner and intended campsite before finalising the itinerary.
Multi-day expedition planning: the essentials
- Calculate walking distances using loaded training experience, terrain and the slowest group member rather than optimistic mileage targets.
- Connect reliable water sources, weather decisions and emergency exits into a practical checkpoint network.
- Build flexibility into the schedule, share a detailed route plan and establish clear conditions for turning back or seeking assistance.
- Why Most Campers Run Out of Water on Day Two of Remote Expeditions?
- How to Calculate Realistic Daily Distance for Loaded Wilderness Hiking?
- Circular Route or Linear Expedition: Which Format for Your First Multi-Day Trek?
- The Planning Error That Strands 40% of Campers in Dangerous Weather Conditions
- When to Insert Rest Days Into Your Expedition Schedule Without Losing Momentum?
- Why Should You Leave a Detailed Route Plan Even for « Just One Night » Solo Trips?
- What Tools Actually Help You Fix Roadside Breakdowns in Remote Locations?
- How to Camp Alone Safely Without Backup Support?
Why Most Campers Run Out of Water on Day Two of Remote Expeditions?
Water shortages on multi-day expeditions often begin with an incomplete consumption estimate rather than an unexpectedly empty stream. Hikers may calculate drinking water for walking hours but overlook cooking, camp chores, strenuous climbs and delays. A surplus that appears adequate on the first evening can therefore disappear before the next reliable source is reached.
The claim that most campers run out of water specifically on day two is not supported by the supplied evidence. Nevertheless, the planning mechanism is important: water consumption continues after the walking day ends, while opportunities to replenish supplies may be separated by difficult terrain.
Loaded ascents, warm conditions, individual physiology and exertion all influence fluid requirements. There is no single daily quantity that safely describes every expedition. Instead, estimate water needs across the complete period between reliable sources, including overnight requirements and a contingency for delays.
Classify each proposed campsite by its water strategy:
- Carry-in: arrive with sufficient treated water for the night and the next planned resupply interval.
- Treat-on-site: use a source whose availability and suitability have been assessed, with adequate treatment time and equipment.
- Dry camp: plan for no usable water at the campsite, carrying the full requirement from an earlier reliable source.
Mark year-round, seasonal and unverified sources separately on the route map. A stream visible on mapping is not proof of dependable flow, especially during dry periods. Local conditions and recent information should determine whether it can be included in the resupply plan.
The CDC recommendations for backcountry water treatment explain that apparently clear water can contain harmful microorganisms. Boiling is an effective microbiological treatment, while filtration and chemical disinfection have different limitations.
Filtration can require cleaning or replacement when sediment clogs the system. Chemical treatment requires the correct concentration and contact time, and its effectiveness varies by pathogen. Boiling consumes fuel and requires cooling time. None of these ordinary methods reliably removes every form of chemical contamination.
Where the next dependable source is more than a day away, a second compatible treatment method provides useful redundancy. It does not replace carrying enough water if sources are absent.
Insufficient hydration can also undermine physical performance and concentration. Once hikers begin rationing water, slower progress and poorer judgement may compound the original planning mistake.
Water availability should shape the route before daily distances are finalised. The next task is determining whether those distances remain achievable with a fully loaded pack.
How to Calculate Realistic Daily Distance for Loaded Wilderness Hiking?
Calculate realistic daily hiking distance from a loaded practice walk on terrain comparable to the intended expedition. Record elapsed time, ascent, descent, breaks and actual pack weight. Use the resulting performance as a baseline, then allow for cumulative fatigue, weather and slower companions rather than assuming that a best-case training pace can be repeated every day.
Generic distance targets can be misleading in mountainous UK terrain. A relatively short route across steep, rough ground may require more effort than a substantially longer walk on a maintained valley path.
The most useful calibration exercise is a full training day with the equipment, food and water weight expected at the beginning of the expedition. Record:
- Distance travelled and total ascent.
- Moving time compared with elapsed time.
- Terrain underfoot, including bog, scree or uneven paths.
- Length and frequency of rest stops.
- Physical condition and concentration at the end of the day.
Repeat the assessment under reasonably comparable conditions if possible. A single successful walk offers useful information but cannot establish a guaranteed pace for every landscape.
Daylight availability is another critical constraint. Autumn and winter expeditions in northern Britain offer less usable daylight than summer routes. Poor visibility can also increase navigation time, even when the mapped distance remains unchanged.
The National Park Service hiking safety recommendations emphasise matching routes to participants’ abilities, accounting for pack weight and terrain, allowing the slowest member to set the pace and establishing a turnaround time.
For multi-day planning, apply a conservative allowance to later stages. Fatigue, disrupted sleep, wet equipment and accumulated discomfort may reduce walking performance, although no universal third-day slowdown percentage is established by the supplied sources.
Hypothetical example: converting pace into checkpoints
A group completes a loaded training route of 12 km with substantial ascent in six hours of elapsed time. Rather than treating 12 km as a guaranteed daily target, the group examines where reliable water, sheltered camping locations and escape routes fall along the proposed expedition.
If the next defensible campsite requires a significantly harder day than the training route, the group shortens the stage or changes the itinerary. The training result informs the decision; it does not override terrain or weather constraints.
Checkpoint spacing should follow the slowest credible day. A water source that can only be reached at maximum pace is not a robust resupply point. Likewise, a campsite reached only after dark leaves little margin for navigation errors or deteriorating conditions.
Once walking capacity is understood, route geometry becomes the next major choice: whether to return to the starting point or finish somewhere else.
Circular Route or Linear Expedition: Which Format for Your First Multi-Day Trek?
A circular route often simplifies transport for a first multi-day expedition, while a linear route can offer a more natural progression through the landscape. Neither format is inherently safer. The better choice is the one with accessible exit points, dependable resupply, manageable transport and alternatives that remain usable when the group is tired or conditions change.
Choosing a route solely because it creates an impressive map or reaches a famous summit can hide serious logistical weaknesses. A spectacular section without practical exits becomes a commitment rather than an option once entered.
The main differences are operational:
| Planning criterion | Circular route | Linear route |
|---|---|---|
| Transport | Usually returns to the starting vehicle or transport hub. | Requires a dependable arrangement at the finish. |
| Emergency exit | Depends on crossings and access roads around the loop. | Depends on accessible exits along the corridor. |
| Water planning | Sources must be assessed around the complete circuit. | Resupply can be organised progressively along the route. |
| Changing the itinerary | May permit shortcuts if mapped connections exist. | May allow an early finish at an intermediate access point. |
| Late-stage uncertainty | The final section may be unfamiliar and difficult to shorten. | Previously travelled terrain may provide a known retreat option, if still safe. |
A linear expedition offers a potentially useful advantage: the route behind the group has already been experienced. However, a familiar retreat can still become unsafe because of flooding, darkness or changing weather. Familiarity is not a substitute for a viable exit.
A circular route has different strengths. It removes the need for a vehicle shuttle and can make the final return straightforward. Yet its least familiar section may occur when participants are already fatigued.
A hybrid loop with a midpoint road crossing can combine practical advantages. For example, a hypothetical three-day route might return to an accessible valley road after the first substantial stage before continuing into a second, more remote circuit.
This midpoint can function as a resupply opportunity, weather decision point or early exit. Its value depends on actual road access, available transport and whether assistance can realistically be reached.
Mixed-experience groups should prioritise the weakest exit options rather than the strongest scenic highlights. A participant who becomes injured near an inaccessible ridge may require a difficult evacuation regardless of how manageable the rest of the itinerary appears.
After selecting the route format, identify which sections become hazardous when weather changes and ensure those sections are never treated as unavoidable appointments.
The Planning Error That Strands 40% of Campers in Dangerous Weather Conditions
The critical weather-planning error is scheduling exposed terrain as an unavoidable stage on a fixed date. A ridge, mountain pass or river crossing may be reasonable in suitable conditions but unacceptable after heavy rain, strong winds or deteriorating visibility. Safe expedition design gives each exposed section a weather-dependent entry decision and an alternative that does not require proceeding into danger.
The 40% figure in this heading is not supported by the supplied sources and should not be interpreted as a verified incident rate. The operational risk is real, but no reliable percentage can be assigned from the available evidence.
Mountain forecasts describe expected conditions over an area, not guaranteed conditions at every point on a route. Terrain can produce substantial local variation. Wind exposure on ridgelines, cloud development and rainfall in neighbouring catchments may alter the safety of a planned crossing.
Before departure, mark weather-sensitive sections on the map and identify the last practical location where the group can change course without entering them.
For each exposed section, establish:
- The forecast information needed before entry.
- The latest sensible decision time.
- The conditions that require cancellation or retreat.
- The time and terrain required to reach a safer location.
- An alternative route or sheltered waiting location that is genuinely accessible.
A weather checkpoint should not depend on receiving a mobile signal in a known coverage gap. Check forecasts where connectivity is reasonably expected, and carry enough information to make conservative decisions when updates are unavailable.
The National Weather Service outdoor flooding safety recommendations warn that heavy rainfall upstream can create dangerous downstream flooding, even when rain is not falling directly at the campsite or crossing.
Watch for rising water, worsening visibility and rapidly changing conditions. Do not enter floodwater or attempt an unsafe river crossing to preserve the schedule. Retreat to safer ground where possible.
The typical escalation begins with schedule pressure: the group continues because a campsite or transport booking appears fixed, reaches exposed terrain later than planned and then encounters worsening conditions without a viable alternative.
Buffer time interrupts that sequence. A spare day or shorter stage gives the group permission to wait, reroute or exit without treating a change of plans as expedition failure.
Weather flexibility is most effective when it is supported by the itinerary itself. That makes rest days and zero-mileage days important strategic resources.
When to Insert Rest Days Into Your Expedition Schedule Without Losing Momentum?
Insert rest days where they protect the next demanding stage or provide a useful decision opportunity, rather than distributing them mechanically across the itinerary. A recovery day helps participants manage accumulated fatigue. A strategic zero-mileage day creates flexibility for poor weather, resupply or reassessment before entering terrain with limited escape options.
These two types of pause may look identical on a schedule, but their planning purposes differ. Recovery is primarily about physical capacity; strategic waiting is about retaining choices.
Consider placing a recovery day after sustained climbing, difficult ground or a sequence of long stages. A strategic pause is more useful immediately before a ridge traverse, remote crossing or section where turning back would become complicated.
For a week-long expedition, a scheduled pause may help prevent fatigue-driven changes to later stages. However, the supplied evidence does not establish that taking a rest day produces a net time saving. Treat that possibility as a planning benefit, not a guaranteed performance result.
A rest day also offers a valuable opportunity for honest group discussion. Participants may hesitate to admit fatigue while others are preparing to move. A scheduled pause makes reassessment a normal part of the plan.
At a planned pause, review water availability, equipment condition, forecast uncertainty, navigation performance and each person’s willingness to continue. Confirm whether the next stage remains suitable or whether the expedition should be shortened.
For a solo traveller, the same pause can support a scheduled check-in. A message sent from a safe campsite may confirm that the planned route remains appropriate, provided the communication device functions and its limitations are understood.
Rest-day locations should themselves be suitable. A scenic but exposed campsite may be a poor place to wait through a storm. Consider shelter, water, ground conditions, local camping rules and accessible exits.
A flexible itinerary still needs someone outside the expedition to understand the plan. That becomes especially important when a trip is short enough to seem routine.
Why Should You Leave a Detailed Route Plan Even for « Just One Night » Solo Trips?
Leave a detailed route plan for every remote solo overnight trip because an emergency contact needs to know where to direct help if you fail to return. Even a single night can involve an injury, navigation mistake or communication failure. A specific itinerary narrows the likely search area and establishes when someone should act.
A vague message such as « camping in the Highlands, back tomorrow » provides little operational value. It does not identify the starting location, intended route, campsite or the point at which an overdue return becomes concerning.
A useful plan records the route and its alternatives, planned overnight location, expected return time, communication equipment and vehicle details. It also names the responsible contact and specifies the escalation procedure.
The official Gates of the Arctic National Park backcountry trip checklist provides a detailed example of the information that can assist emergency planning, including campsites, alternative itineraries, vehicle identification and scheduled check-ins.
For a UK expedition, adapt the contact and escalation arrangements to the actual location. In a genuine emergency, the designated contact should be prepared to contact the appropriate emergency services and provide the route information.
Five deliverables before leaving for a remote expedition
- Mark the starting point, intended route, alternative paths and planned campsites on a shareable map.
- Record the vehicle location, identifying details and expected return transport arrangements in the trip plan.
- Write down the planned check-in times, communication methods and the latest agreed return time.
- Give a trusted contact an explicit overdue-action instruction, including whom to contact and what information to provide.
- Confirm that the contact has received the complete plan and understands how route changes will be communicated.
The overdue threshold deserves deliberate consideration. An unnecessarily short window may cause avoidable alarms after ordinary delays, while an excessively long window may postpone assistance. Choose the threshold according to the planned route, agreed check-ins, expected conditions and available exits rather than adopting a universal number.
A trip plan only works when it stays current. If the route changes, update the contact whenever communication is possible. If an expected check-in cannot be completed, follow the previously agreed contingency procedure.
Leaving a plan with someone does not mean a park authority or rescue organisation is continuously tracking the expedition. The designated contact must understand their responsibility to act when the agreed conditions are met.
For expeditions beginning at remote trailheads, this planning discipline should extend to the vehicle, which may be the only practical way to leave the area.
What Tools Actually Help You Fix Roadside Breakdowns in Remote Locations?
The most useful remote-roadside tools address faults that a traveller can safely diagnose and resolve: tyre problems, a discharged battery and limited routine maintenance issues. A suitable spare wheel, tyre equipment, portable compressor and compatible jump starter can be valuable. However, recovery arrangements and reliable communication are just as important because many mechanical failures cannot be repaired at the roadside.
For a remote expedition, vehicle reliability is part of the route’s exit infrastructure. A successful walk can still end in a difficult situation if the car cannot start at an isolated trailhead.
Choose equipment according to the vehicle, road conditions and your actual mechanical competence. A repair kit is useful only if it is compatible with the fault and can be used safely.
| Equipment | Potential use | Important limitation |
|---|---|---|
| Spare wheel and wheel-changing equipment | Replacing a damaged wheel where conditions permit. | Requires a suitable spare, stable ground and safe working conditions. |
| Tyre plug kit and compressor | Temporary repair of certain repairable tread punctures. | Not appropriate for every puncture, sidewall damage or tyre type. |
| Portable jump starter | Starting a vehicle with a discharged battery. | Cannot resolve every electrical or charging-system failure. |
| Basic vehicle-specific tools and approved fluids | Addressing minor, identifiable maintenance issues. | Major leaks, overheating and mechanical faults may require professional recovery. |
| Offline maps and emergency communication equipment | Identifying access roads and requesting assistance. | Offline maps cannot send messages; satellite devices also have operational limitations. |
Inspect tyres, battery condition, fluid levels and the manufacturer’s recommended maintenance items before departure. Do not attempt roadside work where traffic, unstable ground, severe weather or vehicle position makes it dangerous.
For remote access roads, record the last dependable settlement, known access points and expected mobile coverage limitations. Offline mapping can assist navigation but does not guarantee that a road is passable or open.
A satellite communication device may be appropriate where mobile coverage is unreliable. Its value depends on coverage, battery condition, subscription or activation requirements and the ability to use it correctly.
Carry sufficient water, warm clothing and emergency shelter for a possible overnight wait, taking account of season and expected conditions. Inform a trusted contact about the vehicle approach and intended return.
If the car becomes immobilised, assess whether remaining with it is safer than travelling on foot. Walking towards a distant settlement without reliable information can introduce additional risks.
Mechanical self-reliance has limits, just as personal self-reliance does. For someone camping alone, conservative decisions and reliable outside communication become even more important.
Key takeaways before planning a solo expedition
- Choose a route that remains manageable if an injury or equipment failure prevents normal progress.
- Set communication and turnaround rules before entering areas where fatigue or isolation may affect judgement.
- Make every overnight location part of a wider network of water access, weather decisions and credible emergency exits.
How to Camp Alone Safely Without Backup Support?
Solo wilderness camping can be planned more safely by choosing conservative routes, carrying suitable emergency communication equipment and establishing clear check-in and turnaround rules. Without a companion, there is nobody immediately available to notice deterioration, assist with an injury or seek help. The route must therefore compensate through accessible exits, reliable planning and lower tolerance for uncertain conditions.
The central difference between solo and group travel is not simply carrying additional equipment. It is the absence of immediate assistance when something goes wrong.
A solo camper should generally favour routes with established paths, identifiable landmarks and realistic opportunities to encounter other people. More remote routes require greater self-sufficiency and more conservative contingency planning.
Arriving at camp with adequate daylight is particularly valuable. It allows time to evaluate ground conditions, water availability, shelter and navigation options without rushing.
Communication equipment should be selected according to the actual route:
- Mobile phone: useful where network service exists, but unsuitable as the only assumed communication method in areas with unreliable coverage.
- Satellite messenger: may support scheduled messages and emergency signalling, depending on the device, service and operating conditions.
- Personal locator beacon: designed to transmit a distress alert through an appropriate rescue-alerting system, but generally not intended for routine two-way conversations.
No device guarantees immediate rescue. Terrain, sky visibility, battery condition and the specific communication system can affect performance. Familiarise yourself with the equipment before departure.
Pre-set decision rules are especially important when travelling alone. For example, decide in advance that an exposed section will be abandoned if the required weather information is unavailable, or that a campsite will be reached before the planned daylight margin expires.
These are planning rules rather than universal safety thresholds. They should reflect terrain, season, personal experience and available alternatives.
When an injury, equipment problem or navigation uncertainty develops, avoid allowing sunk costs or the desire to complete the route to determine the next action. Reassess from a safe position, consider the nearest viable exit and seek assistance when circumstances require it.
The same checkpoint architecture used for group expeditions applies to solo travel: reliable water, defensible campsites, weather decisions, alternative routes and a responsible outside contact. The difference is that every decision must be executed without immediate support from a companion.
Before committing to the trip, review the complete itinerary as if the slowest day, least reliable water source and poorest acceptable weather window occurred together. If the plan still offers safe choices, it is more resilient. If not, shorten the route, move a campsite or add an exit checkpoint before departure.
How many safety checkpoints should a multi-day camping expedition include?
There is no universal number. Identify checkpoints at meaningful decisions: before exposed terrain, at dependable water sources, near accessible exits and at planned overnight locations. Their spacing should reflect the group’s realistic walking capacity and the consequences of missing a checkpoint.
Is wild camping permitted throughout UK national parks?
No. Rules differ by jurisdiction, location, land access arrangements and specific restrictions. Scotland has a different access framework from England and Wales, while some popular camping areas have additional controls. Check the current rules for the exact location and obtain permission where required.
Can a GPS device replace a paper map on a remote expedition?
Electronic navigation is useful, particularly with downloaded maps and reliable positioning, but it introduces battery, equipment and software dependencies. Carrying an independent navigation method and knowing how to use it provides redundancy. The appropriate combination depends on terrain, conditions and navigation competence.
What should happen if a planned safety checkpoint cannot be reached?
Stop and reassess before the delay becomes a more serious problem. Compare remaining daylight, weather, water, group condition and accessible alternatives. Use a previously identified safe campsite or exit if appropriate. If there is an emergency or no safe self-rescue option, seek assistance through the available emergency communication system.
How should an expedition plan account for areas without mobile coverage?
Identify likely coverage gaps before departure, save essential navigation information offline and arrange check-ins around realistic communication opportunities. For more isolated routes, assess whether a suitable satellite messenger or personal locator beacon is warranted. A trusted contact should understand the check-in schedule and overdue procedure before the expedition begins.