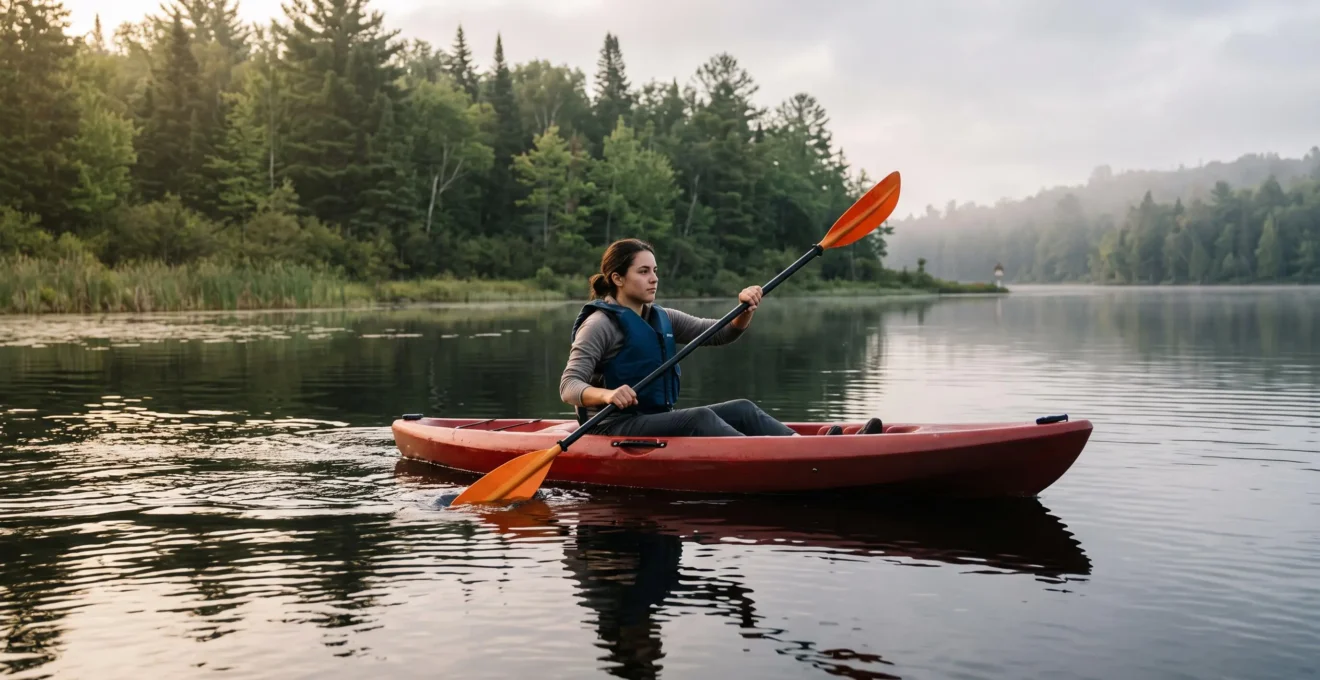
Learning basic kayaking strokes begins with controlling the paddle, not paddling harder. On a calm lake, a relaxed grip, consistent blade placement, and deliberate torso rotation help a beginner travel forward without exhausting their arms or repeatedly steering back onto course. Turning, stopping, and moving sideways become easier once these foundations feel predictable.
The setting matters just as much as technique. A small sheltered lake gives first-time paddlers room to experiment, while strong wind, boat wakes, or difficult launching points can make ordinary mistakes feel alarming. Choosing suitable conditions and learning how to recover from a capsize are therefore part of developing confidence, not separate skills reserved for advanced kayaking.
For campers exploring lakes near their accommodation, short supervised sessions offer practical opportunities to develop these abilities. The goal is to build a repeatable routine: assess the water, launch without rushing, practice controlled strokes, and return while conditions remain manageable.
Beginner kayaking essentials
- Choose a sheltered lake with manageable wind, limited boat traffic, easy shoreline access, and a clear return route.
- Use relaxed hands, torso rotation, and consistent blade immersion to improve forward paddling and reduce unnecessary corrections.
- Practice launching, wet exits, and appropriate rescue techniques under supervision before exploring farther from shore.
- 34: How to Choose Lakes That Provide Safe Learning Conditions for Kayak Beginners?
- 34.3: Should Beginners Launch Kayaks From Shallow Beaches or Deep Dock Areas?
- 33.2: The Hand-Position Error That Causes Blisters and Weak Strokes in First-Time Kayakers?
- 33.3: Sit-On-Top or Sit-Inside Kayak: Which Feels Safer for Beginners on Flatwater?
- 33.1: How to Paddle Straight Without Constant Corrective Strokes?
- 35.3: How to Cross Rivers Diagonally Without Being Swept Downstream?
- 33.4: How to Escape a Capsized Kayak Without Panicking Underwater?
- 33.5: Should You Kayak Alone After One Lesson or Wait for More Experience?
34: How to Choose Lakes That Provide Safe Learning Conditions for Kayak Beginners?
The best learning lakes are small, sheltered, easy to access, and relatively free from motorboat wakes. Beginners should prioritize a shallow or gently sloping launch, clear visibility from shore, and weather conditions that allow an uncomplicated return. A beautiful lake is not necessarily a suitable training lake, especially when wind exposure or boat traffic increases the difficulty.
Start by assessing conditions rather than judging a lake by its size or appearance alone. A quiet lake surrounded by trees may offer protected practice water, but its exposed sections can still develop waves when wind strengthens.
Use the following practical decision grid to compare potential locations. It is a teaching aid, not a validated safety certification or guarantee.
| Criterion | Favorable conditions | Reason to reconsider |
|---|---|---|
| Boat traffic | No-wake restrictions or little motorized activity | Frequent wakes and busy boating routes |
| Wind exposure | Sheltered practice area with a straightforward return | Exposed water or wind pushing away from shore |
| Entry and exit | Accessible, gently sloping shoreline | Steep banks, slippery rocks, or difficult docks |
| Launch proximity | Short distance from campsite or equipment storage | Long, complicated access to the water |
| Shore visibility | Practice area visible to a companion | Hidden coves or remote shoreline |
For a simple comparison, mark each criterion as favorable, uncertain, or unsuitable. An unsuitable condition involving weather, access, or recovery should not be offset by favorable marks elsewhere. Resolve critical uncertainties before launching.
Small lakes with limited motorized traffic can simplify stroke practice because fewer wakes interrupt the kayak’s movement. This is a practical learning advantage, not evidence that any particular lake type guarantees faster progress.
Before departure, examine a map for exposed shorelines, potential landing points, and your intended turnaround location. Compare the forecast wind direction with the shoreline. An offshore wind deserves particular caution because it can carry a struggling paddler away from the planned landing.
Parks Canada‘s water safety guidance for Elk Island National Park emphasizes checking forecasts, wearing an appropriate flotation device, staying close to shore, and preparing for self-rescue. Motorized watercraft are prohibited in the park’s waters, including Astotin Lake, although that restriction does not apply to lakes generally.
Campgrounds with direct, permitted lake access can make short practice sessions easier to organize. Confirm launching rules, water access, supervision arrangements, and equipment availability rather than assuming every lakeside campsite permits kayaking.
Once a manageable practice lake is identified, the next challenge is getting into the kayak without losing balance before the first stroke.
34.3: Should Beginners Launch Kayaks From Shallow Beaches or Deep Dock Areas?
A gently sloping beach is often the simpler launch for first-time kayakers because it allows the boat to float in shallow water while the paddler enters with a low center of gravity. Docks can also work, but they demand controlled weight transfer and dependable hand support. The safer option depends on conditions, equipment, and individual mobility.
Shoreline and dock launches involve different balance challenges. From a beach, a beginner can stand beside the kayak and lower onto the seat while remaining close to shallow water. From a dock, the boat moves independently beneath the paddler, making sudden weight shifts more consequential.
The techniques described in REI‘s kayak launching and landing instructions distinguish shallow-water entry from dock entry, including variations according to dock height.
For a straightforward shoreline launch:
- Check the bottom for submerged rocks, sharp debris, and uneven footing before moving the kayak into the water.
- Position the kayak parallel to the shore in shallow water, with the hull sufficiently afloat to avoid unnecessary scraping.
- For a sit-inside kayak, straddle the cockpit and lower onto the seat while keeping your weight centered. For a sit-on-top, use its open seating area and suitable handholds.
- Bring your legs into a comfortable position, adjust your feet, and keep the paddle accessible.
- Push gently into deeper water once seated and balanced.
Calf-deep water may work at some sandy locations, but it is not a universal requirement. Water depth, hull shape, personal mobility, and footing determine the appropriate entry position.
Beach launching still requires care. Dragging a kayak across gravel, sand, or submerged rocks can scratch or damage its hull. Use the paddle to check for nearby obstacles where appropriate, without relying on it to determine whether footing is secure.
For dock launches, position the kayak parallel to a stable dock, secure the boat against drifting, and maintain controlled contact with reliable supports while lowering yourself into the seat. Some techniques use the dock and cockpit rim; others differ according to the dock height and kayak design. Avoid treating a paddle laid across the cockpit as a universally safe weight-bearing support.
Landing deserves equal attention. At a beach, approach slowly and stop where you can stand safely before exiting. At a dock, stabilize the kayak and reverse the supported transfer, keeping your weight low until firmly positioned on the dock.
Practicing both types with an instructor can make future launch choices more manageable, although no particular first-day drill guarantees confidence.
After launching, comfortable hand placement becomes the foundation for every stroke that follows.
33.2: The Hand-Position Error That Causes Blisters and Weak Strokes in First-Time Kayakers?
Gripping the paddle too tightly is a common beginner error that contributes to hand fatigue, friction, and inefficient strokes. A relaxed grip and comfortable hand spacing let the paddle move naturally while the torso supplies much of the driving force. Blisters can still develop, but squeezing harder rarely improves control or endurance.
A nervous paddler often treats the shaft like a handle that must never move. The resulting tension travels through the fingers, wrists, and forearms, especially during repetitive forward strokes.
Use a simple grip-width check: rest the paddle’s midpoint on top of your head and position your hands so the elbows form approximately right angles. This establishes a starting position rather than an exact measurement for every body.
On a typical unfeathered paddle, the blade orientation can also help confirm that the hands are positioned consistently. With feathered blades, hand placement and control depend on the paddle’s configuration.
REI’s basic kayak strokes instructions recommend a relaxed index-finger-and-thumb loop, with the remaining fingers resting lightly on the shaft. They also emphasize torso rotation rather than relying predominantly on arm strength.
Try a progressive grip drill on calm water:
- Hold the paddle comfortably while maintaining control of both hands.
- Relax the fingers that are not needed to stabilize the shaft.
- Make several slow forward strokes while rotating the upper body.
- Notice whether the hands tighten during blade entry or as the boat changes direction.
- Reset the grip before another short sequence.
The hands guide the paddle; they should not provide all the propulsion. Do not deliberately loosen the grip so far that a companion can remove the paddle unexpectedly. Losing control of the paddle creates an unnecessary hazard.
During camping trips, inspect your hands between short sessions. Redness or developing hot spots suggest friction that should be addressed before a longer outing. Protective tape may help known problem areas if applied appropriately, but it cannot replace correcting an uncomfortable grip.
A smaller-diameter shaft may feel more manageable for paddlers with smaller hands. Paddle fit, skin sensitivity, and individual technique all matter; neither padded grips nor gloves provide a universal solution.
With a comfortable grip established, choosing a kayak that supports rather than undermines confidence becomes easier.
33.3: Sit-On-Top or Sit-Inside Kayak: Which Feels Safer for Beginners on Flatwater?
Sit-on-top kayaks often feel more reassuring to beginners because their open seating areas allow straightforward separation from the boat after capsizing, and properly functioning scupper holes drain water. Sit-inside kayaks can provide more protection from splashes and wind, but recovery requires additional skills. Neither design is inherently safe in every situation.
A sit-on-top is frequently a practical starting point for nervous paddlers who want to explore sheltered lakes near a campsite. Its open deck removes the enclosed-cockpit concern, although remounting after a capsize can still be physically demanding.
Sit-inside kayaks offer a different experience. Sitting within the hull can provide useful contact with the boat and some shelter from the elements. However, the relationship between cockpit position and stability depends on hull width, shape, loading, and other design characteristics. A sit-inside kayak is not automatically more stable simply because the seat is lower.
| Factor | Sit-on-top | Sit-inside |
|---|---|---|
| Capsize exit | Open seating allows separation without releasing a spray skirt | Wet-exit technique may be required, especially with a spray skirt |
| Water management | Self-draining when designed and functioning appropriately | Water entering the cockpit may require removal |
| Exposure | More exposed to splashes and weather | Can offer greater protection from splashes and wind |
| Stroke feedback | Depends on hull responsiveness and handling | Depends on hull responsiveness and handling |
| Beginner priorities | Accessible seating and confidence with open-water recovery | Fit, cockpit comfort, and learning appropriate wet exits |
Some broad recreational sit-on-tops turn more slowly or respond less sharply to changes in technique. Narrower performance-oriented sit-insides may provide more immediate feedback, but these characteristics arise from the complete hull design, not simply the seating category.
Cold lake water changes the decision. A sit-inside kayak with suitable equipment may reduce exposure during normal paddling, yet immersion remains a serious risk regardless of kayak type. A spray skirt also introduces an additional release procedure that must be learned beforehand. Water temperature, appropriate immersion protection, and rescue capability deserve priority over perceived warmth alone.
Renting both designs on the same sheltered lake can clarify what fits your body and abilities. Compare seat support, legroom, foot positioning, entry difficulty, and recovery training requirements rather than selecting purely by appearance.
For families, different members may prefer different designs. Each paddler still needs a suitable personal flotation device, an appropriately sized kayak, and a realistic plan for assistance if someone enters the water.
Regardless of the boat chosen, controlled forward movement is the skill that turns a cautious first outing into purposeful paddling.
33.1: How to Paddle Straight Without Constant Corrective Strokes?
To paddle straight, keep your forward strokes consistent on both sides, rotate your torso, immerse each blade fully, and use a suitable blade angle. Unequal stroke length or a poorly positioned blade can send a kayak off course. Small corrections are normal, but repeated zigzagging often indicates a technique issue worth isolating.
Begin with an upright but relaxed posture, supported by the seat and footrests. Look toward a fixed destination rather than concentrating exclusively on the paddle blade.
For each forward stroke, rotate your torso toward the paddling side and place the blade into the water near your feet. Keep the blade fully immersed through the effective power phase, with an orientation that allows it to move cleanly through the water.
As your torso rotates back, transfer force through the paddle while keeping your arms comfortably positioned. Release the blade near the hip rather than dragging it excessively far behind the body.
The paddler’s box describes the general alignment between shoulders, arms, and paddle that supports controlled movement. It does not mean keeping the paddle shaft horizontal throughout the forward stroke. For efficient forward propulsion, the blade should generally remain near vertical during its power phase.
Unequal strokes commonly appear when a paddler rotates farther on one side, immerses one blade less deeply, or changes blade angle without noticing. Boat characteristics and environmental forces can also contribute, so drifting in one direction does not identify a single guaranteed cause.
A simple shoreline experiment can help distinguish technique from conditions. Choose a visible marker on a quiet, sheltered lake and paddle a short, controlled sequence while a companion observes. As an optional exercise, try 20 alternating forward strokes, check your heading, and repeat after adjusting one technique element.
This exercise is a practice method, not a validated diagnostic test. Repeat it in comparable conditions before attributing any improvement to a specific correction.
Turning and stopping also belong in the beginner’s stroke toolkit. A sweep stroke moves the blade through a wider arc to rotate the kayak, while a reverse stroke can slow the boat. A draw stroke can move the kayak sideways during a controlled approach to a dock.
Five checks for a more controlled forward stroke
- Set a visible target: identify a stationary shoreline marker and record your intended heading.
- Check paddle grip: position your hands comfortably and confirm that the shaft is not being squeezed excessively.
- Check blade entry: make several slow strokes and observe whether each blade enters fully near the feet.
- Compare both sides: have a companion observe stroke length and torso rotation, then identify one difference to test.
- Repeat the route: paddle the same short stretch in similar conditions and note whether fewer corrections are needed.
Wind and current can still alter a kayak’s heading even when the paddler uses balanced strokes. Occasional, deliberate corrections are part of competent technique rather than evidence of failure.
Once a kayak responds predictably on still water, the next step is understanding why even gentle current requires a different approach.
35.3: How to Cross Rivers Diagonally Without Being Swept Downstream?
Crossing moving water requires accounting for the current instead of simply pointing the kayak at the opposite bank. A ferry glide uses an upstream-facing angle and controlled paddling to manage downstream drift. Beginners should learn this technique with qualified instruction in suitable gentle currents, never by experimenting in rapids or hazardous channels.
For lake-focused paddlers, moving water may appear near a river outlet or in a channel connecting two lakes. The surface may look calm despite a current strong enough to affect direction and control.
The ferry-glide principle is to aim the bow partly upstream while maintaining sufficient movement and an appropriate boat angle to cross. The current continues carrying water downstream, while the paddler uses the boat’s movement relative to that water to manage the crossing.
The angle is not universal. Current speed, boat characteristics, and paddling ability influence what is possible. An upstream angle alone does not guarantee that the kayak will hold its position or avoid downstream drift.
Before considering a crossing, identify the direction of current from obvious surface movement and safe shoreline observations. Look for changes in flow around bends, constrictions, and obstacles.
Water features deserve careful interpretation:
- Fast-flowing channels: narrowing water can increase current and make an apparently short crossing difficult.
- Eddies: slower or reversing flows may occur behind obstacles, but approaching them can introduce unexpected currents.
- Standing waves: persistent surface disturbances can indicate more demanding water than a beginner should attempt.
- Strainers: fallen trees and branches can allow water through while trapping a boat or person, making them serious hazards.
- Rising water: recent rain or visibly changing levels are reasons to postpone the crossing.
A downstream V can be associated with water accelerating through a constriction, but interpreting individual surface patterns requires experience. Beginners should not use one visual cue as proof that a channel is safe.
A supervised demonstration in suitable conditions can explain how paddling angle affects the route. Do not practice by entering unfamiliar current, relying on an eddy for rescue, or crossing ahead of hazardous obstacles.
The same directional awareness helps on lakes. A wind blowing sideways across the planned route may require an adjusted heading and an earlier turnaround, although wind-driven drift and river-current dynamics are not identical.
Understanding moving water improves judgment, but confidence also depends on knowing what to do if the kayak overturns.
33.4: How to Escape a Capsized Kayak Without Panicking Underwater?
A safe capsize response begins with wearing a properly fitted personal flotation device and learning the correct exit technique under qualified supervision. Sit-on-top paddlers generally separate directly from the open boat, while sit-inside paddlers may need to release a spray skirt before exiting. Practicing these movements in controlled conditions helps build familiarity without relying on improvised underwater routines.
Unexpected immersion can cause disorientation and an urgent breathing response, particularly in cold water. That is why a capsize should not be a beginner’s first introduction to getting out of a kayak.
Do not deliberately capsize alone or use underwater counting or prolonged breath-holding as an anti-panic exercise. A qualified instructor can organize supervised practice with appropriate safety support and equipment.
For a sit-on-top kayak, the exit is generally straightforward because the seating area is open. The more demanding task may be recovering the boat and climbing back aboard, especially when wind, waves, fatigue, or cold water complicate movement.
Two remount approaches sometimes taught are the heel-hook method and a paddle-assisted climb. Their suitability depends on the kayak, the paddler, and the available support. Learn a method compatible with your equipment through supervised practice rather than assuming every sit-on-top can be remounted the same way.
For a sit-inside kayak fitted with a spray skirt, the wet-exit sequence generally involves:
- Lean forward to establish a controlled position after inversion.
- Locate the external spray-skirt grab loop and pull it to release the skirt.
- Bring the knees together as appropriate, place the hands on the cockpit sides, and push forward clear of the kayak, allowing the personal flotation device to assist with surfacing.
The grab loop must be accessible before launching. This is particularly important when using unfamiliar rental equipment.
REI’s wet-exit kayaking instructions describe the release and exit procedure and recommend learning it from an experienced instructor with a partner or lifeguard present.
Exiting the cockpit is only the first part of recovery. A paddler must also understand how to remain afloat, manage the paddle, recover the kayak, and return to a safe location.
If separation from the kayak is unavoidable during a capsize, prioritize surfacing and breathing safely. Once at the surface, maintain contact with the boat when it is safe to do so; wind may carry an empty kayak away faster than a person can swim. Do not risk being pulled toward an obstacle or another hazard merely to retain the boat.
Self-rescue and assisted rescue, including T-rescue techniques for suitable kayaks, should be practiced with appropriate instruction. Staying near shore reduces exposure but does not replace rescue competence, and being able to swim does not eliminate immersion risks.
Being able to exit a kayak is an important milestone, but deciding whether to paddle without nearby assistance requires a broader assessment.
What Matters Before Independent Paddling
- Stroke control is only one part of readiness: launching, returning against manageable wind, and recovery skills must also be dependable.
- Progress should follow conditions and demonstrated ability rather than the number of lessons completed.
- A nearby companion, a conservative route, and a clear return plan provide protection that individual confidence cannot replace.
33.5: Should You Kayak Alone After One Lesson or Wait for More Experience?
One lesson is not enough to establish that a beginner can kayak safely alone. Readiness depends on demonstrated control, the ability to recover from foreseeable problems, and sound decisions about weather and distance. For early outings, paddling your own kayak alongside another capable paddler is preferable to being completely unaccompanied.
The distinction is simple: a solo boat does not have to mean a solo paddler. Someone can practice independent strokes and navigation while another paddler remains close enough to assist if needed.
Before progressing beyond supervised practice, assess several practical abilities:
- Directional control: paddle toward a destination and make deliberate turns without persistent uncontrolled zigzagging.
- Stopping and maneuvering: use appropriate reverse, sweep, and other basic strokes around accessible shoreline areas.
- Capsize response: demonstrate a reliable wet exit suited to the kayak and complete an appropriate recovery with instruction.
- Return capability: show that you can travel back against manageable wind rather than assuming the outward journey represents the return effort.
- Judgment: recognize when conditions, fatigue, or unfamiliar surroundings require shortening or cancelling an outing.
These are practical readiness indicators, not a formal certification or proof that a person is prepared to kayak alone in all conditions. No single session can reproduce every situation encountered on the water.
Early independent practice should remain on a familiar, small learning lake, near an accessible shore, in suitable weather. Light morning winds may offer favorable conditions at some destinations, but mornings are not universally calm and forecasts must be checked for the specific location.
Extend the route gradually only after demonstrating the necessary skills under comparable conditions with a capable companion. Wind exposure, distance, currents, and cold water each introduce distinct considerations.
Families need additional planning. Adults should match the outing to the youngest or least experienced participant, provide suitable flotation equipment, and maintain realistic supervision and rescue capacity. An adult accompanying a child cannot assume that being able to paddle personally is sufficient to assist another person after a capsize.
Agree on a turnaround signal, identify landing alternatives, and plan short loops near the launch. Supervision ratios should follow the children’s abilities, local requirements, and the group’s actual capacity to respond; no single adult-to-child ratio is appropriate for every situation.
For camping trips, consider a progression from a supervised introductory lesson to accompanied short loops, then longer outings on the same lake when skills and conditions justify them. Inform a trusted person of the route and expected return, even when paddling with a partner.
Choose one familiar sheltered lake, arrange suitable instruction, and build a repeatable routine of launching, forward strokes, turning, landing, and rescue practice. Increase independence only when those skills are demonstrable and an experienced instructor considers the planned conditions appropriate.
Can beginners learn kayaking strokes without strong upper-body strength?
Yes. Basic recreational kayaking relies substantially on torso rotation and coordinated body movement rather than arm strength alone. A suitable kayak, correctly sized paddle, comfortable grip, and manageable conditions help beginners develop technique without treating every stroke as a pulling exercise.
Which kayaking strokes should a beginner practice first?
Begin with the forward stroke for propulsion, the reverse stroke for slowing and backing up, and the sweep stroke for turning. Once these become manageable, introduce the draw stroke for moving sideways near a dock. Practice under supervision in calm water with adequate room to maneuver.
Is a calm-looking lake always safe for first-time kayaking?
No. A lake may appear calm near shore while exposed sections experience stronger wind or waves. Cold water, motorized traffic, difficult landing points, and limited rescue access can also change the risk. Evaluate the entire intended route and current forecast rather than relying on the appearance of the launch area.
Do beginners need a spray skirt to kayak on a lake?
Not necessarily. Many recreational sit-on-top kayaks do not use spray skirts, and some recreational sit-inside outings can be conducted without them in suitable conditions. Where a spray skirt is used, the paddler must learn how to release it during a wet exit. Its presence does not replace suitable clothing, flotation equipment, or rescue training.
How can campers practice kayaking regularly without planning long trips?
Look for campgrounds with permitted kayak access to a suitable sheltered lake, confirm equipment arrangements, and plan short sessions around one technique at a time. Repeating controlled launches, forward strokes, and turns in familiar conditions can make practice easier to organize. Weather checks, supervision, and rescue readiness remain necessary for every outing.